baking

Cherry, cherry, where you goin’ to?

If you’ve been following my crafty exploits for a while, you’ll know that every summer the cherry tree in the yard produces far more cherries than I care to deal with. To top it off, they’re sour cherries so they don’t make a great snacking fruit. I’ve made jam and cherry crisp in the past, and tried throwing them into muffins with great success, but surely there had to be something else to do with them.

As it turned out, I had a pack of ladyfingers in the pantry from a month or two ago when I had visions of making this icebox cake during strawberry season. It didn’t happen, for a few different reasons, and I knew I wasn’t just going to open the package and eat them like cookies. Would the recipe work with cherries instead of strawberries?

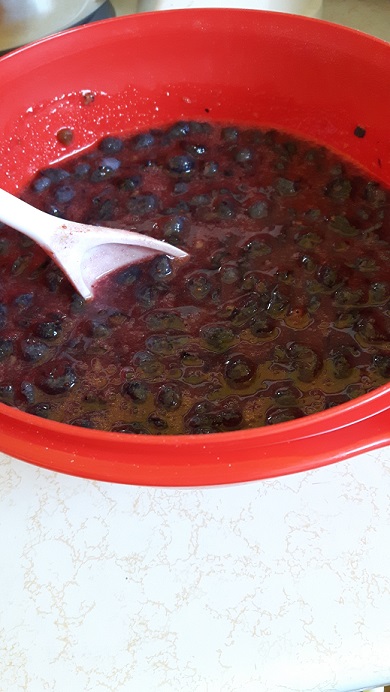
I managed to make cherry picking a bit less arduous this year by grabbing a bowl and picking for as long as it took to fill it. This was somewhere in the 15-20 minute range; definitely doable.

I have problems with recipes that call for fruit (or what-have-you) to be chopped. I’m meticulous rather than speedy…some of my helpers are the opposite.

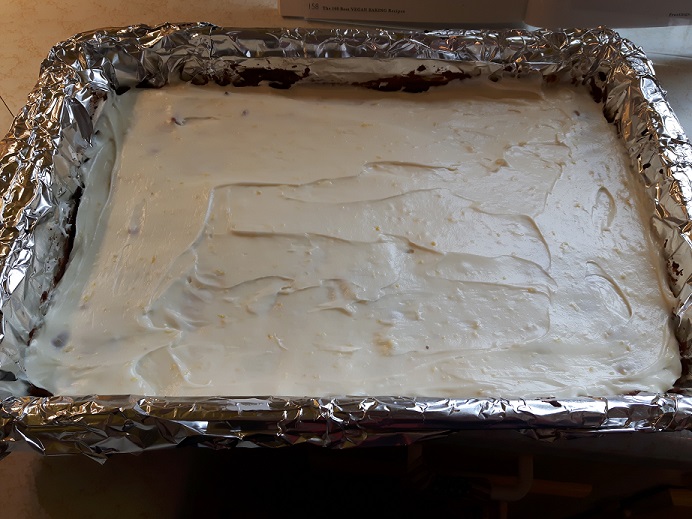
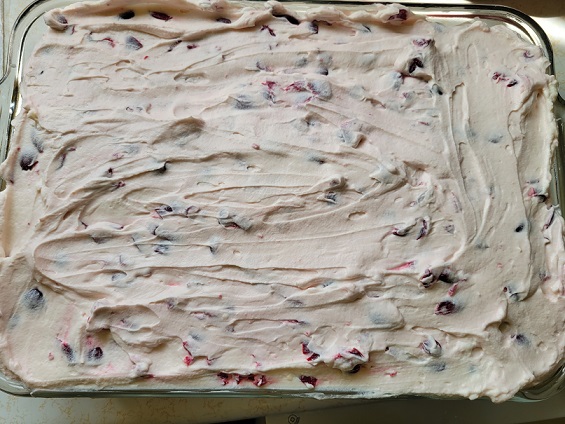
I followed the recipe pretty much exactly. It’s a lot harder (skipping right along to about halfway through the recipe) adding cherries to the whipped cream mixture without any of the juices, since they tend to be juicier than strawberries are. I tried, though, and I’m not entirely dissatisfied with the pretty pink colour the whipped cream took on.

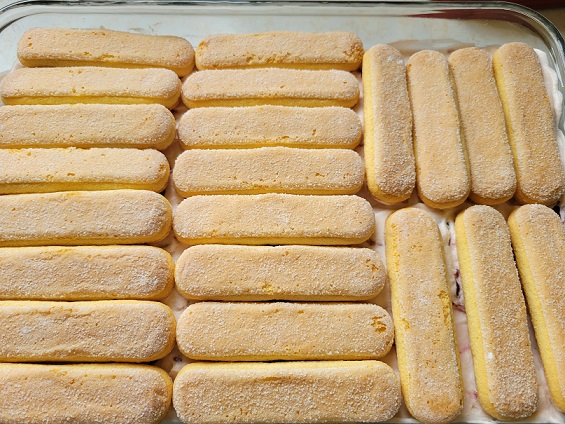
If you don’t count the time taken for cleaning and chopping the fruit, this recipe actually comes together really fast. And fun fact: apparently my pan flares a bit toward the top, because I was able to fit extra ladyfingers on the second layer.

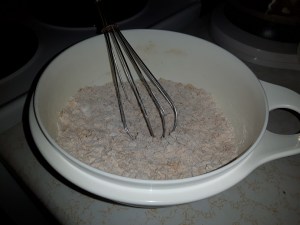
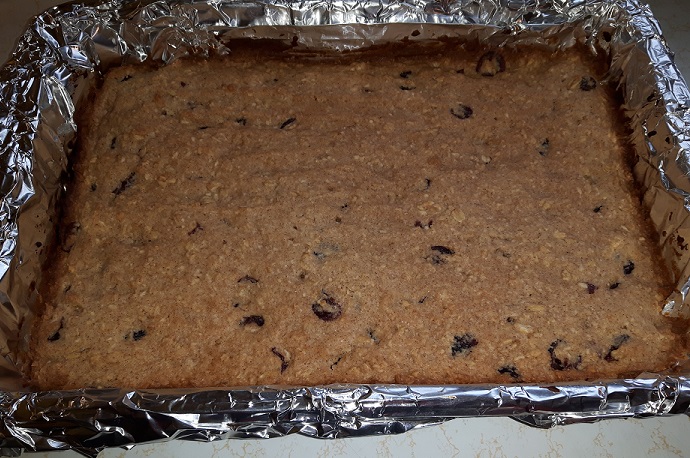
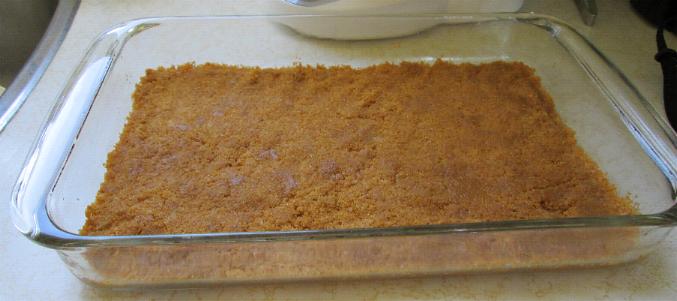
The last couple of times I’ve made this recipe (with strawberries), it’s been hot as all get-out and I haven’t felt like turning on the oven to make the crumbly topping…but I got an early jump on it and was able to not heat up the house too badly. This is after I crumbled it up; pre-crumbling, it looks a little…gross. So no before picture, sorry.
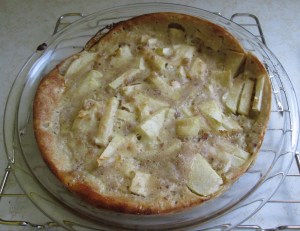
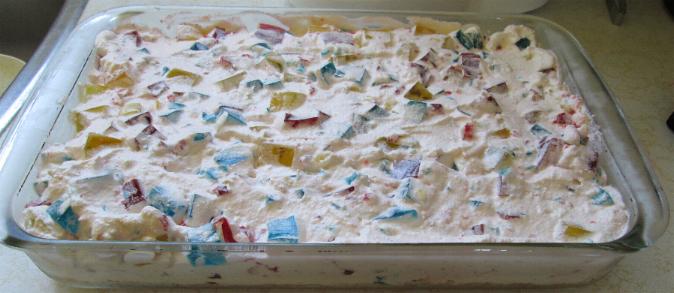
Et voilà!

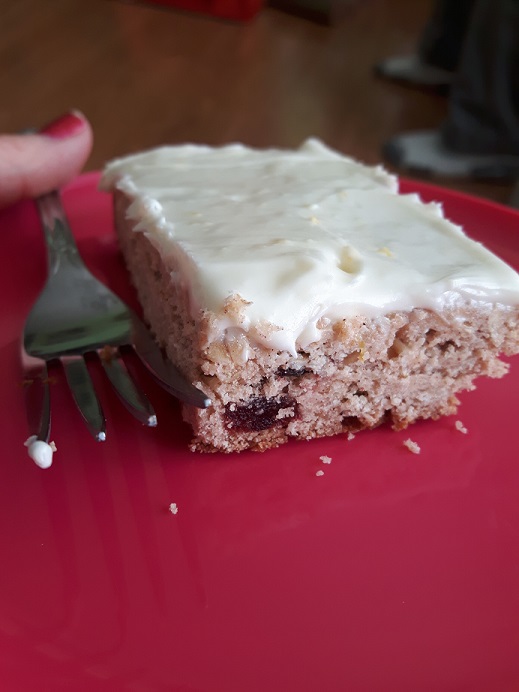
I love the dark pops of colour the cherries offer! It looks like a more sophisticated version of the original strawberry take. But…how does it look? How does it taste?

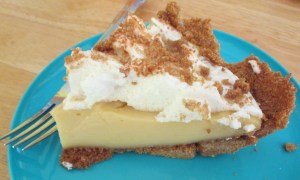
It cut so cleanly, and lifted out of the (ungreased) pan with zero difficulty. As summer desserts go, this is a good one! It’s light and goes down really easy, and because I used the crispy ladyfingers rather than the soft ones, they retained some of their original texture and contrasted nicely with the whipped cream and fruit (and crunchy topping). It’s not too sweet, either, thanks to the sour cherries. I love that I’ve got something I can use them in now, besides jam and more jam. 😉

Thanks for looking! 🙂

P.S. What inspired my post title? Click here!

cooking

*Slightly* less magical than Disney…

Last weekend was supposed to have been hot as all get-out and since turning on the oven to bake sounded less-than-appealing, we decided this was our opportunity to try one of those copycat Dole Whip recipes that proliferate on Pinterest. Who needs a passport and a plane ticket when one can recreate all the magic of a Disney park in one’s own kitchen?

If you search out “copycat Dole Whip” online, there are tons of recipes to choose from. I went for this one, which seemed the most true to the recipe released by Disney a couple of years ago and didn’t include any weird add-ins like sugar (the pineapple and ice cream are full of it already, thanks) or lime juice (just…what?).

I had no idea that frozen pineapple even existed until I sought it out for this recipe. We used about half the package (or 2 cups-ish), plus a “big scoop” (~3/4 cup) of vanilla ice cream, and 1/4 cup of pineapple juice.

This view of the blender holds promises of infinite riches, of creamy, tropical bliss. Now, the recipe says that the frozen pineapple chunks should be set out “a few minutes ahead of time”, without really specifying what “a few minutes” is. Diligently photographing my packaged ingredients and then measuring them all out and adding them to the blender surely took “a few minutes”; what the recipe did not tell us is that that was not nearly enough time, and that trying to blend everything now would result in a solid, seized-up frozen chunk that would need to be poked with a stick like some sort of dead body in the woods in order to start moving around the blender.

I feel like if the four kids in Stand by Me had been on a quest to look at frozen pineapple, the movie would never have been a success. Ahem.

After much poking and pulsing, everything more or less came together and looked like the pictures I was seeing online. The recipes almost unanimously agree that to get a classic soft-serve look, this should be spooned into a piping bag and swirled into your cup or bowl.

What they don’t tell you, however, is that any pineapple chunks that escaped the blender’s blades will block the piping tip, resulting in more poking with a stick (a chopstick this time, and not a wooden spoon).

Me: Do you want to just spoon this into the bowls and eat it?

Him: Yup.

It might not have been much to look at, but it was cool and refreshing. Shockingly, the stick-poking didn’t deter us from wanting to try it again – albeit with slightly thawed pineapple next time.

Thanks for looking! 🙂

baking

Just like Grandma used to make…

I’m not kidding, guys. The bake I’m sharing today is my grandmother’s recipe. I can’t share the actual recipe here under penalty of haunting, but here’s one that’s relatively similar. Just, you know, not as good (of course). 😉

These were the sugar cookies I remember growing up, and they’re different than most. I was…pretty old…before I realized that when most people say “sugar cookie” they mean some weird, buttery cutouts decorated to the nines with icing that’s very pretty but makes my teeth hurt to look at it. The cookies I knew used Crisco, giving them a beautiful, neutral flavour; they were sprinkled with coloured sugar before baking, giving them a pleasing crunch. They’re never too sweet, but sparkle prettily on a plate. When I was a kid, my mom used to get out her shaped cookie cutters at Christmas and enlist her helpers to sprinkle sugar in artistic and realistic designs – but when I got older, I learned they taste just as good cut out in plain circles with a little red-white-green sugar on top for colour.

With Valentine’s Day fast approaching, I got the idea to cut them out into heart shapes and use a variety of coloured sugars to try and recreate a conversation heart aesthetic. If you’ve been with me for a while, you’ll know that I’ve got a bit of a thing for conversation hearts.

And look at them, sparkling prettily!

The big cookie cutter was bigger than I realized, so I soon switched to an antique one (with a wooden handle and all!) to churn out some smaller cookies.

“But wait!” I hear you say, “What’s conversational about these?”

I did prepare a batch of bright-pink royal icing, ready to pipe all sorts of sweet and snarky sentiments, but…it wasn’t to be. I used a recipe from a pretty well-known baking blogger, and although it came together perfectly – and stiffly – in the bowl, it was a mess on the cookies. It might be OK for flooding the entire surface with icing, but not for detailed work. Would I use that recipe again?

About the only positive thing I can say, besides the fact that it dried glossy and gorgeous just like the recipe said, is that it might be handy for people who are bashful about declaring their feelings and don’t want to put themselves out there too much:

“‘Be mine’? No, that says, uh, ‘Mr. Mint’.”

So while I did not wind up with my bevy of conversation hearts, I did wind up with a really delicious batch of sugar cookies to show for it, which is a victory in my books.

Thanks for looking – Happy Valentine’s Day!

baking

Twice as good as uno cotto…

When I was a young ‘un, I understood that “biscotti” meant “a rather hard, crisp cookie found in hipster coffee shops”. While that definition wasn’t necessarily wrong, it didn’t tell the whole story, and it wasn’t until many years later that my language-loving self learned that it came from the Italian for “twice cooked”. “Bi” = “two”; “cotti” = “baked”.

The twice-baked nature of biscotti makes them a little fussier than just making a drop cookie, but when I found myself craving a very specific flavour combination a couple of weeks ago, I knew it was going to demand those crispy edges, that texture. I managed to find the recipe I used the last time I made them (about, oh, four jobs ago) and altered it to suit my needs: about 2 Tbsp orange zest grated into the batter, and 1/2 cup chopped pistachios instead of the chopped cherries called for.

It’s hard to tell from the picture above, but that bowl smelled of orange zest and almond extract at that point and was making the whole kitchen smell good.

Once the chocolate chips and pistachios were mixed in, I shaped the dough into two loaves for the first bake (prima cottura?) After the loaves were slightly golden and set, they cooled off for ten minutes before slicing diagonally into 1/2″ slices.

I had…issues…with the slicing part. While I admit that I did not have a ruler handy to ensure perfect 1/2″ intervals, the recipe didn’t exactly tell me what kind of angle I was supposed to use. If I tried to cut them thin-ish (i.e. 1/2″-ish), they’d be so thin that they’d break and crumble; if I cut them thicker, they’d…break and crumble, but also be really thick. No way was I getting the projected 18 slices out of the first loaf. On the second loaf, I thought I was smart when I started by cutting it in half, thinking it would be easier to sub-divide each half into 9 slices. Oh, how wrong I was.

Once the loaves were hacked into as many viable slices as possible, in they went for their second bake. The recipe specifies “cut edge down”, as though there are a bunch of home bakers out there who try to balance them on edge. After 8-10 minutes on one side, and then flipped for 5 more minutes, they were a delightful golden brown colour.

They weren’t going to be winning any beauty contests, but don’t judge a book by its cover: my test audience loved these. They had a much more sophisticated flavour combination than your garden-variety chocolate chip cookie and provided a nice palate reset after weeks of rich holiday baking. I have no idea how to get around my slicing issues (but am open to suggestions!) but haven’t counted this recipe out yet.

Thanks for looking! 🙂

baking

Pretty please, with a cherry on top…and inside

You know it’s summer around these parts when the cherry tree’s fruity offerings ripen practically overnight and all need to be picked immediately before they cause the branches permanent injury. I admit I’ve grown just a little disenchanted with the picking and the pitting, and was tempted to ignore this year’s harvest altogether and see how long it took the birds to clear it off, but…I just couldn’t do it. I didn’t want to do jam again (there’s still some of last year’s in the freezer because although I like making it, I never think to eat it), and so rescued a modest 6-cup bowl of fruit and thought about what to do with it.

I had first made these muffins a couple of years ago with blueberries, as the recipe calls for, but thought: why not cherries? Yeah! Why not cherries? The sour cherries, while larger than blueberries, are still pretty small compared with the jumbo Bing cherries all the local grocery stores trumpet, so I didn’t feel the need to chop them in any way before using them. But hey, do you know what happens to your hands when you pit a cup’s worth?

I texted that picture to a friend who wrote back, “Wait, did you burn yourself?” Luckily it all came off with soap and water, and yielded these beauties:

The trick to the recipe’s success is soaking your oats in milk for 20 minutes. It might not look like much… (Seriously, how can people eat overnight oats? Bleh.)

But it really does help the finished product – and gives you ample time to pull together your dry ingredients:

…and your wet ingredients.

This doesn’t look like much, either (are you noticing a trend?), but it smells heavenly once the melted butter, honey, and vanilla get whisked together.

Pour the wet into the dry, and add your milk ‘n oats and blueberries cherries.

After spending years baking cupcakes, which you never, ever overfill unless you want them to do things they shouldn’t, there’s something deliciously naughty about making muffins that let you fill the liners right to the very tippy-top.

Five minutes at 425 and 17 minutes at 350 later, they finally look like something!

These are so lovely that I’m almost (but only almost) starting to wish that I had pitted and frozen more cherries to be able to do these year-round. The muffin batter itself isn’t overly sweet, and the cherries are tart in a way that’s reminiscent of cranberries. I tripled the cinnamon called for – we like cinnamon – but even at that it’s an undertone rather than some in-your-face spice. They’ve been a hit so far with everyone who’s tried one (or more!).

Thanks for looking! 🙂

baking

“Zing!” went the strings of my heart

It all started when my friend had a birthday recently.

Wait, scratch that.  It started a few weeks before that, when one of the ladies at work (who knows I’m a baker and has previously been my sprinkle patron) asked me if I baked bars very often.

I wrinkled my nose.  “Not really,” I replied, and economically at that, for those two words were meant to convey the following:

I.  Don’t.  Get.  Bars.  They never seem to bake properly and become inedibly overbaked around the edges before the rest of it is done, and although they’re supposed to be easier than cookies, say, they seem like a lot more work, somehow.  Why do cookbook authors coyly list them with the cookies (e.g. “Bar Cookies”) when they are clearly not cookies?  They’re usually sticky or filled, and you sure as heck can’t eat them with your fingers like a cookie.  But they’re not cake, either.  And how are you supposed to portion/eat them?  With a (sliced) cake or a cupcake, the portioning is self-evident.  With cookies, you can go back and keep grabbing until you’re satisfied.  But bars?  Unless you’re at an outpost of a ubiquitous Seattle-based coffee chain, they’re generally cut into these teeny-tiny squares that look like something from a tea party, and which are not at all satisfying.  Yet because of their often-rich nature, too big a piece is just going to make your teeth and stomach hurt.  Just…why, bars, whyyyy?

I clearly need to work on my non-verbal communication skills, because she pressed on and explained that she had been tasked with baking for a church fundraiser, and thought I might have some ideas.  At that moment, I had a sudden flash of remembered inspiration, and told her all about the Cranberry Lemon Oat Zing Bars from The 100 Best Vegan Baking Recipes by Kris Holechek: they’re delicious, beloved by pretty much anyone who tries one; they’re quick and easy to make (and can be made not-vegan, if that’s how you roll); and they give you something besides just chocolate.  Sometimes there’s just too much chocolate, and these are a welcome antidote.

When I related this exchange to the Birthday Boy, he perked up and said that if I wanted to make a batch to show her what they were like, he would gladly help with the leftovers.  He wasn’t just being nice – I have honestly seen him lick out a container after being brought a sample.  When he mentioned them again, unprompted, a week or so later, I knew I had his birthday cake figured out.

And you know what?  I forgot just how easy these are to make!

Dry ingredients in one bowl:

CLBars1

I always triple the cinnamon called for in the recipe because we like cinnamon around these parts. 😉

Wet ingredients in another:

CLBars2

All together, with cranberries stirred in:

The batter was quite thick, and I had to use my fingers to spread/press it into place in the foil-lined, greased pan to get an even layer.  Always line those pans with foil, kids!

And now, we get to the fun part…

CLBars5

My initial misgivings weren’t entirely incorrect – they did get a little darker around the edges, although not to the point of burning or otherwise ruining them.

CLBars6

A lemon-cream cheese frosting seals the deal and hides the toasty edges.

CLBars8

We managed to not set off the smoke detector or get wax on the cake bars, so I’d call that a win-win.

CLBars9

Look at that: they cut beautifully, have just that little extra browning at the bottom edge, but stayed moist inside.  We played by ubiquitous coffee chain rules and made the pieces cake-sized, but because these aren’t overly sweet (the lemon zest and cranberries provide the right amount of tartness and tang), no one batted an eye.

The Birthday Boy was delighted by his “cake”, and even more so when I sent half of what was left home with him.

I’m still not sold on bars-as-a-culinary-subgenre, but these definitely have a place in my repertoire.

Thanks for looking! 🙂

baking

The Hunt for Red Velvet

I know that red velvet cake is generally considered to be a southern dessert.  That’s “southern” as in “below the Mason-Dixon line”, and not “Windsor” – being within spitting distance of the Ambassador Bridge doesn’t count, but I really, really wanted some sort of red velvet cupcake for Canada Day.  It’s red cake!  With white icing!

Silly me: if I wanted a patriotic dessert, I should have stuck with something simple like Nanaimo bars or butter tarts (again).

See, I’ve got issues with red velvet cake.  The Crimson Velveteen cupcakes from Vegan Cupcakes Take Over the World are moist and delicious, but, well, darkish.  (The authors fully own this colour issue, arguing that their dessert is much classier than some of the day-glo red versions you see.  Very well, but what if I want bright red?)

Last year I tried the recipe on the Brown Eyed Baker.  Those puppies were nothing short of fire-engine in the picture on her site, but were just as dark as my original recipe and much less flavourful once baked.  Talk about your bait-and-switch!

When I happened upon the red velvet recipe on Sally’s Baking Addiction, I thought I had died and gone to baker’s heaven.  Sally is a full-on baking geek who understands the chemistry and technique involved in making a truly spectacular dessert.  I followed her recipe to the letter, and was rewarded with lovely, brighter-red cupcakes.  (The secret is using about half the cocoa called for in other recipes I’ve seen.)

RVCC1

They’re red and gorgeous and perfect!  They look exactly like the ones on the blog (piping techniques notwithstanding).  They rose, and formed these perfectly rounded tops upon which to pipe scads of icing

RVCC2

And they’re just as beautiful under the wrappers, too.

RVCC3

This is as striptease-y as it gets.

I so appreciated the methodology of the recipe: there’s butter for flavour; oil for moisture; buttermilk to make them tender; and two eggs, the whites of which were whipped and folded into the batter separately to keep things light and fluffy.

There was just one problem…they were kind of dry.  Okay, really dry.

My test audience was split about 50/50 as to whether or not this was a dry cake.  One conceded that “they were fine at first” and only got dry after a few days.  On the other hand, whenever I ate one, I felt like I was playing that old party game wherein one tries to whistle while eating crackers.  And I’ve made hundreds of moist cupcakes, so believe me, I know a dry cupcake when I taste one.  So disappointing!  The only thing I can figure is that the cornstarch in the batter dries them out – there’s cornstarch in the vanilla cupcakes from VCTOtW, and they’re nowhere near as moist as the other varieties.

It’s back to the drawing board for a red velvet recipe that’s at once moist and red; in the meantime, I think I’ll have to order a piece from Sals when the craving hits:

RVCC4

(Now that’s a red velvet cake!)

Update: After this fiasco, I tried the Betty Crocker red velvet cupcake mix-in-a-box, and once I got past the shame of using a mix, was forced to admit that they’re pretty darned good.  Darker in colour than my scratch-baked cupcakes, above, they’re moist and light.  And I still made my own icing from scratch, so that makes them practically homemade.

Happy Canada Day! 🙂


cooking

It’s like Violet Beauregarde in a jar

Quick confession time: I tackled cherry jam again this year.  After last year’s attempt, I tried making proper freezer jam using the basic instructions from the Certo box, and wow.  Wowee wow.  This stuff is good.  Not nearly as sweet as last year’s, and actually (ta-daaa!) a proper, jam-like consistency.  No more holding my toast perfectly level!  I did not, however, document the process in photographs, since the hour and a half leading up to jam-making found the two of us with red, juicy hands and increasingly cranky temperaments as pits kept shooting onto the floor.  (There must be a market somewhere for pre-cleaned fruit.)  Ah, well.  Suffice it to say it was worth the struggle.  And now on to today’s adventure.

I had fully expected the cherry jam to be my swan song for the summer.  How much jam does one need in one’s freezer, anyway?  But then this happened:

20170812_090936resized

A big ol’ box of blueberries for $8.99 seemed too good to pass up.  And with the holiday weekend, well – that could have meant blueberry waffles, blueberry-oatmeal bar…did I mention waffles?  Unfortunately, the bathroom was being redone that weekend, and the neighbour’s cats were being baby-sat, and so it wasn’t quite the lazy weekend I had in mind.  By the time I rescued them from the basement fridge the following Saturday, they were still holding up really well, but I wanted to get them dealt with while that was still true.  Did you know they make pectin especially for freezer jam?

20170812_093301resized

Well, they do!  And look at how simple it is:

20170812_094448resized

So, I got to a-washin’, a-crushin’, and a-measurin’.  Note my extremely sophisticated berry-crushing station.  I bet Smuckers hasn’t got a set-up like I have.

After adding my crushed fruit to the sugar-and-pectin mix, and stirring for three minutes, I got this:

20170812_095122resized

I left the fruit fairly chunky on purpose, figuring that if the pectin didn’t gel up the way it was supposed to, the fruit would give it some body.  I just noticed now that there’s a lot of vintage Tupperware gracing my pictures here – this is what happens when you have two former dealers in the family.  (Dealers?  Representatives?  Oh, holy spirit of Brownie Wise, what do you call those ladies?!)

20170812_095928resized

My jars are Dollarama specials – at $3 for a pack of three-250 ml jars, they’re slightly more expensive than the flats you can find in all the grocery stores at this time of year – but darn it, check out those adorable gingham lids!

I wasn’t sure how non-Certo pectin would work, but this turned out really well!  Because the recipe uses less sugar, it tastes pretty much exactly like fresh blueberries – like summer (or Violet Beauregarde) in a jar.

As always, thanks for looking! 🙂

baking, cooking

“M” is for “May” and “Mother” and “Meringue”…

Note: This post was originally written and meant to be posted on Sunday; however, because of some technical issues with WordPress first obscuring my photos and then abruptly deleting my entire text, there has been a slight delay.

My neighbours, who are DINKs (to clarify: very nice people, who happen to be Dual Income, No Kids), made the rookie mistake of going out for breakfast this morning.  The restaurant, they reported later, was absolutely packed.  You people have no children!  That’s a free pass from having to do the Mother’s Day brunch mob!  That’s one big advantage to not having kids!  Of course, the advantage to having children who are old enough to use the stove without summoning the local fire department is that you also get to avoid the crowds, and enjoy a home-cooked breakfast, possibly still in your pajamas.

I had mulled over a few ideas for what to make for breakfast, but decided to go with an old standby: giant(ish) baked apple pancakes, which I’ve posted on here before.  They come together really quickly, and yet look so impressive – because whoa, that thing’s the size of my plate!

Just after coming out of the oven, all puffed-up and golden at the edges.

The butter and brown sugar create a built-in syrup of sorts as it bakes, no maple required.  Fun fact: I once forgot to add the brown sugar to the pie pans before baking, and although they released super-easily, they were a little dry and not…quite…right.

I also wanted to make something for dessert, but not the same-old.  Cupcakes are nice, and all, but it’s been done.  While flipping through my collection of cookbooks, I found a recipe for flapper pie in the Kitchen Magpie’s book.  (Hardly surprising, since said book is titled Flapper Pie and a Blue Prairie Sky.)  The recipe took me a little bit out of my comfort zone, but seemed fairly simple, so I thought I’d give it a go.

Did I say “a little bit out of my comfort zone”?  This thing had me tense.  It was only the second time I’ve had to make a thick, pudding-like filling using cornstarch and heat as my catalysts (the first time was the pudding for my Brooklyn Blackout Cake), and I thought it was never going to thicken.  When it did, though, did it ever.  One minute, I was stirring what was in essence a pot of liquid, and the next it was producing a diabolical plopping sound as it came to a boil, and I’m pretty sure I could have gotten my spoon to stand up in the middle of it.  Also, I had never had occasion to make meringue before, and was convinced I would never get stiff peaks out of what seemed like fairly benign ingredients.  But lo (and behold!), the Kitchen Magpie did not fail me, and before long I was topping my pie and popping it into the oven to brown up.

It didn’t come out of the pan quite as neatly as I would have liked, but it did stay more-or-less intact, and tastes like it’s supposed to.  Certainly the Woman of the Hour was impressed – and that’s what matters, right?

Thanks for reading – Happy Mother’s Day! 🙂

baking, cooking

What rhymes with “glass”?

“Glass…glass, hmm…I’ve got it: ‘alas’!” – Linus Larrabee, Sabrina

With Easter approaching (or, ahem, upon us), I wanted to make something light and springy – in taste and appearance, not texture.  No one likes rubbery cake.  Years ago, my grandmother used to make a dessert we called “Broken Glass”.  A quick Google search reveals that yes, this is still something that people know about, and recipes abound.  I used this one, but I think I’ll re-write it for myself to better order the steps.

0922new

If you decide to make this, you really ought to consider making your gelatin first.  The recipe calls for strawberry, lime, and orange, but I opted for a cherry-lemon-berry blue combination.  You’re limited only by your imagination, your personal preferences, and what’s readily available in your local grocery stores.  (There, that’s not very limiting, is it?!)

0921new

Although the crust is the first step in the recipe – and the second, if you count “chill” as a step – I held off on making it until my gelatin was nice and firm.  The crust really doesn’t need to chill for that long, and you want to make sure you’ll have sufficient fridge space for everything.  If you’ve got a gloriously large and/or empty fridge, good for you; feel free to shove everything in there at once to chill and/or firm up.

A word about the dreadfully ambiguous eighth step “Set aside until slightly thickened”: I have no idea what “slightly thickened” means, especially since at no time are we told to put it in the fridge to start the thickening/setting process.  At last, something that doesn’t go in the fridge!  When I made this, I let it cool to room temperature so that it wouldn’t completely dissolve my formerly-frozen, now-thawed whipped topping.

And a quick word about pineapple juice: make sure it’s pure pineapple juice, unsweetened, and untainted by other “filler” juices.  My friend made this recipe using a pineapple/apple/pear blend, and it left a funny taste to the filling.

0924new

You should wind up with something that looks like this.

0931new

Isn’t it pretty when it’s cut?

This makes a light, fruity dessert that goes down easily.  It’s also a great recipe for summer because there’s no oven involved – and no stovetop, either, if you boil your water and pineapple juice in the microwave.

Thanks for looking – and Happy Easter! 🙂