…my true love gave to me, a stocking just for my kitty!
When my Baking Buddy became a cat dad earlier this year, I knew I wanted to do something special for kitty’s first Christmas. (Yes, he already has an ornament like that.) He’s always made sure that my furkids have something for the humans and their opposable thumbs to unwrap on their behalf at Christmas, and I wanted his new addition to have the same.
I found a fun paw-shaped stocking pattern (in three different sizes!), and also some fabric on Spoonflower that looks a lot like the cat in question.
Funny story…you’d think that having three stocking sizes to choose from would be enough, but you would be wrong. The regular-sized one sounded human-sized, and the mini felt too small. And don’t get me started on the jumbo! Now I understand Goldilocks’ struggle. In the end I used the pattern for the regular-sized stocking but resized the PDF to 3/4 its original size to strike a balance.

I also left off the foot pads and toe beans. I know! Toe beans! If I had been using a solid colour for the body of the stocking I would 100% have included them (because…toe beans!), but I didn’t want to cover up the fun pattern with them. Besides, human stockings don’t include toenails…right? Help me out here.
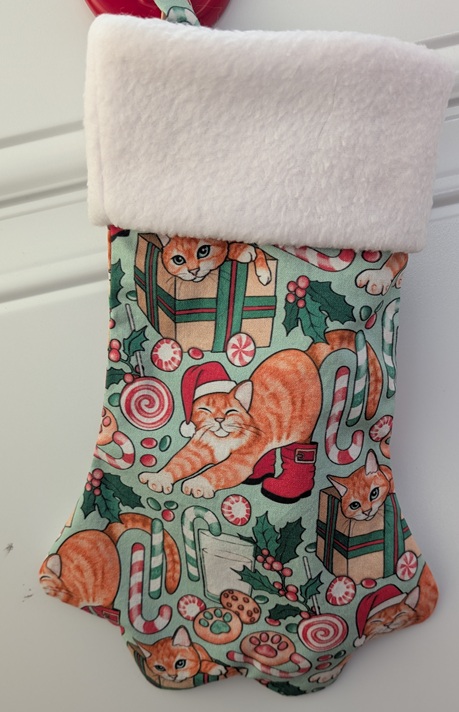
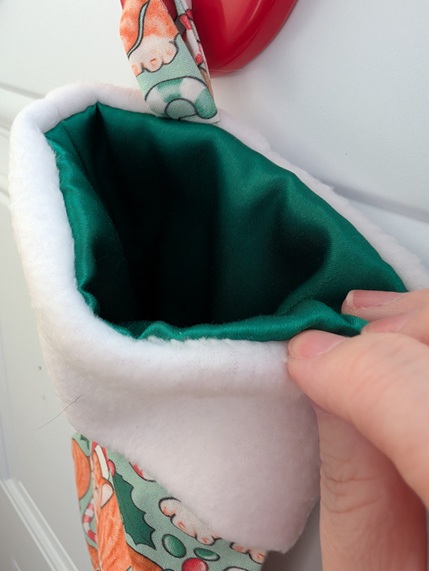
My favourite part – or maybe second-favourite, after the orange cat fabric – is the lining. I found a couple of scrap pieces of green cuddle satin in my stash, left over from a pair of pajama pants, that were just the right size and matched the darker green on the outer fabric admirably. It gives the stocking such a luxe feeling!
I filled it up with all kinds of toys and goodies, including a gift card to the pet store for future treat purchases…and am starting to think there might have been something to the regular size after all. Right now it’s hanging at kitty’s new abode, where she’s patiently waiting until Christmas morning.
Thanks for looking! 🙂