I’m not on social media. The idea of mindlessly scrolling my days away is a bleak one indeed. Do these people not have anything better to do with their time? I do, however, have a Pinterest account, which occasionally shows me TikTok videos, and that’s how I came to learn about, and I quote, “Tiny Tuna Muffins for Cats”. How could I not try making them?
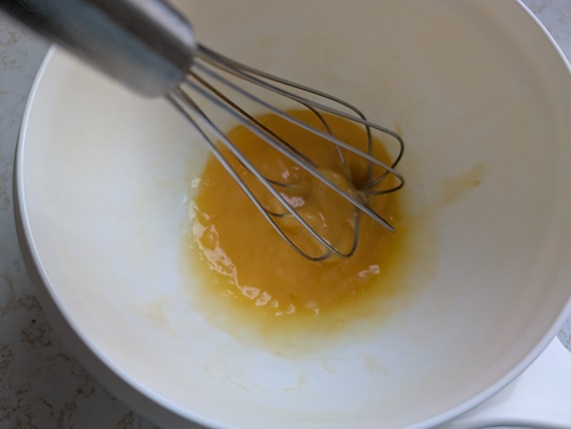
First, I beat one egg:
Then, I drained a can of flaked tuna in water and added it to the egg.
“Mix well”, the video says. No kidding.
To this, I added 1/4 cup each all-purpose flour and shredded cheese.
And then…I mixed well again.
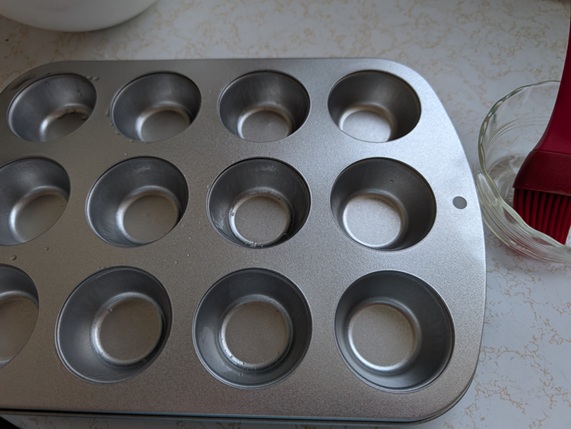
Next, I was instructed to grease a mini muffin tin…
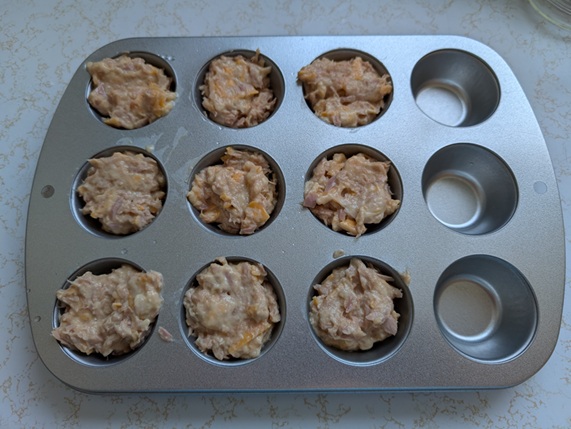
…and add the mixture to the tin. Unlike actual mini muffins or cupcakes, there’s no fear of rising and overflowing, so I filled these pretty much to the top.
Bake at 350°F for 15-20 minutes.
Let cool and serve.
I have thoughts about these. First, use chunk tuna and not flaked; when I drained the tuna I also drained a lot of flakes out because they’re so darned small. My sink smelled like fish, my hands smelled like fish…ugh. Second, consider whether you want this fish goo touching your baking equipment. I bought a small mini muffin tin from the dollar store specifically for this so that I wasn’t at risk of permanently baking a fish smell into my good tins. Third, know your cats and what they like, and be prepared for any reaction anyway. Mine is a cheese fiend, but after taking a couple of nibbles and licking the fishy/cheesy essence from her muffin, completely ignored it.
Was it a cute idea? Sure. Will I be trying them again? Probably not. Maybe staying off social media isn’t so bad after all.
A couple of years ago, one of my mom’s friends from out of town came by with a box full of produce from her garden and homemade preserves. It was then that I encountered groundcherries for the first time, but of more immediate interest was the jar of peach-pepper jam.
“Is it spicy?” my mom asked, not unreasonably.
“Oh, no. If I can eat it, it’s not spicy.” She explained that she likes to spread a thin layer of cream cheese on a cracker (or several) followed by a smear of the jam, and the cream cheese helps dull any spice. Not the healthiest snack, surely, but she was right: it was delicious like that.
Fast-forward a couple of years, and my Baking Buddy and I were spitballing ideas for homemade Christmas gifts (yes, it’s September and I used the C-word), when I remembered the jam. He thought it sounded like a good idea, and that’s how we came to spend a Saturday morning slicing and dicing the produce we had carefully selected a few days prior.
We used this recipe, which I had confirmed was the one from whence sprang the jar that showed up a few years prior. My previous experience had been limited to freezer jam and not honest-to-goodness cooked and sealed stuff, so I was looking forward to practicing a new skill, too.
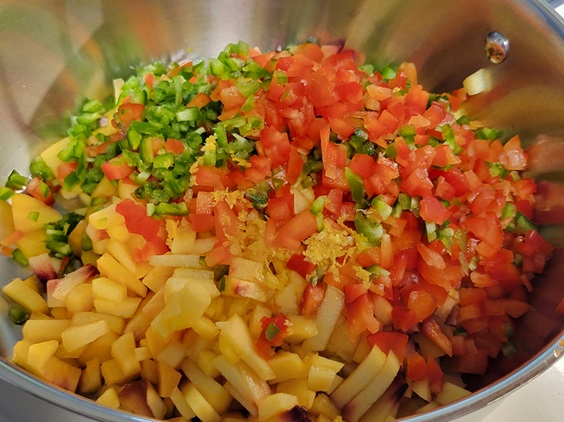
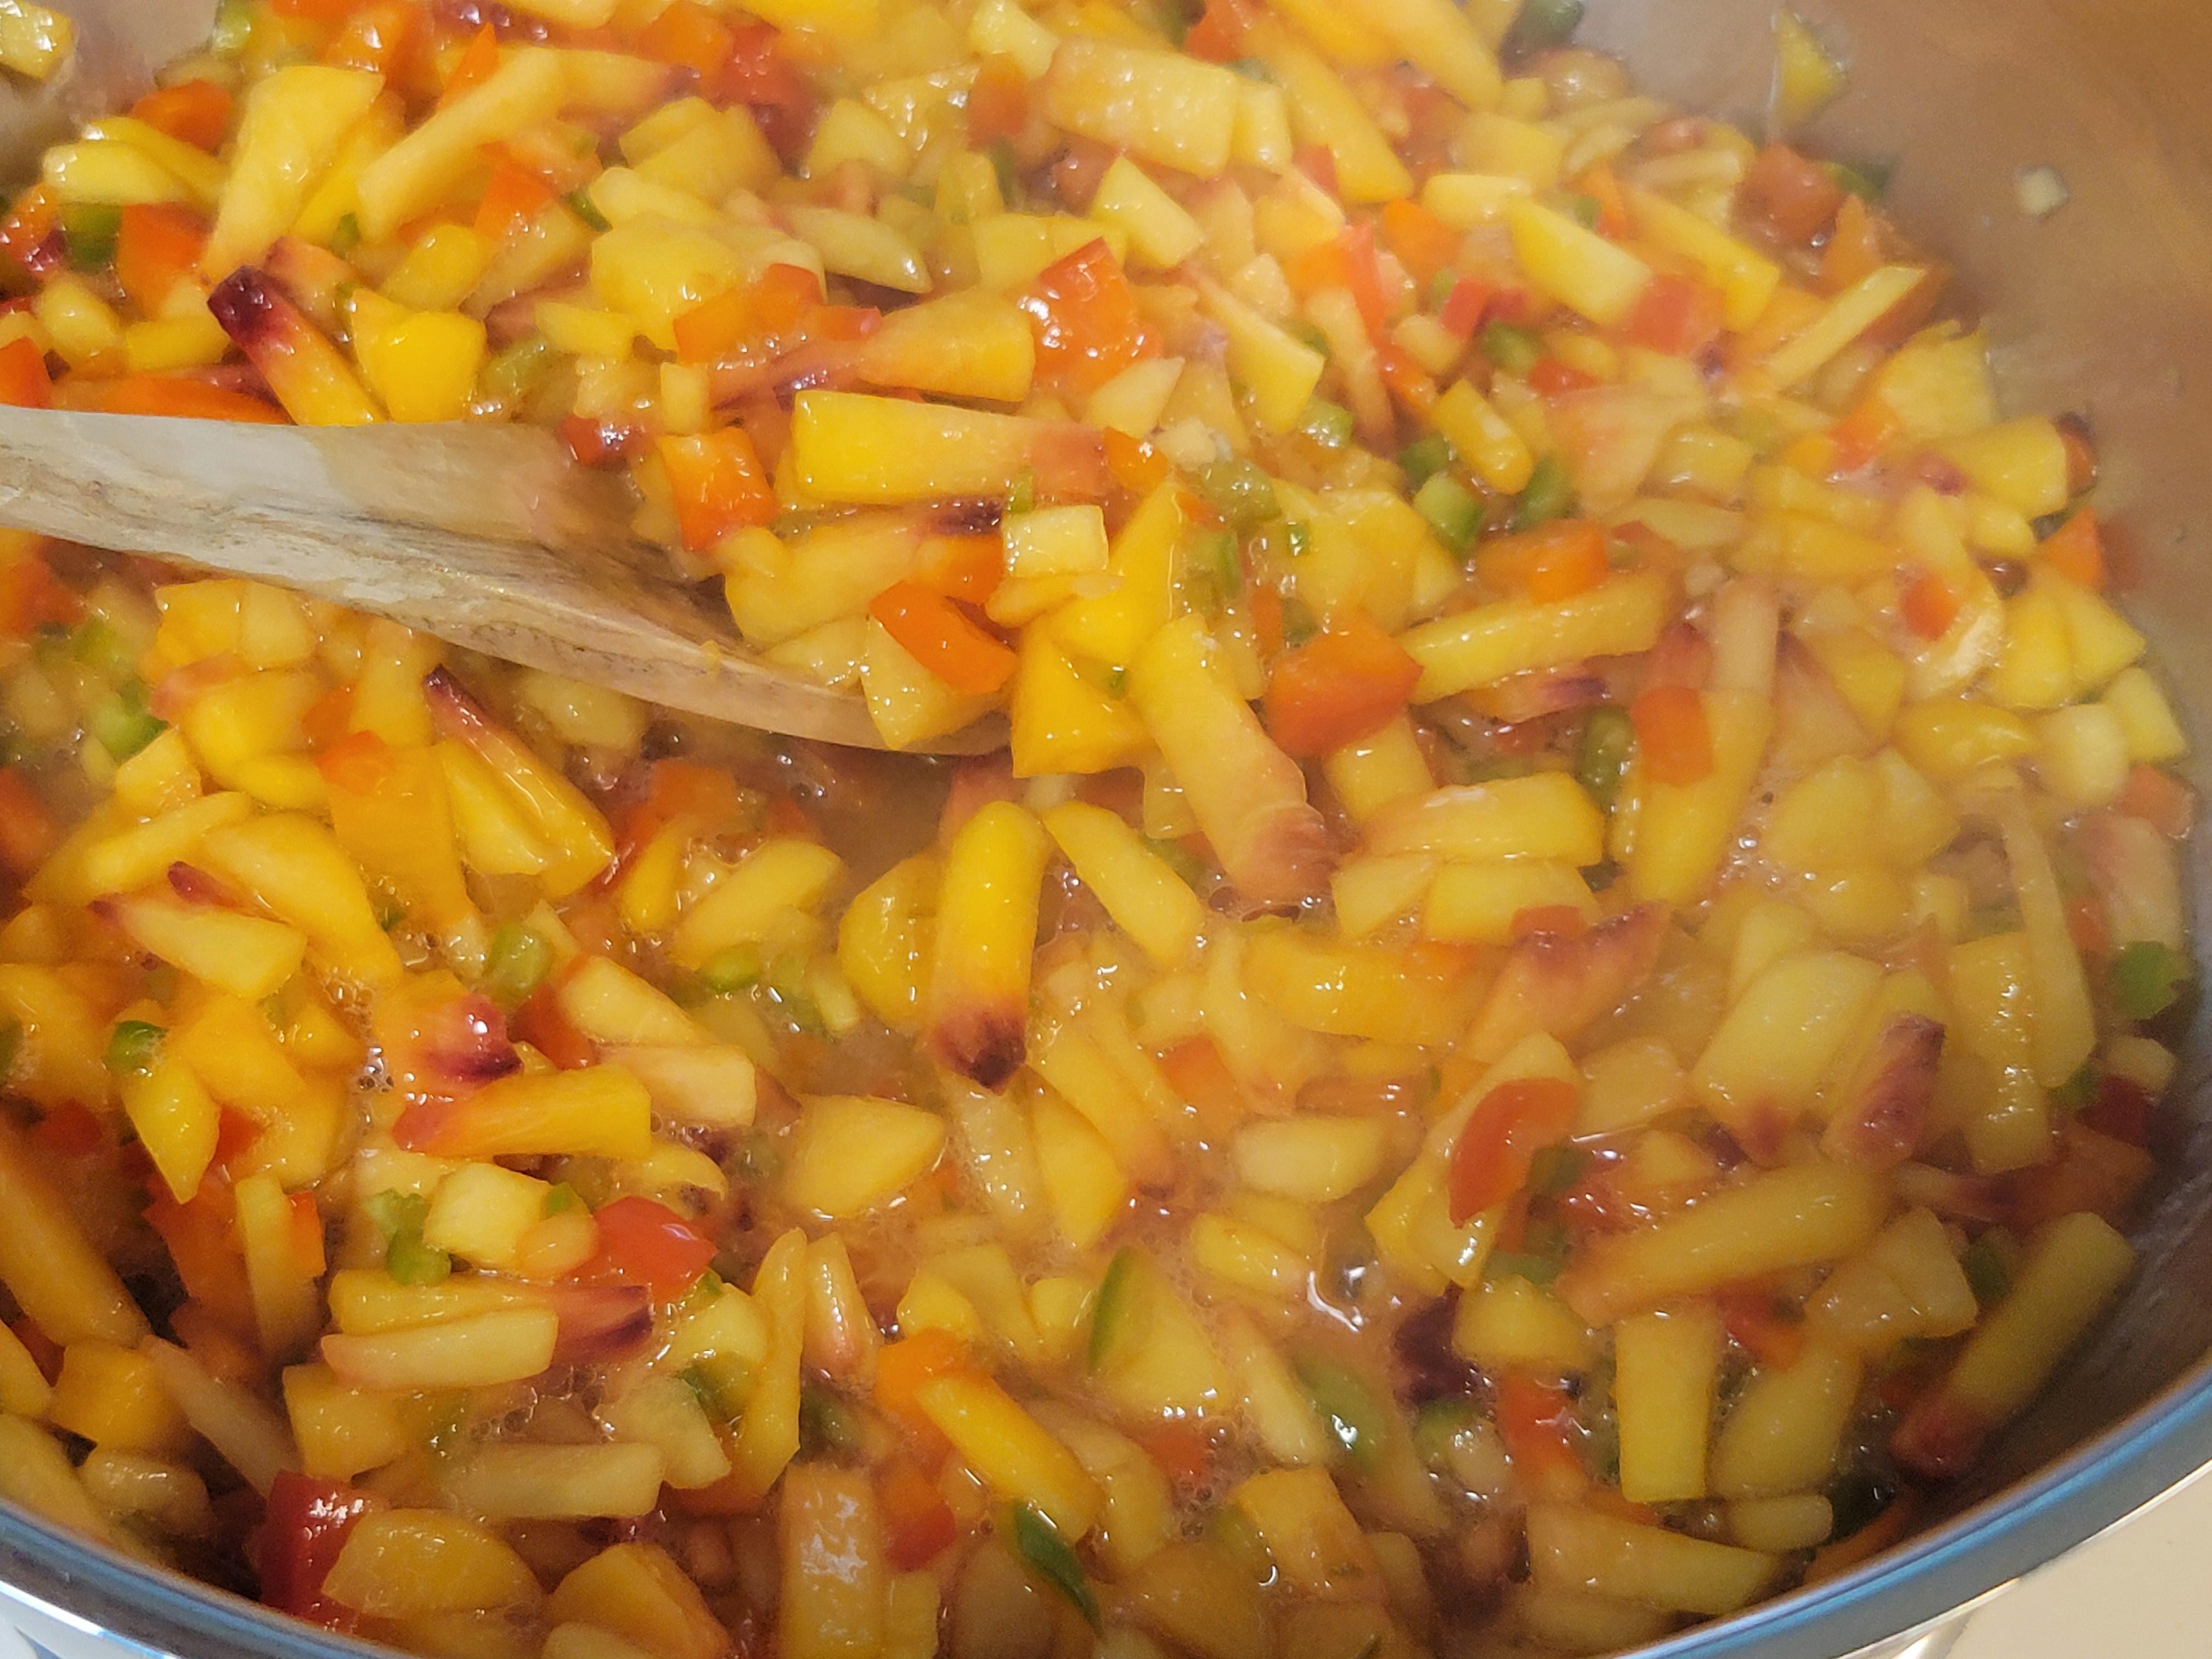
It made me think of peach salsa, albeit a deconstructed version, when we first added all our ingredients to the pot. There’s something so appealing about the vivid colours of the produce.
Before long, though, it started to get saucy.
Full steam ahead! This was actually a welcome relief, because when we first started out we were concerned there wouldn’t be any liquid to gel. The peaches were pretty firm and not really juicy, and the peppers didn’t seem to offer a lot of moisture, but by the time we got to this stage I was glad we didn’t try to “help it along” with any added water.
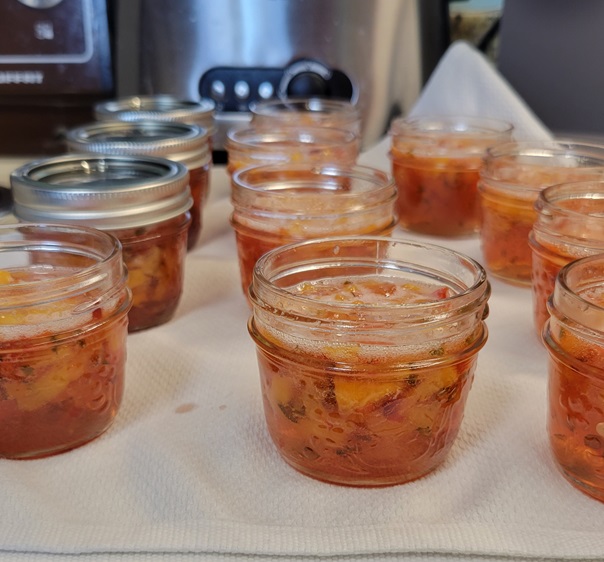
Aren’t those little 125 ml jars the cutest? They’re going to be perfect for tucking into a gift bag.
The beautiful pink-ish colour is just a bonus. I was expecting yellowy-peachy, but this is so pretty!
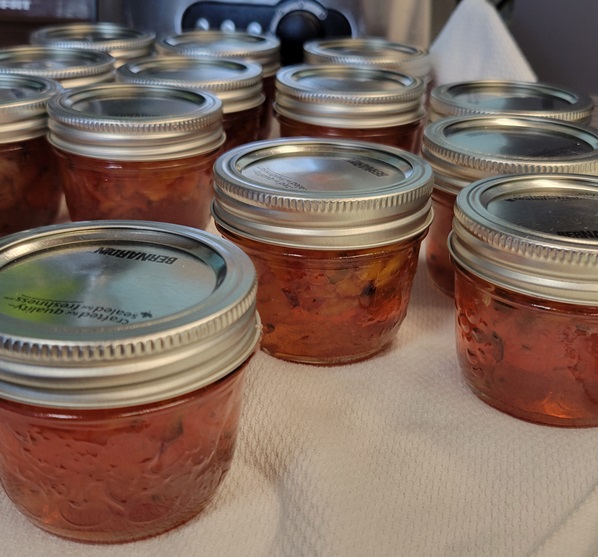
Our finished product had a bit more kick than the jar I had been gifted, making me think the recipe had been tweaked somewhat to include a bit more peach or a bit less pepper – but this is by no means unbearably spicy. We cracked open a jar to try it, and it’s got a sweet-hot zip that should be a hit.
When I was a kid, I thought I wanted to go to camp. I suspect this is because one or two of my classmates did, and it sounded like the height of summer fun. Did the reality of sleeping in a cabin with seven randos, sharing communal bathrooms, and not having my bed or cat or toys/books/stuff occur to me? It did not, and so it’s probably better for all involved that my parents tuned out this particular passing fancy of mine. I don’t go outside…or swim…or enjoy sports…really, this would have been a terrible idea, and popular culture backs me up.
Hail, Hail Camp Timberwood by Ellen Conford – Melanie gets bullied by a cabinmate and her horse tries to drown her. (I’m really showing my bias here: horses terrify me, and in her place, if the drowning didn’t get me the absolute cardiac arrest would have.)
I Want to Go Home by Gordon Korman – Rudy can’t escape Camp Algonkian to save his life, but because I’m not experiencing it personally, I can laugh at it. Please read this one if you get the chance.
“Kamp Krusty”, S4 ep1 of The Simpsons – Bart and Lisa get sent to the eponymous camp where they’re fed gruel and forced to make wallets for export. This is made up for (maybe?) by a trip to Tijuana; maybe it was easier to sneak across the border with a busload of kids who probably didn’t have passports on them in 1992.
Lolita by Vladimir Nabokov – Dolores is sent to camp, from which she is retrieved by her newly-minted pedo of a stepfather who kidnaps her and keeps her isolated from everyone and everything.
To summarize: very happy, in hindsight, to not have gone to camp. Who needs the colour wars, the singalongs, or…the s’mores. Sigh. The s’mores.
My baking buddy and I decided we could definitely do this ourselves, no campfire or mosquitoes necessary.
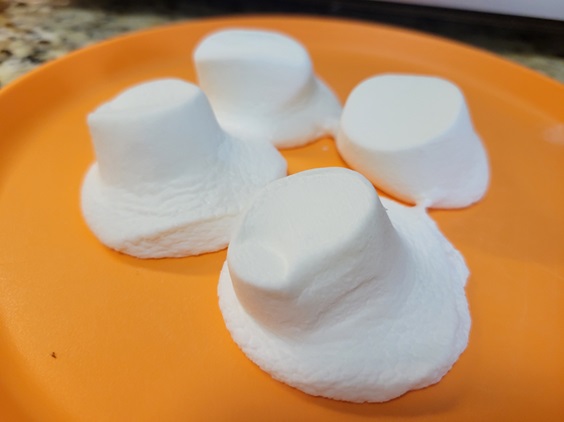
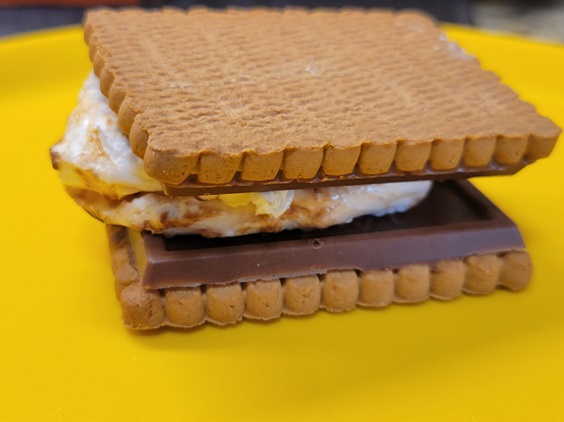
We started out with marshmallows and chocolate-dipped cookies, figuring they’d be easier to deal with than graham crackers and a chunk of chocolate. Also, the box itself exhorts their suitability for s’mores, so who were we to question that? We found a kitchen torch on sale to get that toasty outside crust on the marshmallows.
We weren’t sure how long it would take to toast them using the torch, or if they’d get soft enough on the inside, or if we’d use all our butane, so we hastened the process by microwaving them for a few seconds first, just to soften them up a bit.
We speared two at a time on a regular fork and had at ‘er with the torch. They toasted up fairly quickly (making me think we were right to pre-soften them) and absolutely caught on fire more than once.
It was a bit of a trick to get them off the fork – once the flame was turned off, they congealed pretty quickly – but two marshmallows made the perfect fluffy layer between our cookies. Unfortunately, because they had cooled a bit, they didn’t melt the chocolate so well…
…until we stuck the assembled s’mores back in the microwave for a few more seconds to soften everything up.
These were a great, no-bake summer dessert. And with most of a bag of marshmallows and a whole bunch of butane left, I think we’ll be making these again. Who needs to sleep on a cot just to get them?
My latest kitchen experiment was borne out of wanting to avoid the restaurants on Mother’s Day. It’s right up there with Valentine’s Day as far as overcrowding and the antithesis of a relaxing, enjoyable meal. Luckily, I had recently borrowed The Superfun Times Vegan Holiday Cookbook from my local library, and had tons of inspiration.
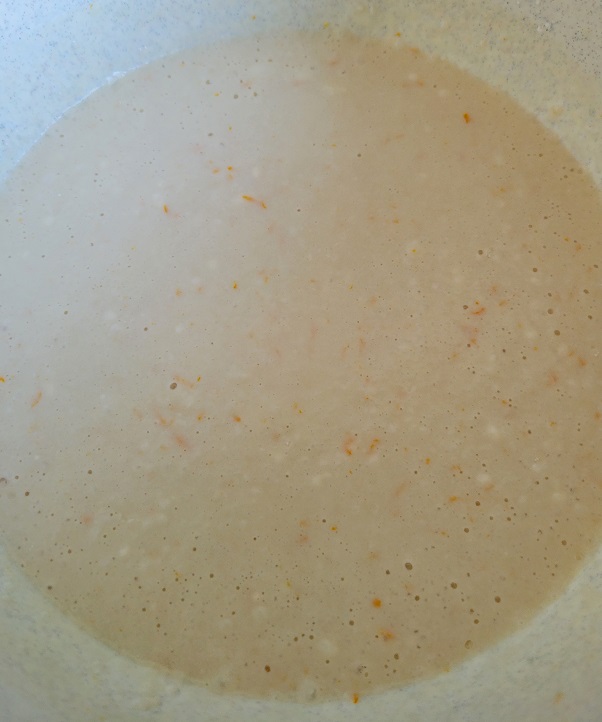
I opted for almond-crusted French toast, and although “crusted” isn’t a super-appetizing word (it makes me think of the top of the ketchup bottle), this was delicious! It’s not my recipe to reprint, but it’s similar to this – only vegan, so coconut milk for thickening instead of eggs – although there’s no cinnamon in the mixture. Instead, add in some orange zest: the recipe called for a teaspoon, but I chose to zest until my orange was zest-less, because a little extra flavour never hurt anybody.
Speaking of unappetizing: there was something a little off-putting about soggy bread with almond slices stuck to it. I got all of my bread dipped and almond-ed while I waited for my pan to heat up, and seriously had my doubts before the first side turned golden brown.
But before long, we were cooking (ha! In more ways than one).
In a moment of inspiration, I peeled the orange who had so bravely given its zest to the cause and served it on the side as a juicy little amuse-bouche. Who knew that citrus could be so tasty outside of the usual season?
This couldn’t have turned out better. The orange flavour really came though in the toast, and the almonds provided a wonderful crunch. The best part? It takes less than half and hour to make, so this is a lot of impressiveness for such a short amount of time. I made some for a friend for lunch the following weekend, and it tastes just as good when you’re not trying to avoid crowds.
(Bonus points if you recognize the title of this post as being from Pat Boone’s 1962 single “Speedy Gonzales”.)
Today, I come to you not with a decadent dessert, but with a quick and easy entrée. I’m pretty sure my junior-high Home Ec. teacher wouldn’t classify this as food, and I secretly kind of agree with her (purely hypothetical) assessment, but when you’re hungry but also unmotivated, this does the trick.
I first spotted this “recipe” on Buzzfeed, which of course sources its content from Reddit, whose original poster saw a video for this on TikTok. This feels a bit like the 21st century version of passing a recipe down through the generations, albeit at warp speed.
Preheat your oven to 400°F, grease a baking dish, and let’s get started.
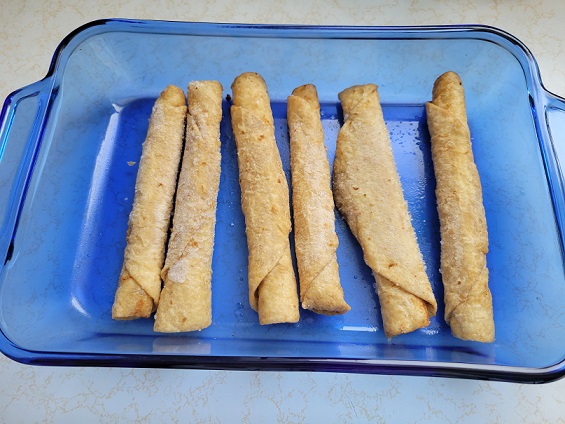
Start with some frozen Taquitos. I used plant-based ones from my favourite independent grocery store, but any kind will work. Once your oven is up to temperature, pop them in there for 10 minutes.
Once your 10 minutes are up, turn them over and pour a can of enchilada sauce over the works. I used verde sauce which admittedly looks a bit nasty in photographs but smells and tastes heavenly. Sprinkle some shredded cheese over the top (my designated shopper brought me old Cheddar), and put them back in the oven for another 10 minutes.
Crispy shells and melted cheese? Check and check.
Et voilà, lazy enchiladas in 20 minutes. Like I said, maybe it’s not food-food, but it’s quicker and cheaper than hitting up the local drive-through. It’s also no slower than making Taquitos the usual way, so for 20 minutes the choice is yours. I made these a couple of times over the holidays, and they hit the spot.
Earlier this summer when the temperatures were high and my motivation to do much of anything was low, I spent a few consecutive evenings camped out on the couch and watching DVD’s from my collection. One night’s feature presentation was Dick, which is a fictional take on the Watergate scandal. High cinema? Hardly. But it had a recognizable cast and a good soundtrack, and there are worse ways to spend an hour and a half.
Some time after that, I was leafing through my mom’s copy of Retro Recipes from the ’50s and ’60s: 103 Vintage Appetizers, Dinners, and Drinks Everyone Will Love (this was a Mother’s Day gift from me, and 100% worth it just for the photos, even if you don’t ever plan on making liver and onions or beef Wellington), when I came across Watergate Salad in the “Side Dishes” section. Reading through the ingredients, I thought that calling it a side dish might be stretching it a bit…but also, I really wanted to make it!
I assembled my ingredients…
Kraft created this recipe to showcase their new-at-the-time pistachio pudding mix, and originally called it “Pistachio Pineapple Delight” before a newspaper columnist gave it its more infamous name. I call it a misnamed dessert.
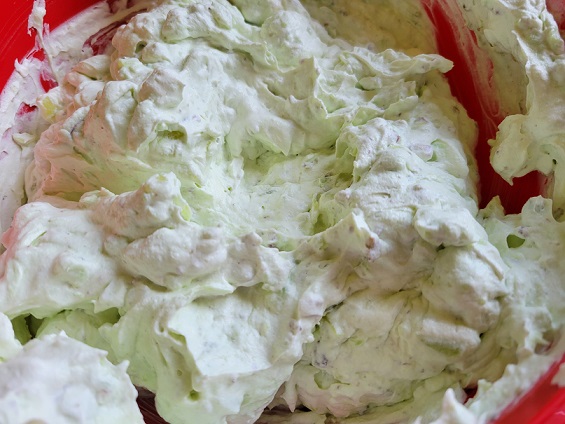
The pineapple, pudding mix, and pecans get thrown into a mixing bowl along with the marshmallows.
It’s still not a salad, but at least it’s still fairly benign-looking at this point.
Not for long, though…
What the heck, Kraft? This looks like one of those queasy-making dishes you see at Halloween. (“Zombie Brains”!) Folding in the Cool Whip helped a bit.
By the time I was spreading it in the pan, it looked like the picture in the book.
The recipe called for an 8″ baking dish; I went larger than that after looking at how much was in the bowl. (I think my problem might have been a larger container of Cool Whip than the recipe called for, but in my defense it was not labelled as being 8 oz and was also the only size available at the store, so…)
Also of interest: the recipe said it could either be scooped or sliced for serving, and I had my doubts at first. Until…
I’ll be darned! That stuff really held its shape, and I’m not sure if that’s a selling point or not.
By the way, if you’re wanting to try this for yourself, here’s a very similar recipe to the one in the book.
I’m not sure what it is, but it’s definitely not a salad. Even Ambrosia salad feels more salad-like, somehow. Perhaps it’s best enjoyed with shlocky 70s-by-way-of-the-90s nostalgia. It’s cool and light, though, and my mom loved it – so I guess the book was a good investment.
Last weekend was supposed to have been hot as all get-out and since turning on the oven to bake sounded less-than-appealing, we decided this was our opportunity to try one of those copycat Dole Whip recipes that proliferate on Pinterest. Who needs a passport and a plane ticket when one can recreate all the magic of a Disney park in one’s own kitchen?
If you search out “copycat Dole Whip” online, there are tons of recipes to choose from. I went for this one, which seemed the most true to the recipe released by Disney a couple of years ago and didn’t include any weird add-ins like sugar (the pineapple and ice cream are full of it already, thanks) or lime juice (just…what?).
I had no idea that frozen pineapple even existed until I sought it out for this recipe. We used about half the package (or 2 cups-ish), plus a “big scoop” (~3/4 cup) of vanilla ice cream, and 1/4 cup of pineapple juice.
This view of the blender holds promises of infinite riches, of creamy, tropical bliss. Now, the recipe says that the frozen pineapple chunks should be set out “a few minutes ahead of time”, without really specifying what “a few minutes” is. Diligently photographing my packaged ingredients and then measuring them all out and adding them to the blender surely took “a few minutes”; what the recipe did not tell us is that that was not nearly enough time, and that trying to blend everything now would result in a solid, seized-up frozen chunk that would need to be poked with a stick like some sort of dead body in the woods in order to start moving around the blender.
I feel like if the four kids in Stand by Me had been on a quest to look at frozen pineapple, the movie would never have been a success. Ahem.
After much poking and pulsing, everything more or less came together and looked like the pictures I was seeing online. The recipes almost unanimously agree that to get a classic soft-serve look, this should be spooned into a piping bag and swirled into your cup or bowl.
What they don’t tell you, however, is that any pineapple chunks that escaped the blender’s blades will block the piping tip, resulting in more poking with a stick (a chopstick this time, and not a wooden spoon).
Me: Do you want to just spoon this into the bowls and eat it?
Him: Yup.
It might not have been much to look at, but it was cool and refreshing. Shockingly, the stick-poking didn’t deter us from wanting to try it again – albeit with slightly thawed pineapple next time.
b) a rejected prototype for the Angry Sun from the Super Mario franchise?
c) my very first piece of kindergarten artwork?
Actually, it’s d) the start of something really fun. Take a look!
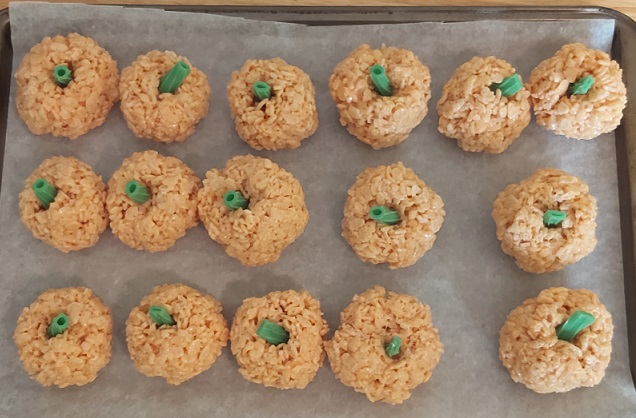
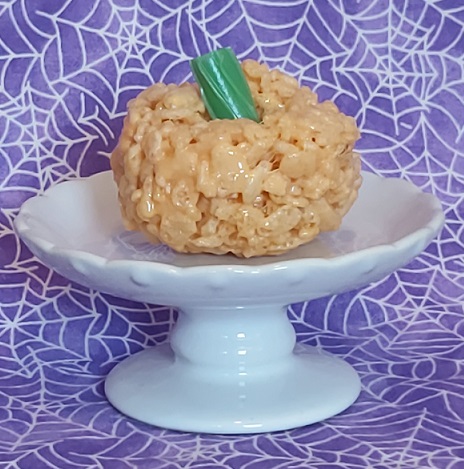
Last year, the employees from the west side of our floor had a bit of a Halloween party and didn’t invite the east-siders. I discovered it by accident when I went to file something and walked into a table covered in sharable finger food. When I ran into one of the west side denizens later on in the shared kitchenette, she bade me come over and grab something to eat. That’s where I first encountered Rice Krispies treats in the shape of pumpkins, and I’ve had to wait a whole year for them to be seasonally appropriate again.
I used this recipe, and started by cutting two pieces of green Twizzlers (from the rainbow pack) into 1″ pieces, like you see above. I’m glad I cut the full 16, because that’s exactly how many pumpkins I got, not the 12 the recipe indicates. They’re watermelon-flavoured, which is normally not something I’d go for but which is less gross than it sounds, especially in small quantities like this.
I really dug the tie-dye aesthetic the marshmallow got when I added my red and yellow food colour – if I thought it would stay swirled and separate, I’d try making a batch in a different colour, but even if I hadn’t dutifully blended these to a solid orange beforehand, stirring in the cereal would have done the job.
Every recipe I’ve seen for these recommends greasing up your hands with butter or oil before rolling each pumpkin (or donning food-handling gloves, which boast Teflon-esque properties), and oh, that is one step you don’t want to mess around with. I think I managed to form my first two with one coating of oil, but after that stray pieces of cereal began to stick. A few seconds oiling your hands will save a ton of frustration later on.
Rather than wait until I had rolled all of my pumpkins before adding stems, I created a little indent on each one with my thumb as I went along, and found it much easier to get the licorice in while the mixture was still soft.
And there you have it! These were really quick and easy to make, and taste great. So far, they’re proving to be a hit with anyone who’s tried one.
This is how I envisioned my self-isolation when authorities everywhere told us to stay home and flatten the curve:
This is what it’s actually been like:
Ha! Just kidding! I’d kill for a paper file right about now. But seriously, I’m working from home, yanked from my extremely paper-based environment and plunked into a paperless wonderland. And I’m not complaining, because hey, I have a job, I and those I care about are healthy, and I’m helping people. But it’s hard not to be a little jealous of those who have all the time in the world to bake and craft and create all day, every day, or who can undertake some great project. Apart from saving the commute, my routine really hasn’t changed. The grass is always greener, right?
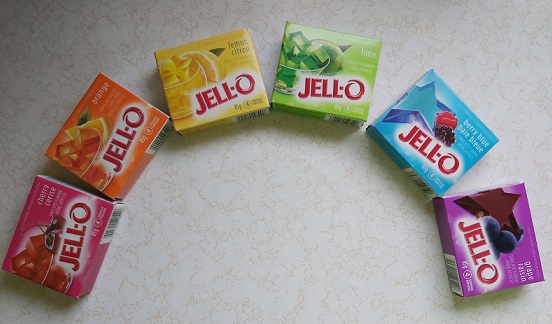
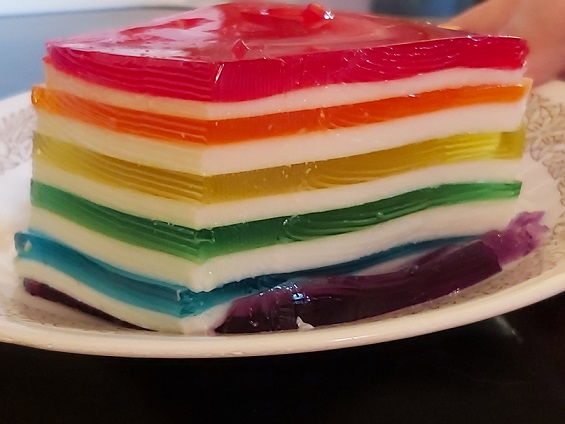
Because my weekdays are filled with PDFs and occasionally wonky network connections, I took the opportunity over the weekend to try something deliciously retro: Ribbon Jell-O. I don’t have deeply-rooted memories of this being made for family dinners (but a classmate’s mom made it once, I think?), so I wasn’t in danger of ruining the nostalgia. Also, it’s a) bright and colourful and b) pretty straight-foward and simple, which was reason enough to give it a try.
(A word to the wise: I was a heck of a lot happier before I started reading nutritional information on things. There’s a whack of sugar in this, so, you know, proceed with caution.)
I’m not going to rewrite the recipe here – the original is quite simple enough to follow – but offer some insight for those who might want to follow in my footsteps.
Be aware of the capacity of your kitchen implements. The recipe called for “six small bowls” to mix the Jell-O. I used soup bowls, figuring they’d be more than enough – but by the time I added my one and a half cups of water to each flavour, those babies were full. Ditto the “small saucepan” for warming the milk. Luckily, I decided while the milk was still in the carton that a small saucepan couldn’t hold a litre and sized up. Also: some of the comments complained that all the layers wouldn’t fit into a 9″ x 13″ pan as promised, so I bought a deep (3″) disposable one just for this project.
2. One of the comments asked whether it was necessary to grease the pan. The author swore she never did, but I didn’t feel like taking that chance. I gave my shiny new pan a couple of quick spritzes with PAM and spread it around with a small wad of waxed paper. It’s a really easy insurance policy (and I promise it doesn’t make your dessert greasy).
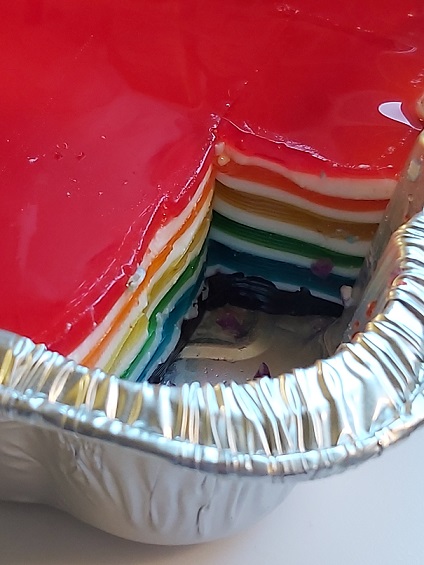
3. The layers take about 45 minutes each to set up, which adds up when you’re adding 11 of them in total. This is actually a great isolation dessert, because really, where are you going to go?
4. Remember the 3″ pan I procured just for this? Holy heck, am I ever glad I had it! That puppy was almost full to the top when I was finished. Oh, and heavy, too! I had decided to store this in the basement fridge for the duration, and had the foresight to realize I didn’t want to have to carry it upstairs each time I wanted to add a new layer. Because there’s no way those soup bowls were going to make it downstairs without spilling, I emptied each one into a 2-cup measuring cup when it was time to add it and took that down instead. (For the white mixture, I measured out my cup-and-a-half in another 2-cup measuring cup.) An added bonus: because my last few colours were gelling even at room temperature, it was easy to pop the measuring cup into the microwave for 20 seconds or so to loosen everything up again.
5. I’ve blocked out a lot of high school physics class, but I can tell you that there’s a lot of pressure working on this structure from all sides. The adhesion of the white to the colours isn’t absolute, and in serving, the layers start to slide a bit.
6. It fares slightly better if you lay it on its side, although it will also collapse from this position. If I ever make this again and really want it to stay intact, I’ll do individual parfaits – but as it is now, it’s still delicious and fruity, even when it’s a slippery mess.
Thanks for looking – hope everyone’s staying safe! 🙂
Who couldn’t use one of those in his or her repertoire, especially at this time of year? There’s so much to get done, and anything that doesn’t involve preheating, rolling, cutting, frosting, etc. can’t be all bad.
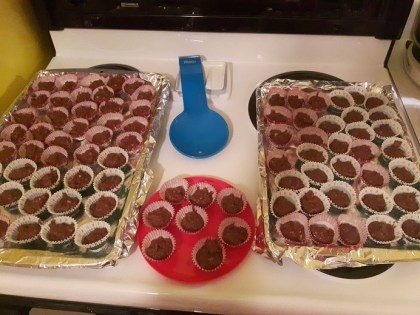
And so I present to you my recipe for Cuban Lunch. They’re based on a defunct chocolate bar (which was apparently resurrected earlier this year, but I haven’t seen it anywhere), and are a crowd-pleaser if ever I saw one. You can make a lot quickly, and they’re perfect for gift-giving or cookie trays. A few years ago, I gave little care packages to the management team at work, and within half an hour everyone had IM-ed me to say thank you – except for the men in the group, who IM-ed me to say thank you, and also that they had eaten all six in one shot.
What you need:
2 cups each of semi-sweet chocolate chips, peanut butter chips, and butterscotch chips. If you buy these things in bulk and actually want to measure, great; I find that your standard 300g bags found in the baking aisle give you what you need
1 1/2 cups crushed ripple potato chips
1 1/2 cups chopped peanuts
Optional, but nice: a kind person to help you set out your mini cupcake liners, and to set out more when your hands are occupied by chocolate-coated utensils and you realize you’re getting way more of these from the recipe than you anticipated
Set out your mini cupcake liners. The recipe I found has a yield of 75, but whoever wrote it must have filled their liners fuller than I do. This may take some experimentation on your part, so keep a few extra nearby. Also, the tinfoil is not strictly necessary, but prevents you having to wash your cookie sheet when you drop chocolate on it – and you will drop chocolate on it.
Chop your peanuts and crush your ripple chips. I like to use a mini food processor for the chips, but if you have some holiday rage to work through, a sturdy Ziploc bag and a rolling pin make a wonderful substitute. Set them aside for now.
Put your 6 cups of baking chips in a microwave-safe bowl. I like to fold them all together to prevent weird pockets of one kind or another in the finished product, because I’m like that. Once you’re satisfied that your mixture is as homogeneous as it’s going to get, microwave it on high for 30-second bursts. After each round, take it out and stir it before putting it back in for another 30 seconds. Yes, this is a giant drag, but chocolate likes to hold its shape even when it’s at a melting point, so check and stir, every single time, until everything is completely melted. No one likes scorched chocolate.
Once the baking chips are completely melted, fold in your potato chips and peanuts. It can seem like a lot to integrate, but keep at ‘er. Your mixture should look something like this.
Spoon the mixture into those mini cupcake liners you so painstakingly peeled apart and placed on your cookie sheets. Once they’re all filled, they’ll need to set. They will set up at room temperature, but some time in the fridge or freezer helps immensely. If you live somewhere cold, use nature’s freezer! (Just make sure you don’t have any neighbourhood wildlife creeping around.)
These can be stored in a sealed container at room temperature or in the fridge, and look so cute in a little cellophane treat bag tied up with a bow.