…my true love gave to me, three stockings hanging.
(OK, I might be a stocking short, here…)
For the past several years, Lettuce Craft has hosted a Christmas card swap. As swaps go, it’s super low-key: you can choose how many people you want to exchange cards with, and then get your cards made before you sign up. Once sign-ups close, boom, you’re ready to send (and receive!). Who doesn’t like getting mail, especially when it’s a handmade card?
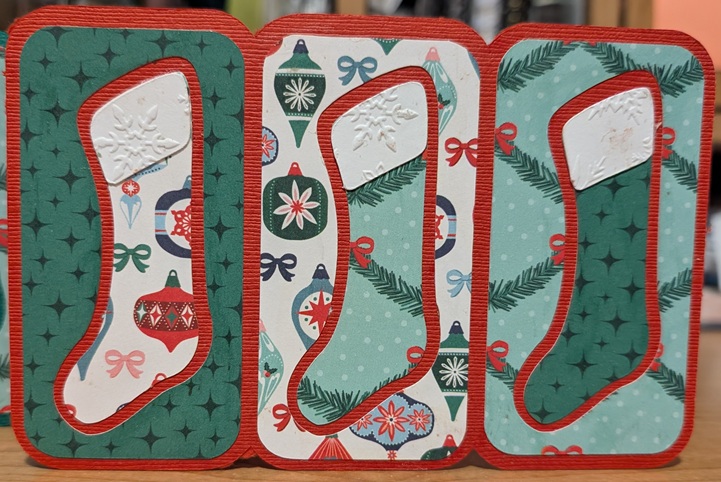
This year, I sent the tri-fold stockings card from the Merry and Bright kit on SVGCuts. They fit perfectly in your standard 18.5 cm x 13.5 cm envelope – that’s 7″ x 5″ for those who don’t speak metric – and were a fun way to mix and match patterns.
I stamped a festive message inside, and they were ready to go.
And just for fun, I did a variation with a green background:
I first heard about Altoid wallets a year ago or so – or rather, heard the term and then conducted my own online research and learned that yes, they’re pretty much exactly what they sound like. There’s something almost freeing about leaving the house with just a tin somewhat smaller than 2.5″ x 4″ containing all the essentials: a debit card, lip balm, hair tie, a few dollars in cash, and maybe even wireless earbuds if that’s how you roll…but I knew that would never work for me. I want an actual bag to hold my actual wallet, not to mention the sunglasses case, phone, reusable bag or two, and emergency rations in the form of leftover fun-size Halloween chocolate. (And occasionally, incoming/outgoing mail or a library book.) I dismissed the idea as “cute” and promptly forgot about it.
A month or two ago, Pinterest started showing me images of little mini beauty kits in an Altoids tin. Their creators managed to cram all this soft-girl aesthetic into a very small space, with strands of tiny faux pearls outlining teeny-tiny mirrors and little pink bows in the same shade as the lip stain tucked into the bottom. And thanks to the site algorithms, I also started seeing more pragmatic versions, like little tiny emergency kits.
I should make one for my mom, I thought, clearly a victim of social media saturation. Only…a beauty kit to go isn’t quite her speed (did you even know you can buy Altoid-sized mascara?), and a full-out “In Case of Emergency, Open Tin” scenario didn’t feel very gift-y somehow. I decided to hit somewhere between those two extremes, and decided on a cute tin with some purse essentials in it.
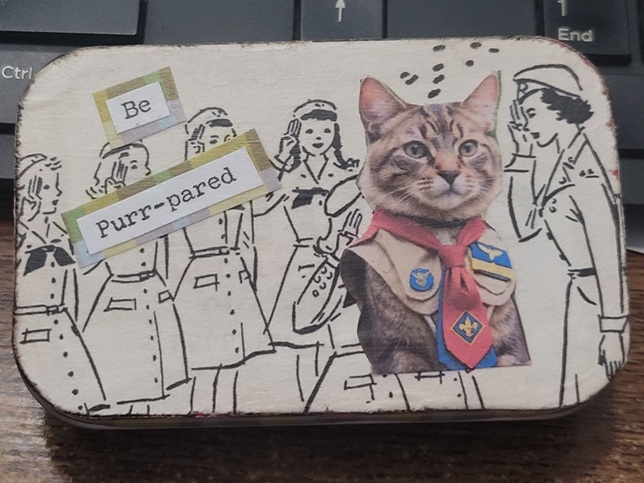
The theme came together in about five minutes for me when, in a fit of boredom, I googled “cat in boy scout uniform”. Google happily obliged with several images that I’m sure were AI-generated; one of them was captioned “Be Purr-pared”.
Yes! Be purr-pared, indeed! With the help of some musical inspiration, I was on my way.
I found some images from a vintage Girl Scouts manual on Etsy, and had my aesthetic.
And filled with lip balm, hand cream, Band-Aids, and gum for those post-coffee emergencies.
There was a good amount of Mod Podge involved, and it was impossible to perfectly line up the plaid on the short edges, but overall I’m pretty happy with how it turned out.
My friend Ricky recently had a birthday, and I wasn’t going to let the little matter of a couple thousand kilometres keep me from celebrating him in style. I got it in my head that I needed to do a “birthday in a box”-type package for him. In rapid succession, I decided on: an actual gift (Lego-adjacent building block set), a banner, a “I’m the Birthday Boy” badge that would likely have gotten him beaten up in school, a singing candle, and…cake? I make a mean cupcake, but I didn’t think they’d travel especially well via Canada Post. I looked at mug cake mixes at the grocery store, but just about dropped the box when I made the mistake of reading the nutrition information. (Cake will never be health food, but for 400 calories and 50 grams of sugar, reconstituted and microwaved “cake” just isn’t worth it.) I did find a homemade cake-in-a-can tutorial on Pinterest that, although I applaud its creativity in having layers of cake and icing sandwiched securely in a repurposed tin can, looked frankly kind of gross. Maybe if I couldn’t reasonably make him dessert, I could buy him dessert instead.
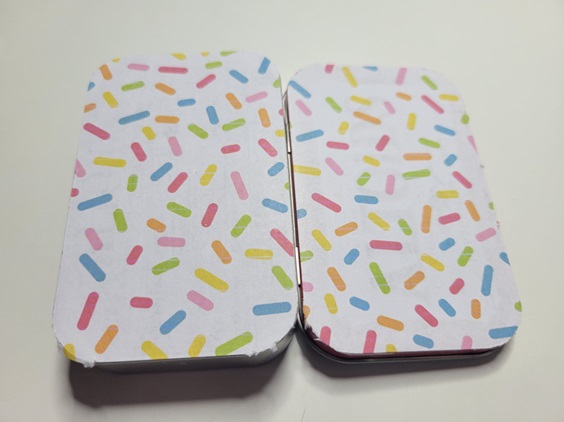
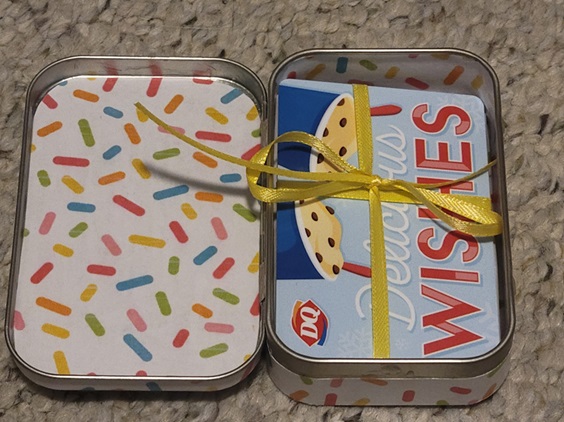
Armed with that somewhat heartening thought, I bought a Dairy Queen gift card to tuck in the box. Only…we all knew I couldn’t just toss the card in on its own, right? In looking through my Downloads folder, I found a sprinkle patterned digital paper I bought ages ago off of Etsy, and everything fell into place.
I’ve used this tutorial for altered Altoid tins before, and it’s delightful. The step by step pictures are a fantastic help, even for someone who doesn’t consider herself a papercrafter and gluer (like me).
I started out by covering the outside and inside surfaces with the paper, and then (not pictured) covered the edges. I learned in kindergarten that cutting in a straight line eludes me, so I used my Silhouette to cut perfectly straight pieces exactly the width of the various edges I had to cover.
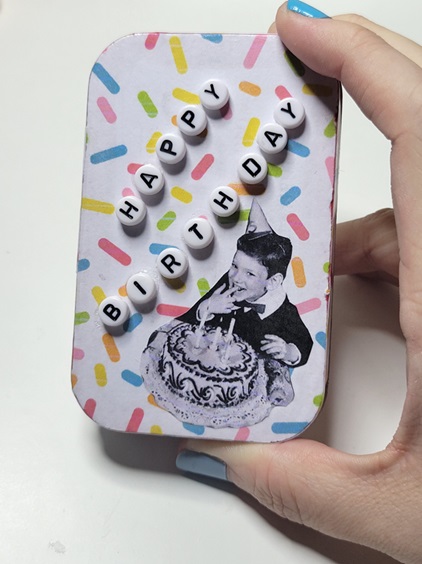
Next, I had to figure out what kind of decoration I wanted to add to it. I’m a fan of vintage kitsch (shocking, I know), and after a search-engine rabbit hole of results for “retro birthday party”, I found a couple of images I liked. I resized them to the width(ish) of the tin and printed them out, then cut out the section I wanted by hand. I also used a typewriter-inspired font to spell out a few well-wishes (although I only used one in the end). I couldn’t resist sneaking a quote from National Lampoon’s Animal House in there.
The front, on the other hand, required the big guns be brought out (brought in?).
Just laying out slips of paper saying Happy Birthday didn’t quite give it enough oomph. Luckily, I had bought some alphabet beads a year or so ago in a moment of inspiration.
When the glue had dried, I was ready to add the gift card.
Besides being festive, the ribbon made it easier to pull out the gift card – experience is a great teacher sometimes.
The tin was the perfect size to tuck into a little open space at the end of the box, and the postal gods were on their game because it made it to him in time for his big day.
…my true love gave to me: a card with a greeting merry!
For the second year in a row, I signed up for the Christmas Card swap on Lettuce Craft, because who doesn’t like getting a little festive mail? Or mail in general, really?
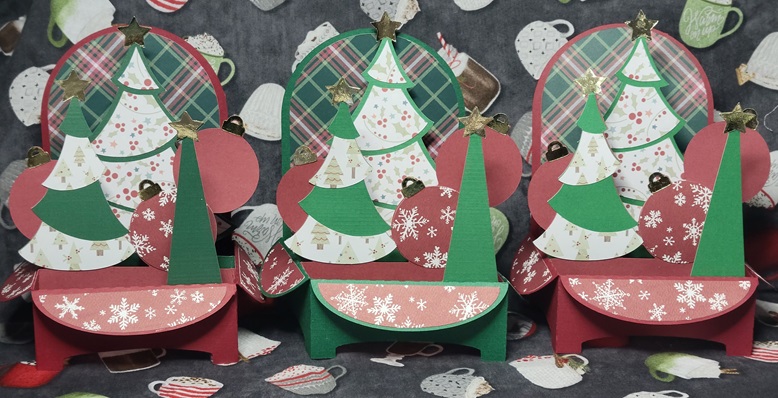
Last year, I kept things fairly simple with a bit of embossing powder and die-cut messages (trust me, it’s simpler than it might sound), but this year I apparently lost all sense of reason when I saw the Christmas Trees box card on SVGCuts. This had presence, drama, and a great reason to play with some fun patterned papers that mysteriously find their way into one’s stash but don’t get used for being “too busy”.
Speaking of patterned papers: trying to decide on a colour scheme was pretty much impossible. In the end, I made three cards in a traditional red-and-green theme, and the other three using fun mid-century pinks and teals. The traditional set got gold stars and ornament hangers, and I used silver for the mid-century set. I stamped the back of each card with a fun, festive message that still left plenty of room to sign. The pattern came with a little train to attach to the inside front of the card, but I left it out to make things all about the trees.
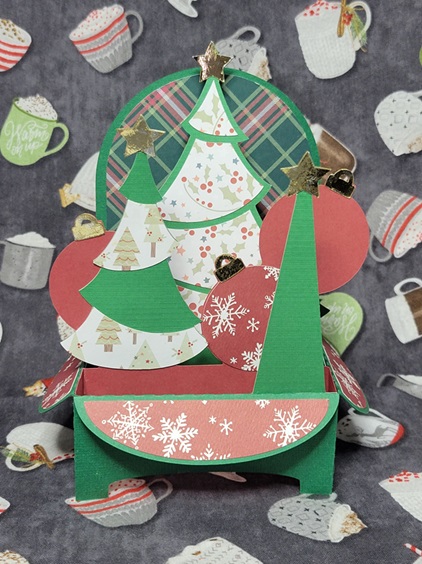
I wouldn’t say that making six 3D cards was a mistake, but it sure was an undertaking. The actual assembly wasn’t so bad – I hit upon a rhythm and system that got me down to about 30 minutes of gluing and positioning per card – but cutting out all the different pieces and keeping them sorted until I could put them together was a challenge. I started by making little piles for each card, starting with the solid coloured base and then setting subsequent stars, tree bits, etc. on top, and then putting each little group into its own envelope to wait patiently to be glued together.
The other challenge came when it was time to mail them. When folded flat, they’re 7 inches square (or as square as you can be with irregular edges), which is bigger than most envelope sizes commonly found in stores. Sure, there are 9″ x 12″ envelopes for letter-sized paper, but that felt like overkill. I found some 7.5″ x 10″ “catalogue envelopes” at Staples which fit the bill nicely. And then…I worried that they would get bent in the mail, so I made little cardboard sleeves to give them a bit of stiffness. Some people helicopter-parent their kids; I do it to my crafts.
Luckily, my over-packaging seems to have worked: four out of six partners have received them so far, and they’re standing just as straight as they did before mailing.
Oh, no! Using humour to drive home the importance of using the Oxford comma? That can only mean one thing…it’s National Grammar Day!
I’m not only a witty child, I’m also an incurable dork. For the ongoing happy mail swap I take part in, I decided to turn last year’s Punctuation Saves Lives calendar into notecards to send out.
Start with one calendar:
Cut a few 8.5″ x 11″ pieces of cardstock in half, then score and fold each half to create a 4.25″ x 5.5″ card (A2 sized):
Affix the thumbnail images from the calendar onto the cards. When I first did this, they looked really stark, so I gussied them up a bit with co-ordinating washi tape.
To be extra-resourceful, I then trimmed each full page from the inside and then scored them to make co-ordinating envelopes.
They’re just waiting to be signed and addressed before they can start winging cheerful geekiness all over the place.
Thanks for looking…and remember, always check your punctuation! 🙂
I’ve gotten myself hooked up with a few different snail-mail groups over the last several years. Who doesn’t like getting a bit of mail that’s not a bill or a solicitation for money? I wanted to make a few notecards to send out in anticipation of Easter, but I’m not the single most artistic person out there (read: I can’t draw or paint).
Last year, when I was still essentially scared of playing around with the Silhouette Cameo cutting machine, I had downloaded a file of three bunnies shaped like…well, like those marshmallow candies that are everywhere at this time of year, and with the wording “Hanging With My Peeps”. My friend and I cut out a few repeats of the pattern out of heat-transfer vinyl and made tea towels. I thought about using the file again, but didn’t want to mess around with getting the lettering on straight. Mind you, the bunnies were cute on their own…
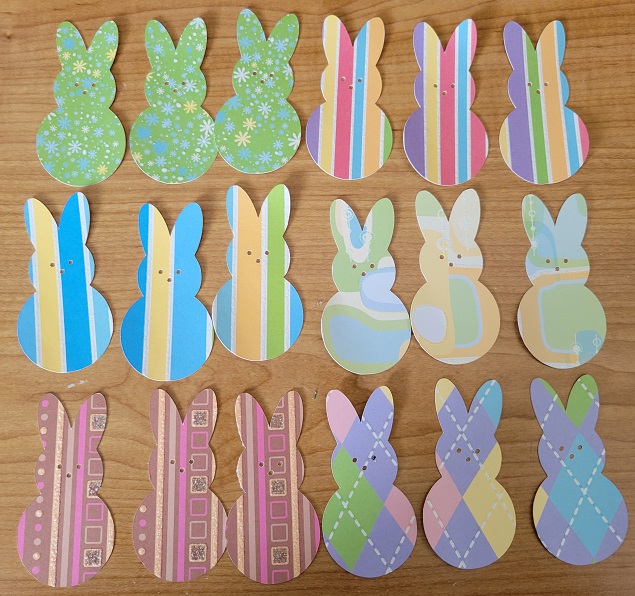
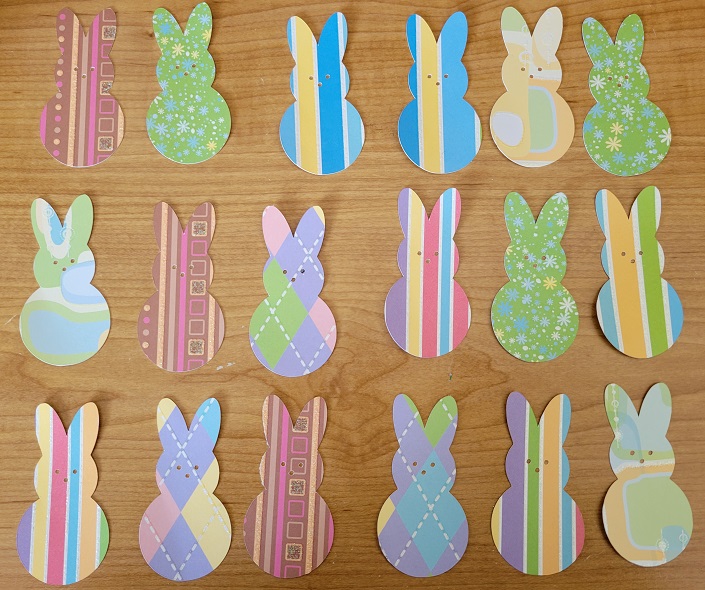
I wound up cutting out six sets of the three bunnies. When I resized the file so that they’d fit on the blank notecards I bought, I discovered they’d fit perfectly on sheets of this glittery cardstock I’ve had for probably the last 15 years. I bought it because it was sparkly and pretty, and then had no idea what to do with it. Also, that much pattern can be a bit much in one big chunk, but in smaller shapes? It works!
Once they were all cut out, I took the plunge and started shuffling them around to see how any three given patterns looked side-by-side-by-side. I have a hard time with being random, and this takes every ounce of self-uncontrol that I have in me.
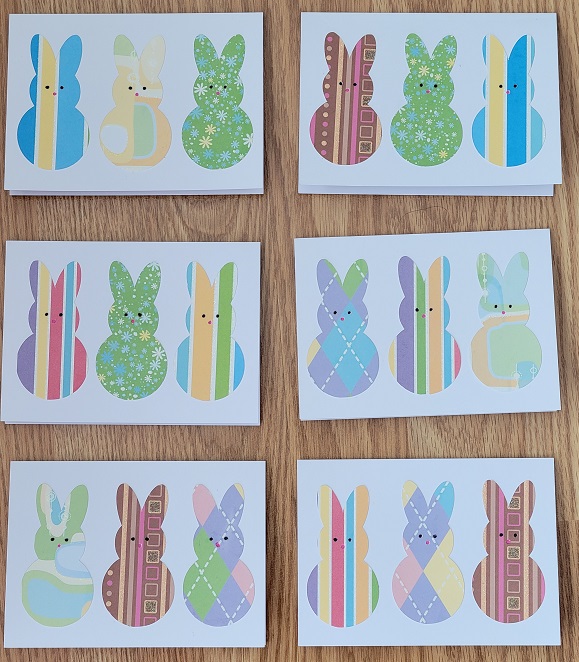
Once I was satisfied with my groupings, I glued them down on my card blanks:
I elected to colour in their eyes and noses just to give them a bit of definition.
And there we have it: quick, simple Easter cards!
I did use a cutting machine for my bunnies, but I think this could be achieved with a bit of patient tracing and cutting with scissors…although if I were doing that I’d probably not bother trying to neatly cut eyes and noses. I used a plain UHU glue stick to affix them, nothing fancy. And they were a great way to use up smallish pieces of paper that might not have gotten used otherwise.
…my true love gave to me: a card to spread greetings merry!
When my friend and I first made our foray into the world of cutting machines last year, we didn’t realize their full potential. I made a couple of Schitts Creek-themed masks using heat transfer vinyl (HTV), and we experimented with HTV on tea towels, but…how many vinyl-ed tea towels or whimsical pop culture masks does anyone really need? As such, the Silhouette sat largely untouched until I discovered that by upgrading my software to a paid (ahem!) version, I could open and cut SVG files rather than importing only PNG or Silhouette-formatted ones.
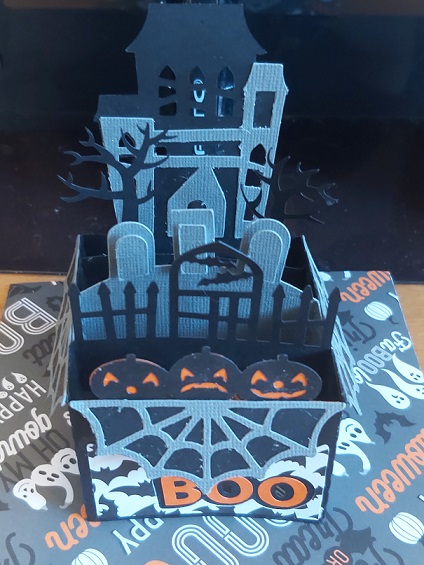
After making the haunted house box card and pumpkin banner for the Halloween Spooktacular Swap, I was feeling good about my paper-crafting abilities and scanned SVGcuts.com for something cute and Christmassy. I wasn’t disappointed.
I liked the elegance and (relative) simplicity of the Rooftops Box Card, and decided it was perfect to send to my aunt and uncle.
It creates such a neat effect with just four shades of cardstock.
A better angle to show the dimension (I used 3D foam squares to affix Santa’s sleigh):
And just for good measure, a close-up of the glittery snow I added before assembling:
There may or may not have been glitter all over everything, including my pants, by the time I was done.
I also decided to try my hand at North Pole Rudolph. This one was part of a larger set, and didn’t have an instructional video so I was left studying the product image carefully and trying to make mine look like hers. I think (?) I succeeded.
More glitter on this one, too, but what’s Christmas without at least a little bit of glitter? The designer had used a red adhesive gem for his nose, but I had mini pompoms, so that’s what I used. I hope it stays on until it arrives at its destination!
It’s a little hard to tell from the picture above, but this is a tri-fold card:
(The colours are truer in the first shot, but this proves that it can actually stand up.)
It just dawned on me that I didn’t take pictures of the back of either card, but be it known that I stamped a festive message on each one. They went out in the mail yesterday, so should be ready to spread good cheer in just a matter of days.
After what felt like a lifetime away from swapping (it was, gentle reader, a little more than a year), I signed up for the Halloween Spooktacular Swap on Lettucecraft at the very last possible moment to turn their five-some into a sextet. My partner described her style in her questionnaire as vintage with a touch of gothic. The original parameters of the swap were for either one medium or two small items, but we agreed that an extra crafted item would be fine, too. With these guidelines, I pulled together a perfectly vintage-y, slightly goth-y Halloween package.
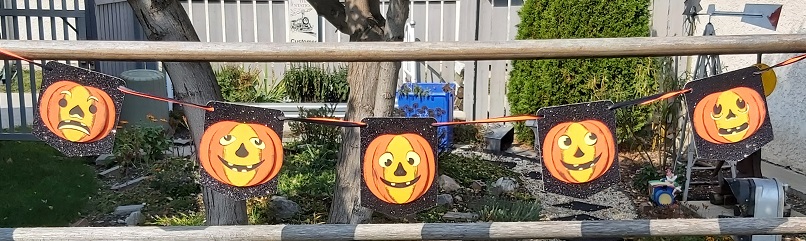
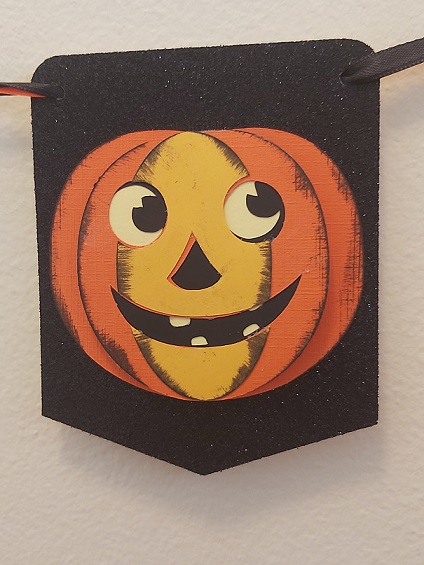
The very first thing I decided on was this vintage-inspired banner.
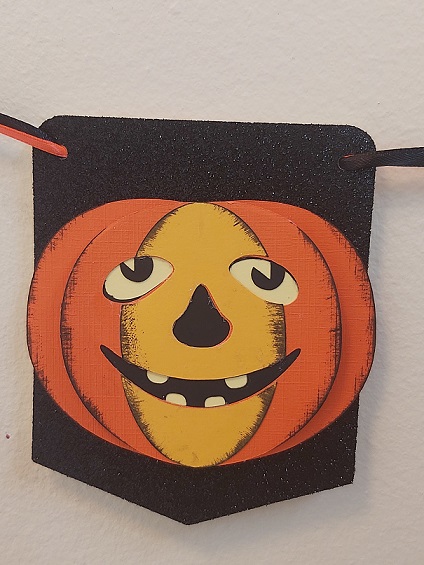
I cut out the pieces using my Silhouette machine, “aged” the pumpkins a bit, and then glued the works together. To add a bit of dimension, I used adhesive foam squares in between the pumpkins’ layers to make them pop.
A few close-ups:
One of her favourite Halloween themes listed on her questionnaire was “Sleepy Hollow”. Etsy came through for me, and offered up the perfect little pattern designed to fit a 4″ hoop.
But what to do for an extra crafty item? Maybe something like…
…run with her love of old-school movie monsters and alter an Altoids tin into a spooky tea bag tin (individually wrapped, of course, because we all know not to eat open Halloween treats).
It would have been weird to send a package without a note or card or something, right?
The haunted house card (and the banner!) came from SVG Cuts. This was the second time I’ve put one of their box cards together, and it was deceptively simple to make.
I added in some candy (of course) and a few little Halloween-y extras just for fun, and voila – Halloween in a box.
I have a confession: I knew this blog turned the big 1-3 this year (how am I the parent of a teenager, however digital?), but got myself confused about the actual date, and thought for one brief, shining moment that this was its champagne birthday. It was not. For anyone hoping to witness that milestone, you’re stuck with me for another eight years.
As soon as I realized my error, I scrapped my foolish plan of turning on the oven in the ridiculously oppressive prairie heat just to make some sort of elaborate birthday cake. Instead, I thought I’d share some of the irreverent fun (“Not that much fun.” – Ed.) that I try to bring to the proverbial table.
For the uninitiated, a “mondegreen” is a misheard lyric. For example, the title of this post: Johnny Nash actually sang that he could see clearly now because the rain [was] gone. With my love for wordplay, it’s probably not surprising that I find these misinterpretations amusing, and have been known to deliberately sing the wrong words to songs even when I know better.
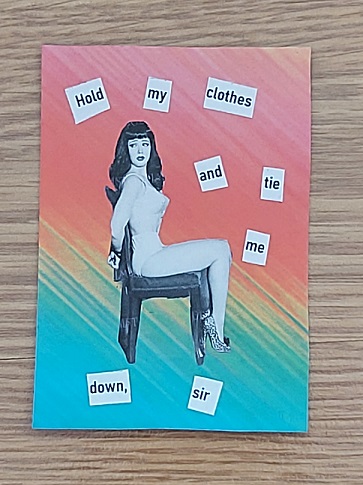
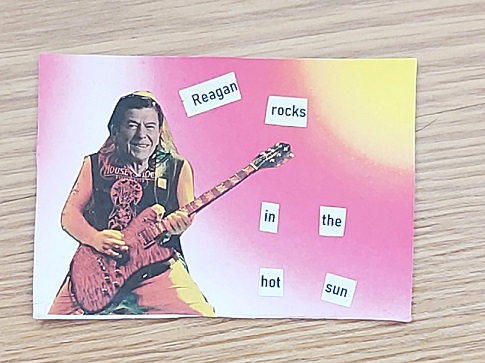
Although I’m not really a crafts-with-paper type, I had had the idea to create a series of Artist Trading Cards featuring various mondegreens, and I finally made it happen. I started by cutting cardstock into 2.5″ x 3.5″ pieces, then used some origami paper cut to size for my backgrounds. After that, I just had to type out my lyrics and find appropriate images. Because I wanted whoever wound up receiving these to know just what the heck I was getting at, I also wrote the correct lyric (plus title/artist) on the back of each card.
“You know how bad girls get.” – The Police, Don’t Stand So Close to Me“Hold me closer, tiny dancer.” – Elton John, Tiny Dancer“‘Scuse me while I kiss the sky.” – Jimi Hendrix, Purple Haze“Breaking rocks in the hot sun.” – The Bobby Fuller Four, I Fought the Law“Sont des mots qui vont très bien ensemble, très bien ensemble.” – The Beatles, Michelle
There we have it: art (or “art”) for art’s sake. I had no real plan for these, but I’ve sent a couple of them off to crafty pals who hopefully enjoy a side of pop culture with their papercraft.
Thanks for looking – and for sticking with me the last 13 years! 🙂
…my true love gave to me: a calendar to count down daily.
The saga of this advent calendar started almost a year ago. A few days after Christmas – not Boxing Day; I’m not insane – Mr. Gummi Bear and I hit the streets to check out a few stores. He wanted to look for some jeans, and after a fruitless search for a pair that fit properly, and a life-regenerating coffee at a Starbucks that was tucked away in an out-of-the-way Sobeys, we found ourselves in a scrapbooking store. I was looking for some stickers to send a swap partner, and thought they might have a bigger selection than Michaels.
Near the front of the store, they had a table of Christmassy supplies marked down by 50%, and even though I’m not a papercrafter per se, I wandered over to see what they had. The advent calendar kit jumped out at me. It comes with everything! And it’s half-off! “I’ve got a whole year to put this together!” I crowed, tossing it in my basket. It was going to become a much-loved heirloom, I could feel it in my bones.
Shortly after it arrived home, it got set aside and forgotten about until early November.
When the latest restrictions on gatherings came into effect, and it became apparent that our weekend carousing (read: getting takeout and watching Netflix at his place) was going to be stymied, I thought this might be a fun way to keep a piece of me around (sort of) as December wore on.
It really did come with everything. All of the little pieces for the pockets were cut out and pre-scored for folding, and (bonus!) even came packaged in the right order so I wouldn’t have to sort them out later.
The kit didn’t include instructions for what to do with the tags, so I opted for the corny, bad Dad-joke route.
The most tedious part, probably, was cutting 6″ lengths of baker’s twine for each of the 25 tags. If you look really closely, you can see the “25” not looking super-firmly attached to the pocket – I don’t know what kind of adhesive their stickers had, but it wasn’t great, and I wound up touching up a few with my gluestick to make sure they would hold.
All laid out and ready to be packaged up and given to the lucky recipient.
There was about 11.5 feet of baker’s twine left over once all the tags were tied, and I left it all as one length so he could decide for himself whether he wanted one long row of pockets, or a 12-13 split, or 5 rows of 5, whatever he wanted.
He opted for a single length, and even found some complimentary cutouts of Christmas lights to add to the ambience.
OK, so it might not become one for the generations, but it’s (almost) a way to be together apart, and a fun way to start the holiday season.