A couple of years ago, one of my mom’s friends from out of town came by with a box full of produce from her garden and homemade preserves. It was then that I encountered groundcherries for the first time, but of more immediate interest was the jar of peach-pepper jam.
“Is it spicy?” my mom asked, not unreasonably.
“Oh, no. If I can eat it, it’s not spicy.” She explained that she likes to spread a thin layer of cream cheese on a cracker (or several) followed by a smear of the jam, and the cream cheese helps dull any spice. Not the healthiest snack, surely, but she was right: it was delicious like that.
Fast-forward a couple of years, and my Baking Buddy and I were spitballing ideas for homemade Christmas gifts (yes, it’s September and I used the C-word), when I remembered the jam. He thought it sounded like a good idea, and that’s how we came to spend a Saturday morning slicing and dicing the produce we had carefully selected a few days prior.
We used this recipe, which I had confirmed was the one from whence sprang the jar that showed up a few years prior. My previous experience had been limited to freezer jam and not honest-to-goodness cooked and sealed stuff, so I was looking forward to practicing a new skill, too.
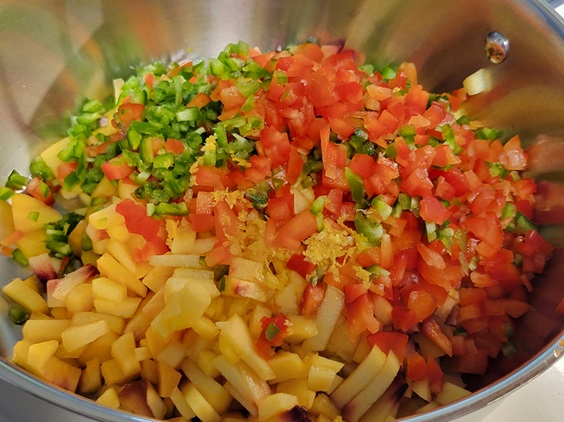
It made me think of peach salsa, albeit a deconstructed version, when we first added all our ingredients to the pot. There’s something so appealing about the vivid colours of the produce.
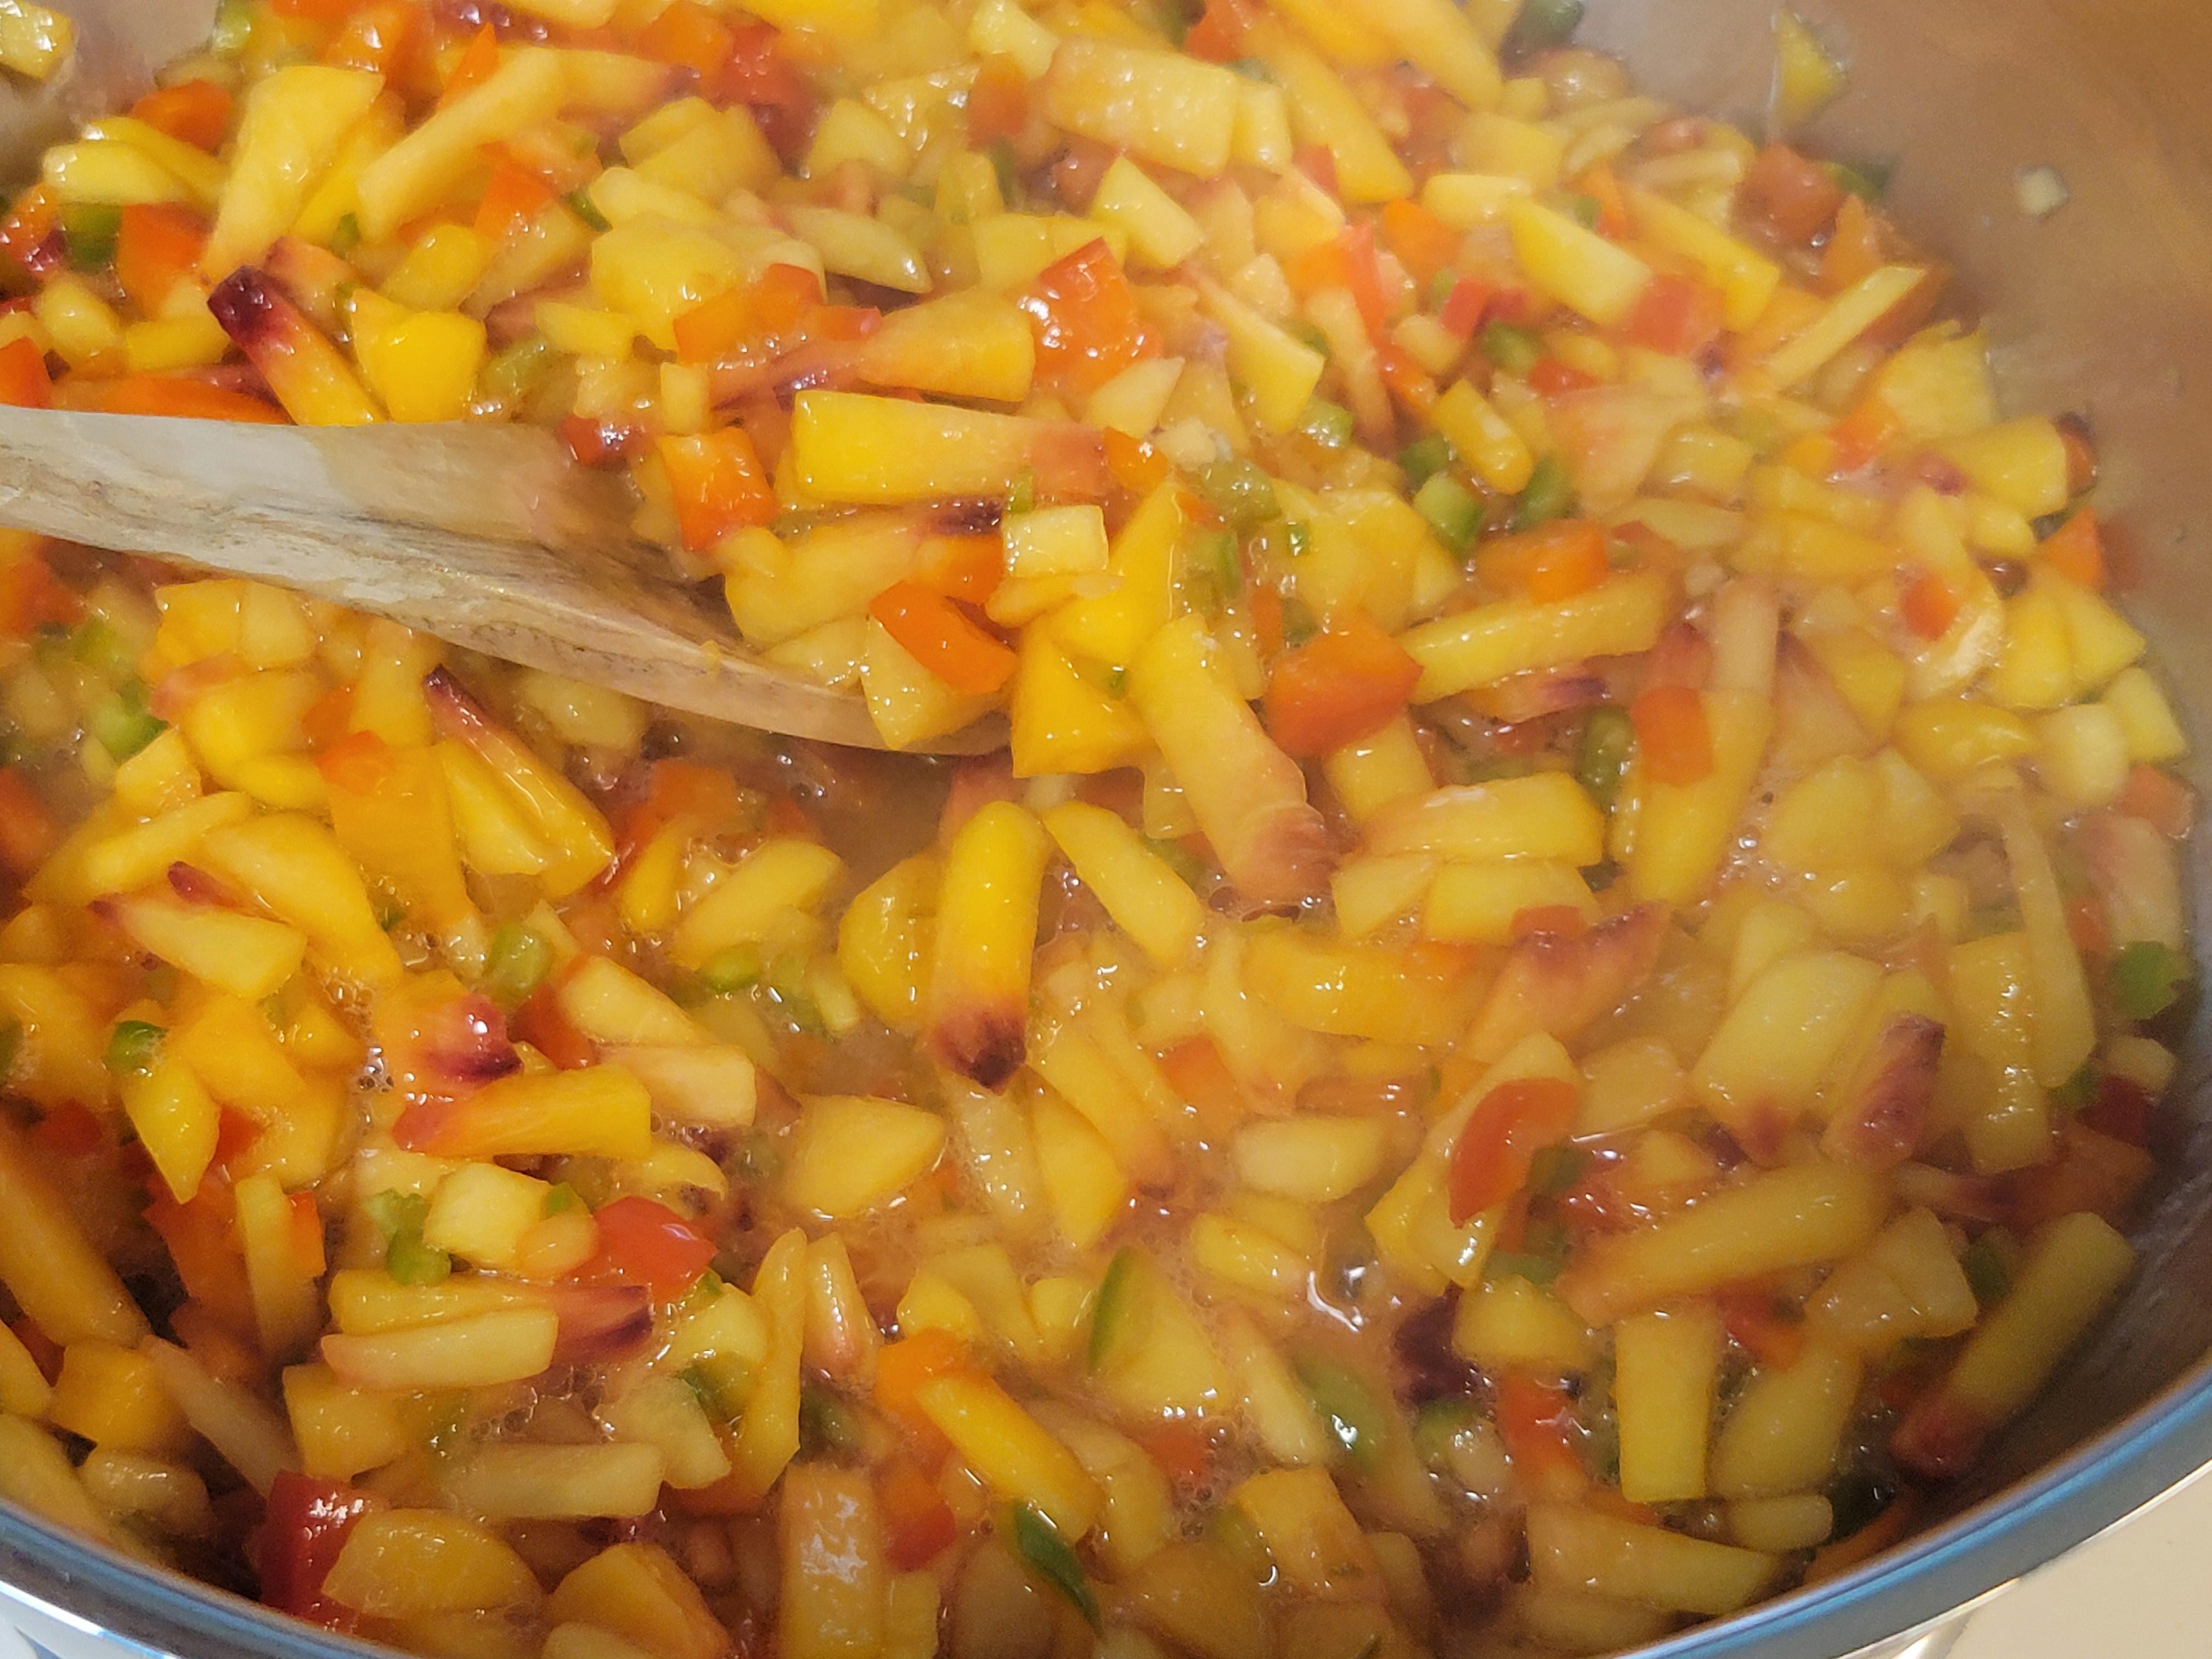
Before long, though, it started to get saucy.
Full steam ahead! This was actually a welcome relief, because when we first started out we were concerned there wouldn’t be any liquid to gel. The peaches were pretty firm and not really juicy, and the peppers didn’t seem to offer a lot of moisture, but by the time we got to this stage I was glad we didn’t try to “help it along” with any added water.
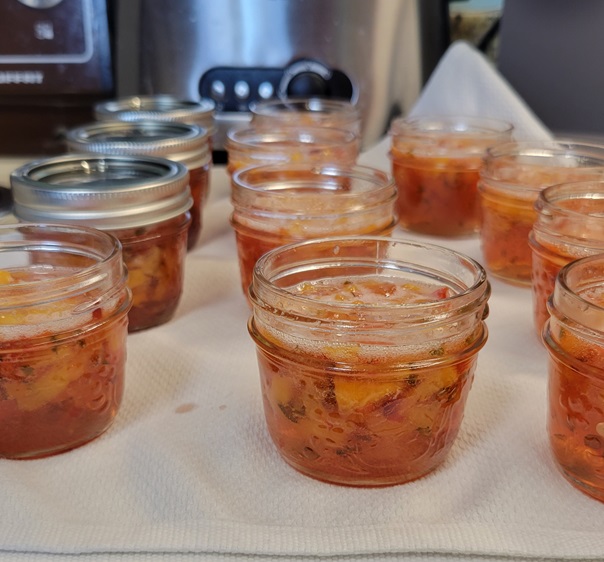
Aren’t those little 125 ml jars the cutest? They’re going to be perfect for tucking into a gift bag.
The beautiful pink-ish colour is just a bonus. I was expecting yellowy-peachy, but this is so pretty!
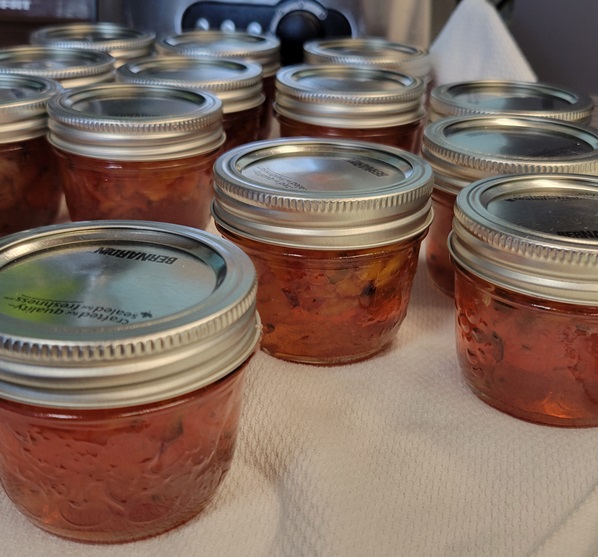
Our finished product had a bit more kick than the jar I had been gifted, making me think the recipe had been tweaked somewhat to include a bit more peach or a bit less pepper – but this is by no means unbearably spicy. We cracked open a jar to try it, and it’s got a sweet-hot zip that should be a hit.
In a fit of fey inspiration (largely fuelled by wanting an excuse to buy some of the neon yarn I’d been seeing at Michaels, because really, where else am I going to use acrylic neon yarn?), I crocheted a cat-sized party hat.
I found the pattern on Etsy and wound up using a too-large crochet hook and too-thick yarn, and so left a few rounds off the bottom before it turned into a hat for a medium-sized dog. Even with that, it was a little on the large side; luckily, by reshaping the base into a bit of an oval, it would sit further back on the cat’s head and not look quite as ridiculously oversized.
When I was a kid, I thought I wanted to go to camp. I suspect this is because one or two of my classmates did, and it sounded like the height of summer fun. Did the reality of sleeping in a cabin with seven randos, sharing communal bathrooms, and not having my bed or cat or toys/books/stuff occur to me? It did not, and so it’s probably better for all involved that my parents tuned out this particular passing fancy of mine. I don’t go outside…or swim…or enjoy sports…really, this would have been a terrible idea, and popular culture backs me up.
Hail, Hail Camp Timberwood by Ellen Conford – Melanie gets bullied by a cabinmate and her horse tries to drown her. (I’m really showing my bias here: horses terrify me, and in her place, if the drowning didn’t get me the absolute cardiac arrest would have.)
I Want to Go Home by Gordon Korman – Rudy can’t escape Camp Algonkian to save his life, but because I’m not experiencing it personally, I can laugh at it. Please read this one if you get the chance.
“Kamp Krusty”, S4 ep1 of The Simpsons – Bart and Lisa get sent to the eponymous camp where they’re fed gruel and forced to make wallets for export. This is made up for (maybe?) by a trip to Tijuana; maybe it was easier to sneak across the border with a busload of kids who probably didn’t have passports on them in 1992.
Lolita by Vladimir Nabokov – Dolores is sent to camp, from which she is retrieved by her newly-minted pedo of a stepfather who kidnaps her and keeps her isolated from everyone and everything.
To summarize: very happy, in hindsight, to not have gone to camp. Who needs the colour wars, the singalongs, or…the s’mores. Sigh. The s’mores.
My baking buddy and I decided we could definitely do this ourselves, no campfire or mosquitoes necessary.
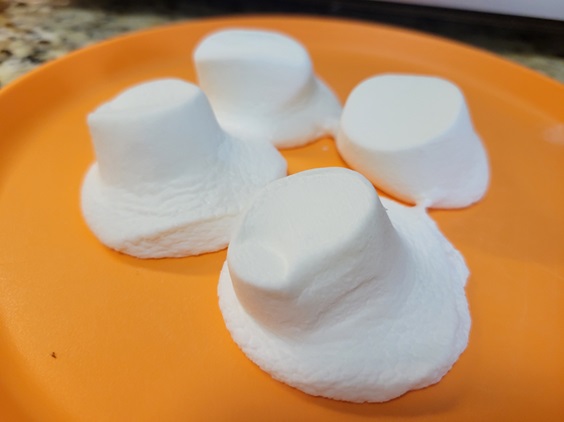
We started out with marshmallows and chocolate-dipped cookies, figuring they’d be easier to deal with than graham crackers and a chunk of chocolate. Also, the box itself exhorts their suitability for s’mores, so who were we to question that? We found a kitchen torch on sale to get that toasty outside crust on the marshmallows.
We weren’t sure how long it would take to toast them using the torch, or if they’d get soft enough on the inside, or if we’d use all our butane, so we hastened the process by microwaving them for a few seconds first, just to soften them up a bit.
We speared two at a time on a regular fork and had at ‘er with the torch. They toasted up fairly quickly (making me think we were right to pre-soften them) and absolutely caught on fire more than once.
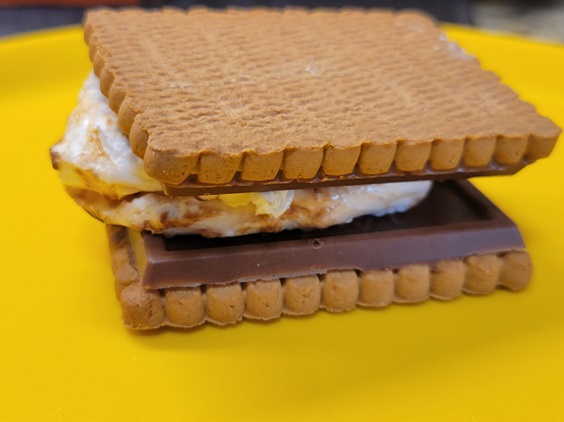
It was a bit of a trick to get them off the fork – once the flame was turned off, they congealed pretty quickly – but two marshmallows made the perfect fluffy layer between our cookies. Unfortunately, because they had cooled a bit, they didn’t melt the chocolate so well…
…until we stuck the assembled s’mores back in the microwave for a few more seconds to soften everything up.
These were a great, no-bake summer dessert. And with most of a bag of marshmallows and a whole bunch of butane left, I think we’ll be making these again. Who needs to sleep on a cot just to get them?
I have mixed feelings about reusable shopping bags. On the one hand, I appreciate the sustainability factor and the waste reduction, especially when some of the last plastic carrier bags provided in stores tended to rip if you even looked at them funny, rendering them unusable after the first five minutes. On the other hand, I still don’t always remember to bring a reusable bag with me, and wind up purchasing a new one which as often as not gets used as a Goodwill donation bag as soon as I get it home. (Especially those weird, crinkly, plasticky ones…) It also irks me a bit that I’m having to pay for the privilege of advertising for the store.
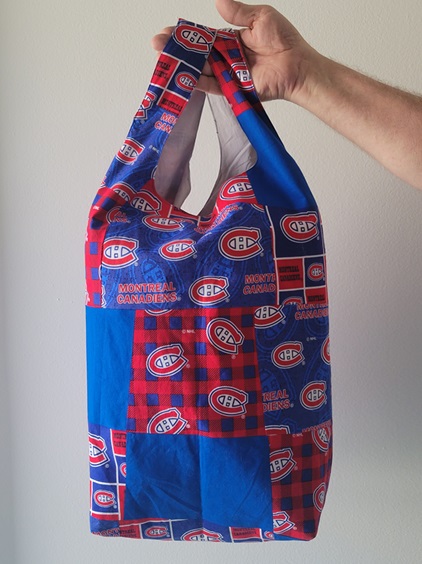
I’ve talked before about poochie bags, which are great for those little drugstore runs for deodorant and toothpaste, but what about bigger shopping trips? Enter the Vanessa market bag from I Think Sew.
I found the pattern really easy to follow, and quick to sew – especially once I had my first one under my belt. They’re the approximate size and shape of a “traditional” plastic shopping bag, which I find oddly comforting.
Each bag needs just a hair less than 2 metres of fabric – one for the outside, and one for the lining. For the lining, I like to purchase a king-size flat sheet: it really won’t show so the pattern or colour isn’t super-important, the fabric is typically sturdy, and it’s cheaper than buying a similarly sized cut at the fabric store.
The pattern also includes a patchwork variation which is fat quarter-friendly and not that much more difficult to make, if a little more time-consuming. I had bought so many fun prints when I was sewing masks and this is a great way to mix and match a few.
I’ve given a couple of these away as gifts, and am told they always get commented on at the store.
A little while back, I had wanted to make a dozen vanilla cupcakes. If you’ve been with me for any length of time, you’ll probably know that I have yet to find a really lovely, moist, not-too-dense vanilla cupcake recipe. So it was with only a minimum of guilt that I reached for a cake mix – and because one mix makes 24 cupcakes (or 22, according to the box), I carefully divided the dry mix in two and saved half for another time. Fast-forward to me being sick of making sure I don’t stash my baggie of cake mix too far into the recesses of the pantry, and also don’t lose the instructions I cut off the box to save. It was time to do something with this.
When my baking buddy and I used to work together, we had a birthday club at work. The one year I was in it, I asked him what kind of birthday cake he wanted, and he replied, “Boston cream pie.” I think that was the first time I had ever baked something just for him…who knew it was just the start? I also hadn’t made Boston cream pie cupcakes since then, so it was time for a hit of nostalgia.
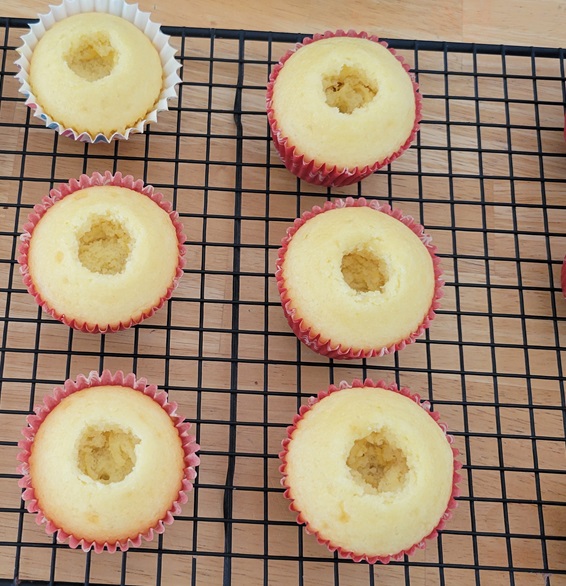
I started by baking my cupcakes more or less according to package directions. A full mix calls for three eggs, and I was fresh out of half-eggs so I used two. (Gasp!) There might be something to that promised yield of 22 cupcakes instead of 24, because as I was filling up my last few liners I was really scraping the bottom of the bowl.
Once they had cooled, I grabbed my trusty cupcake corer and put it to good use. The best part about this is that I got to set the cores aside in a little bowl, to be topped with the leftover filling and topping and consumed as a guilt-free snack later because calories don’t count when they’re bite-sized. (Right?)
It was time for the filling. The first time I made these way back when, I had tried making a pastry crème from one of my vegan cookbooks, and it was an abysmal failure. Maybe trying it again until I got it right would have helped, but I didn’t have time for that, and found a shortcut on that wonderful trove that is the internet. It seems that… [looks around for eavesdroppers and whispers hastily] vanilla instant pudding, made with half the milk called for on the box, sets up with just the right consistency to fill cakes and/or cupcakes. And a four serving-size box prepared thusly will provide enough pudding for a dozen cupcakes, plus a bit extra for all those cores I saved.
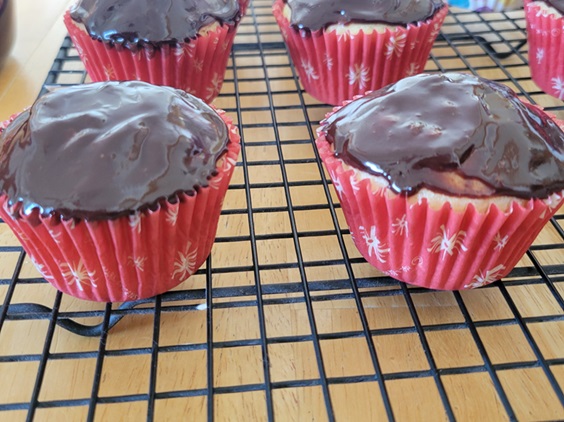
The final step was adding ganache to the top. I’ve seen recipes for Boston cream pie cupcakes that use a chocolate buttercream and I admit those fluffy swirls are pretty, but the classic simplicity of the ganache is all these treats really need.
(Bonus: this was a great way to use up some snowflake cupcake liners left over from Christmas.)
A brief chill-out in the fridge helped the chocolate set admirably. When I unveiled these with a flourish to my baking buddy, the first thing he said was, “Hey, remember when you made these for me at work?” Nostalgia is a powerful force!
My friend Ricky recently had a birthday, and I wasn’t going to let the little matter of a couple thousand kilometres keep me from celebrating him in style. I got it in my head that I needed to do a “birthday in a box”-type package for him. In rapid succession, I decided on: an actual gift (Lego-adjacent building block set), a banner, a “I’m the Birthday Boy” badge that would likely have gotten him beaten up in school, a singing candle, and…cake? I make a mean cupcake, but I didn’t think they’d travel especially well via Canada Post. I looked at mug cake mixes at the grocery store, but just about dropped the box when I made the mistake of reading the nutrition information. (Cake will never be health food, but for 400 calories and 50 grams of sugar, reconstituted and microwaved “cake” just isn’t worth it.) I did find a homemade cake-in-a-can tutorial on Pinterest that, although I applaud its creativity in having layers of cake and icing sandwiched securely in a repurposed tin can, looked frankly kind of gross. Maybe if I couldn’t reasonably make him dessert, I could buy him dessert instead.
Armed with that somewhat heartening thought, I bought a Dairy Queen gift card to tuck in the box. Only…we all knew I couldn’t just toss the card in on its own, right? In looking through my Downloads folder, I found a sprinkle patterned digital paper I bought ages ago off of Etsy, and everything fell into place.
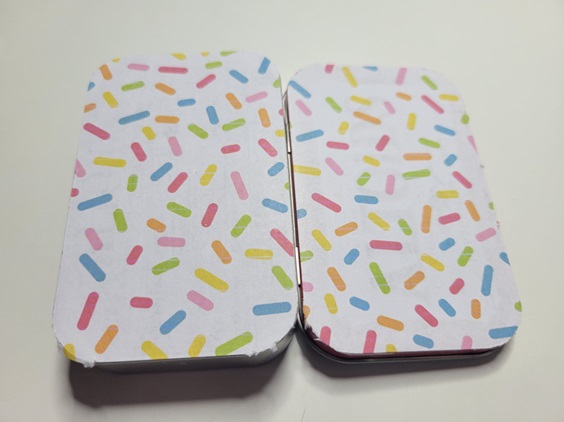
I’ve used this tutorial for altered Altoid tins before, and it’s delightful. The step by step pictures are a fantastic help, even for someone who doesn’t consider herself a papercrafter and gluer (like me).
I started out by covering the outside and inside surfaces with the paper, and then (not pictured) covered the edges. I learned in kindergarten that cutting in a straight line eludes me, so I used my Silhouette to cut perfectly straight pieces exactly the width of the various edges I had to cover.
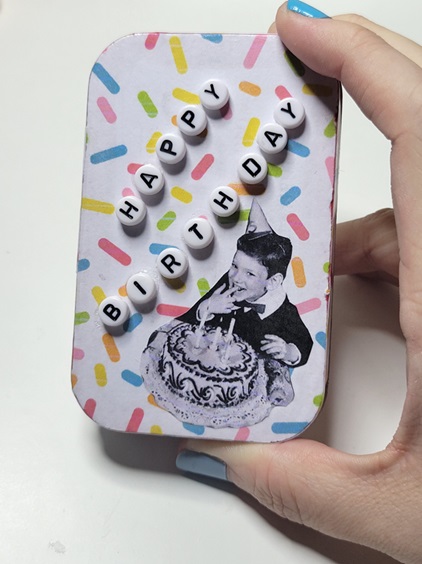
Next, I had to figure out what kind of decoration I wanted to add to it. I’m a fan of vintage kitsch (shocking, I know), and after a search-engine rabbit hole of results for “retro birthday party”, I found a couple of images I liked. I resized them to the width(ish) of the tin and printed them out, then cut out the section I wanted by hand. I also used a typewriter-inspired font to spell out a few well-wishes (although I only used one in the end). I couldn’t resist sneaking a quote from National Lampoon’s Animal House in there.
The front, on the other hand, required the big guns be brought out (brought in?).
Just laying out slips of paper saying Happy Birthday didn’t quite give it enough oomph. Luckily, I had bought some alphabet beads a year or so ago in a moment of inspiration.
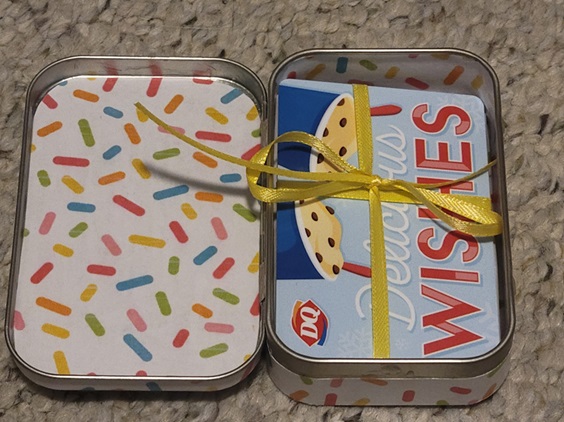
When the glue had dried, I was ready to add the gift card.
Besides being festive, the ribbon made it easier to pull out the gift card – experience is a great teacher sometimes.
The tin was the perfect size to tuck into a little open space at the end of the box, and the postal gods were on their game because it made it to him in time for his big day.
Around Valentine’s Day, my Baking Buddy and I decided to re-watch the To All the Boys trilogy on Netflix. (Was this my idea? Yes. But was he into it? Also yes.) We were partway through the first one when I realized, with a funny pang, that no matter how cute the two leads might be, the book was so much better. The book is always better than its filmic adaptation. And naturally, that (re)discovery meant that I needed to (re)read the books, stat.
One thing they do show in the movies in a mostly faithful adaptation of the novels is Lara Jean’s baking. There’s something so relaxing about watching her very neatly go through the process of making, say, cherry turnovers or frosting a batch of cupcakes perfectly. In the third book, Always and Forever, Lara Jean, she’s on a quest to bake the perfect chocolate chip cookie.
(Can I just say here that that book stresses me the heck out? First of all, it’s the final book in the series, so there’s the anticipation of “goodbye” which is inherently a little stressful in itself. Then, there’s the agony of waiting for university acceptances to be announced, and I am so glad that social media wasn’t a thing when I was waiting. There’s the fact that she doesn’t get in to her first choice school and the idea that her happily-ever-after might be derailed because of it. Her friends ambush her with a surprise birthday party, and her dad ambushes her with a trip to Korea without even asking if she wanted to go or had other plans for the summer. Oh, yeah, and her boyfriend’s mother is a manipulative cow. Ugh.)
When she’s not being pressured five ways from Sunday, she’s baking batch after batch of chocolate chip cookies, and encounters Jacques Torres’ take on it during a trip to New York. I was pleasantly surprised to see that his recipe is readily available online, and decided I had to try it. These are supposedly the ne plus ultra of cookies, and perhaps that’s why the recipe thinks it can get away with its extreme fussiness. In no particular order:
It uses two kinds of flour: cake flour and bread flour. For some of us, this means a trip to the grocery store for five-pound bags only to use ~2 cups of each. What happened to all-purpose flour?
The dough must be made 24 – 72 hours in advance, and allowed to rest in the fridge before baking. While I have made dough the night before in the past just to expedite the baking process the next day, there’s a big difference between deciding to do it as a gift to your future self and being told you have to do it, thereby necessitating even more planning. (Hope you’ve got the flours!)
It calls for chocolate discs instead of chocolate chips, and then (annoyingly) provides a weight rather than a volume measurement. Luckily I found some lovely dark chocolate discs at Bulk Barn; less luckily, a modestly sized bag of them cost $15. I will admit that they were good, though – I don’t even like dark chocolate, but couldn’t tell that’s what these were.
A petty complaint, but, per the last step in the recipe: “Best eaten warm.” Do they think I’m baking for a party, here?
Step 3 of the recipe urges us not to overmix, but to mix only until the dry ingredients are incorporated, 5 to 10 seconds. My guess is that they don’t want to overdevelop the gluten (then why use bread flour, seriously?), but that is not enough time to work four cups of flour in.
Despite the misgivings brought on by the above, I gamely bought my ingredients and planned ahead so it had about 40 hours of resting time before baking, which is pretty good, I thought.
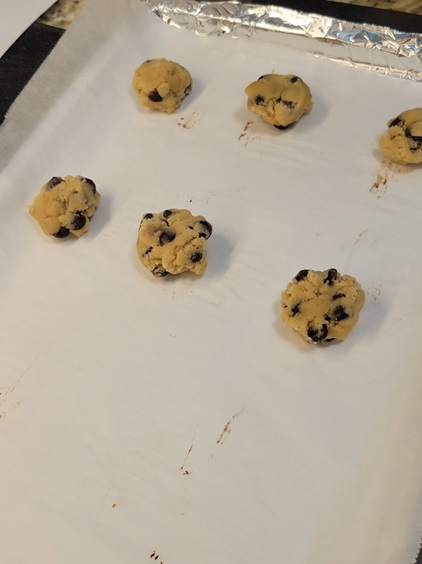
We tried to use a cookie scoop for maximum uniformity but the dough was so stiff from its time in the fridge that we quickly dispensed with that and grabbed two spoons instead.
They still wound up uniform-ish.
The recipe advises pushing in any discs that stick out of the dough for a better aesthetic once baked. Does it sound silly? Yes, but we dutifully did it anyway.
I was surprised by how much these spread, considering how long the dough had been chilled and that it didn’t really get a chance to warm up that much – I guess that’s what using butter will do for you.
We didn’t use flaked salt as recommended, but sprinkled a few grains of kosher salt on top to contrast against the sweetness of the cookie.
Overall? These weren’t bad, but I don’t know that they were worth the hassle, either. They were a perfectly OK cookie, but the flours, chilling, and pricey chocolate didn’t necessarily elevate them to superstar status. One interesting thing the discs did is melt and streak throughout the cookie, giving the inside a really neat appearance. And just like the recipe says, they truly do taste better warm. My test audience liked these well enough, so these may be a “sometimes” bake. (Or perhaps a more frequent bake until I use up the rest of the special flours I bought.)
Have you ever had one of those days when you wanted to bake something for the special people in your life, but also didn’t want to spend all day messing around with rolling and cutting dough, decorating to the nines, and all that other stuff?
Relax, because I’ve got you.
In the lead-up to Valentine’s Day, I saw (and Pinned!) all manner of cutesy cookies and other sweet treats, a fair number of which were heart-shaped and bedecked with red and pink sprinkles and/or frosting. They were cute, but the prospect of having to actually find the time to make them was a daunting one. Eventually, it hit me: why not make something I already know is quick and tasty, but dress it up? A few weeks back, the newspaper had run an article in its Arts & Life section about how to add a swirl to brownies, and that sounded like a darned good idea.
I started with Quick and Easy Brownies (because they are quick and easy!), but you could use your favourite recipe.
They’re not naturally lumpy; I stirred in half a bag of semi-sweet chips and chunks (about 1 cup, give or take) for a little extra chocolatey goodness.
If the title of this post hasn’t completely given it away, I decided to try a peanut butter swirl. I spooned about half a cup of peanut butter – this is a visual estimate only – into a standard zip-top bag, snipped one corner, and went to town.
A quick word on this: I found it really hard to squeeze the peanut butter out! I have no idea if melting the peanut butter first or even just having held the filled bag in my hot little hands for a minute or two would have helped. Because of this, the peanut butter was a bit hard to control and didn’t always pipe on where I wanted it to. Notice the nearly-naked perimeter that goes 3/4 of the way around.
Next, the fun part! Take a butter knife or other implement of mass swirling, and start dragging it through the peanut butter.
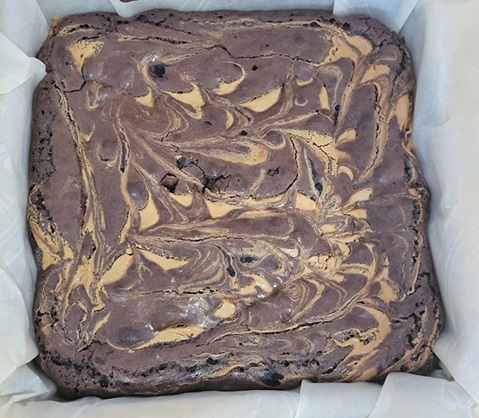
Every single tip I read about this cautions against over-swirling. You still want some contrast between the base and the swirl, and don’t want it to all homogenize into one chocolateandpeanutbutter layer on top. I might have swirled more than necessary, but I was also trying to work my peanut butter into all those missed edges and corners. Overall, I think I managed it. Once I was satisfied, I baked as usual.
Apparently I gave the pan a quarter-turn clockwise when I took it out of the oven! But look at how nicely that swirl stayed in place. I half-expected it to sink to the bottom during baking, and the fact that it stayed on top gives me an inflated sense of my own culinary genius.
The only thing I would have done differently is to have cut the pieces larger. No pictures, but I did a 4 x 6 cut to get 24 pieces out of an 8″ square pan. They were the perfect size for popping into your mouth, but really didn’t show off the swirl to its best advantage. (They still tasted great, though!)
I’ve written in the past about trying to find a red velvet cupcake recipe that’s both tasty and fire-engine red (oh, and moist! But that’s a cousin of “tasty”). Since the last time I wrote about it, my red velvet escapades have primarily consisted of hitting up a local restaurant famous for its version and/or trying my recipe from Vegan Cupcakes Take Over the World with the addition of red velvet baking emulsion and red velvet cocoa from Bulk Barn. Somehow, the inclusion of these ingredients seemed to only make the finished product dryer than usual, so I quickly abandoned that. But hey, that’s OK – there’s always the restaurant cake.
And then, a special request for mini Baileys cheesecakes came my way. Cheesecakes, I can handle. When I nonchalantly found my way over to Life, Love, and Sugar to double-check the ingredients, whammo! There was a recipe for red velvet cupcakes staring me in the face. ”No harm in at least reading it through,” I thought, followed by, “Hey, this looks pretty straightforward.” At the very least, I had all of the ingredients in the house, and – bonus! – this would be a great way to use up the little bit of buttermilk left in the carton from a different recipe. I tried to temper my expectations, and got my supplies together.
There are only two teaspoons of cocoa in the whole recipe, and yet – and yet! – they still managed to have little cocoa-y clumps that I tried my darnedest to break down with my mixing spoon.
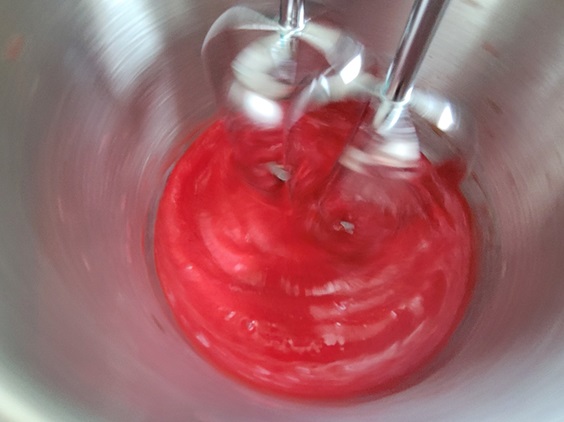
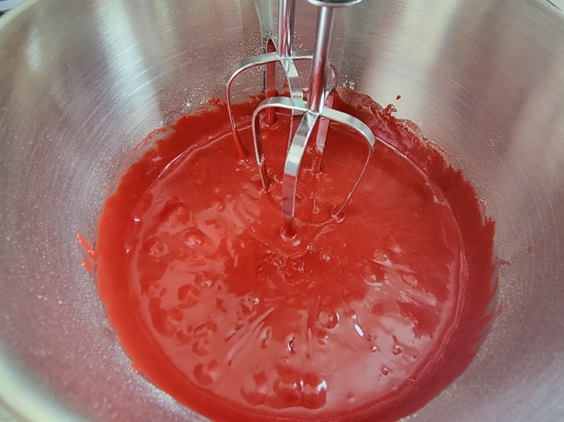
It got interesting in the wet ingredients. The recipe calls for two teaspoons of red food colouring. I found a powdered colour by LorAnn and tried it on a whim, thinking it might be more concentrated than a liquid colour. Dang, did it ever make my wet ingredients red!
The colour was muted only a hair when I added my wet ingredients into my dry. The method surprised me: normally, I’d add dry to wet, but I dutifully followed the instructions. The oddest part was after the two sets of ingredients are mixed, a half-cup of hot water gets slowly incorporated. It makes the batter incredibly thin, and I admit I was a bit skeptical at first.
The thin, thin batter made filling my cups a bit of a messy prospect, but they baked up like a charm and (bonus!) retained that nice red colour.
I cheated a bit and used a can of store-bought frosting, for a couple of reasons: 1) There had been a can kicking around the pantry from a bake a while ago that didn’t happen and I wanted to use it up instead of tossing it, and 2) I don’t have the clairvoyance required to have taken out cream cheese to start softening before I even realized I was going to bake, so a homemade cream cheese frosting was out. For the record, it wasn’t awful. It definitely tasted less sweet on the cupcakes than it did off the knife, and it served that all-important purpose of keeping the tops moist.
Look how red they stayed! That was one point for them, but how did they taste?
Like red velvet should, that’s how. These are moist (there’s that word again…) with a tender crumb and just the slightest hint of cocoa to compliment the notes of vanilla from the extract. The next time I make these, I’m pulling out all the stops and making a homemade frosting for them. A cream cheese frosting would really pop on these, although I’m also having thoughts of the cream cheese whipped cream topping I use for almost everything.
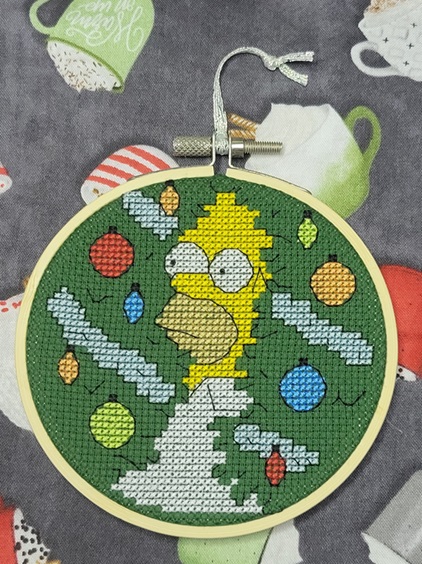
…my true love gave to me: a meme that comes straight from TV!
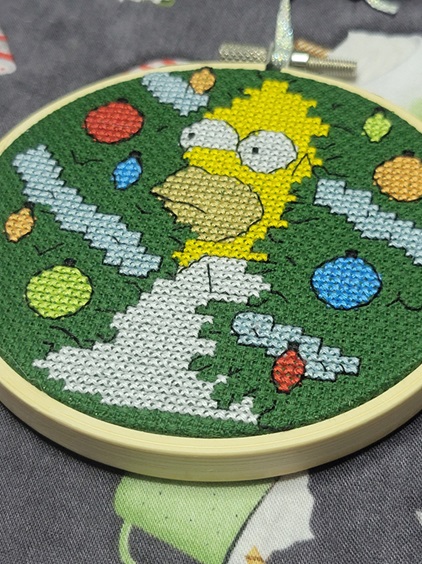
It was quite by accident that I found this pattern for a Christmas’d version of Homer Simpson moving silently through Ned Flanders’ hedge, but knew right away that I had to stitch it.
Luckily, my local needlework shop (always support your local needlework shop if you have a choice!) had the requisite Christmas green aida cloth, so I was able to get started on him right away.
He fits perfectly in a 4″ hoop!
The backstitch really creates the illusion of the hedge, and the two little French knots for his pupils are the finishing touch.