
(pattern by weelittlestitches)
Thanks for looking – happy Canada Day!
A compendium of homespun endeavours.
So here’s something you may or may not have known about me…
I love colour.
Colour, all of it, all the time. Seriously. I’ve never been able to pick just one favourite. I can admit that I’m not a fan of earth tones and that super-washed out pastels don’t do much for me, but everything else is fair game. The only thing better than bright colours is bright colours in a rainbow order, because I appreciate order and routine.
(Order and routine slightly outweigh colour, however. Don’t get me started on bookshelves arranged by colour rather than alphabetically/by author/by subject area.)
Since no books were misfiled, is it any surprise that when I saw this pattern on Etsy it called to me like a siren song? How could I not stitch something with twenty perfectly gradient shades?

One of my favourite things about cross-stitching is watching the design come alive (like Peter Frampton, but…not), stitch by stitch. Normally it happens so gradually that you don’t even notice it happening until you look at the design with fresh eyes and marvel that you can see the outlines developing, but it happens just the same.

It definitely harshes the stitching vibes to stop and take a picture after even the littlest bit of progress, but watching the heart form colour-by-colour is vaguely hypnotic.
As I stitched, I realized the rainbow heart reminded me of something. This song lived in my head rent-free while I worked:
If you haven’t seen A Mighty Wind, stop reading this right now and go watch it. Now.
I wanted something suitably punchy to display the finished piece in, so I painted a simple bamboo hoop from Michaels using acrylic paint pens in matchy-matchy colours.
Thanks for looking! 🙂
Maybe it’s a side effect of the pandemic, but I don’t bake as much as I used to. Sure, I’ll bake a batch of cupcakes or muffins sometimes, or my grandmother’s chocolate chip cookies, or mini cheesecakes if I’m feeling really ambitious, but…that’s the exception rather than the rule. Maybe it’s because I don’t have a huge sweet tooth, but these days I’d rather pick up a package of cookies from the grocery store if I’m craving something than be on my feet in the kitchen for ages.
But for one brief, shining moment I felt a flicker of my old self when I made the Triple Chocolate Hazelnut Brownie Pie from the Kitchen Magpie‘s book Flapper Pie and a Blue Prairie Sky for Mother’s Day.
What can I say? My mom likes chocolate – and has a way bigger sweet tooth than I do.
There are a lot of steps, but they aren’t difficult, and the end product looks way more impressive than the effort it actually took.
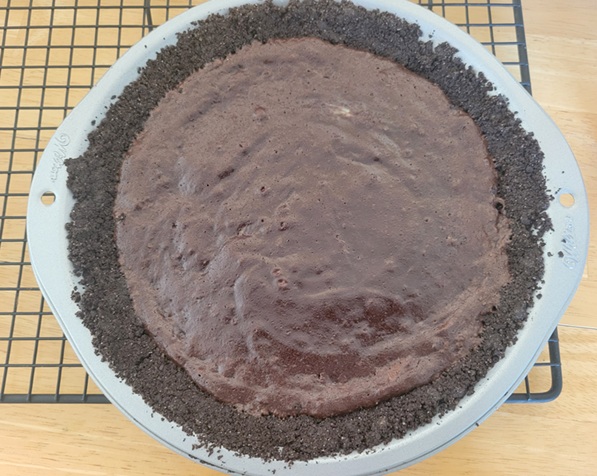
First, a chocolate crumb crust:

I know from this picture it looks level to the top of the pan, but I promise there’s a recess for filling. This pie pan has the weirdest-angled sides.
Next, a layer of brownie:
And then, while the brownie is still hot, some Nutella spread over the whole thing (or Kraft chocolate hazelnut spread, if that’s what’s available at your local grocery store).

See? I told you there was space in the middle.
One thing that really made this feel next-level for me? Toasting my own hazelnuts for the garnish. I’ve toasted coconut and sesame seeds (not at the same time), but this was a first for me.
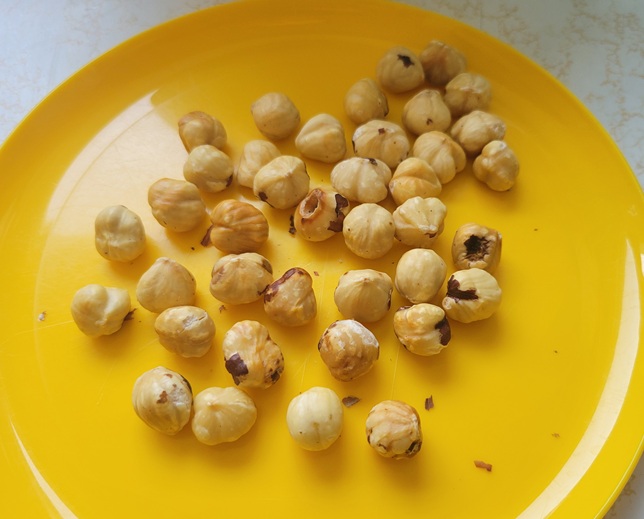
Who would have thought that something as simple as chucking them in the oven for 10 minutes – when it had already been turned on to bake the brownie – would transform them like this? The flavour was so different before and after.
Once the brownie layer cooled completely, I made a chocolate hazelnut mousse to spread on top, and garnished with pieces of toasted hazelnut and chocolate curls. The curls weren’t called for in the original recipe, but while searching the bulk store for nuts I found a bin of curls and thought they’d make a nice addition.

The true test was going to come when we cut into the pie. Did it work?
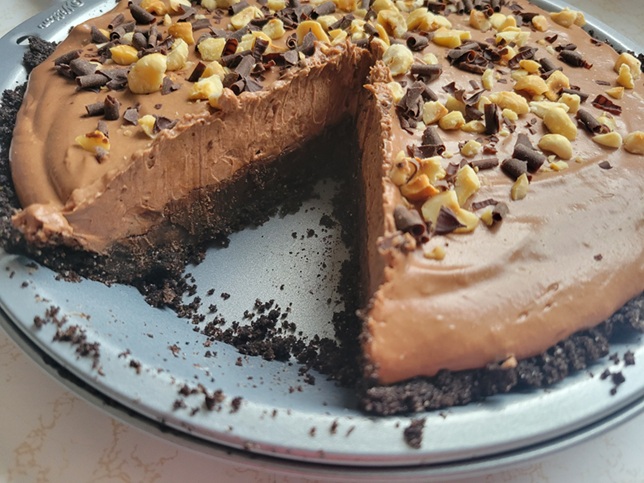
It did! (Also, look at the angle of the pan’s sides. Crazy, man!)


I would like to go on record as stating that I cut that first piece entirely too large. This dessert is rich, and a small slice is more than enough to savour the magic of chocolate and hazelnuts.
Rich or not, my mom absolutely loved it, so mission accomplished.
Thanks for looking! 🙂
My Baking Buddy recently experienced the joy of fatherhood. His little bundle of joy weighs about seven and a half pounds, likes to wake him up at 3:00 AM, and meows when he comes home from work (but also at 3:00 AM).
Yes, he is fully in his Cat Dad era, and I couldn’t be more delighted for him.
With Easter coming up, I wanted to put together a basket of some sort for him. I didn’t want to go overboard on candy, because a) who really needs that much candy, and b) a lot of Easter candy is aimed at kids and isn’t super-great. I finally decided on a few pieces of chocolate (Aero lambs come but once a year, so enjoy the bubbles while you can!), a newly-released book in a series he’s been reading, and a shirt to reflect the bliss that is having a furry friend inspect every plate and every glass he’s trying to eat or drink from.
After combing Etsy for “cat dad SVG”, I found this:

Black would have been classic for this but is so overdone, so I opted for a navy heather triblend from Michaels – I think it was Bella & Canvas. The design was cut from white Easy Weed Siser heat-transfer vinyl.
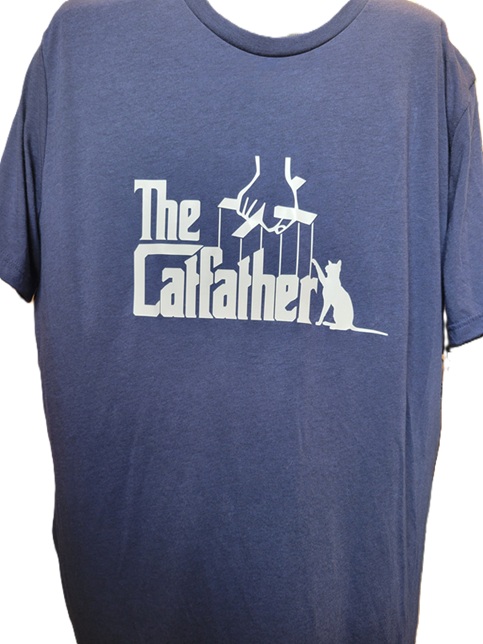
(Excuse the disembodied shirt.)
The vinyl adhered like a dream…I’m so happy with how this came out! He loved it, and couldn’t believe I had made it (despite having worked on vinyl projects with me before). It looks great on him, too.
Thanks for looking! 🙂
Can I make a quick confession? I’m that weirdo who flosses every day, and not just when I’ve got a dental appointment a week from now. It’s nice to see all that BeMod training be good for something. (Also, Johnson&Johnson has apparently discontinued Listerine Fresh Burst dental floss; if anyone has a secret source somewhere, let me know!)
Longer ago than I care to admit, I found the cutest little pattern on Wee Little Stitches‘ Etsy shop (the shop has closed, but their old website still exists!) espousing this very sentiment, but with a crafty twist. Not only do I floss daily, I also floss (almost) daily, and I knew I had to stitch it.

I stitched it on 14-count “Sterling” aida from 123stitch, and (with some help) mounted the finished piece on a 5″ x 7″ canvas for a less-fussy look than framing.
It’s currently hanging in my little stitchy nook, to remind me to keep on flossin’.
Thanks for looking! 🙂
I’ll spare you all the long and fabled history of the French-Canadian fur traders, because it’s widely available elsewhere. I had to learn about it in school, and even then, my strong pull toward an indoorsy life prevented me from fully embracing the spirit of the voyageur.
Recently, the newspaper published a recipe for tarte au sucre, a.k.a sugar pie. I hadn’t thought about it since I made one back in Grade 5 as part of the aforementioned school experience, but thought it sounded simple enough to try again. My baking buddy was enthusiastic when I showed him the recipe, and was even kind enough to pick up any missing ingredients from the store.
What you’ll need:
The recipe doesn’t call for it, but we added a generous splash of vanilla.
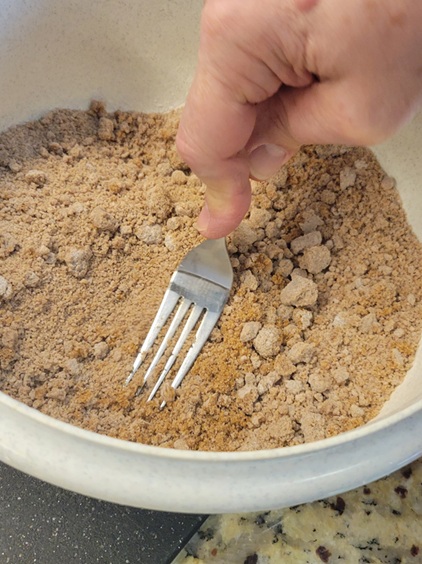
Turn the oven to 350°F, and while it comes to temperature, mix the brown sugar and flour together until well-combined. If your sugar is lumpy, break those puppies down. We used a fork to crumble them and incorporate them.

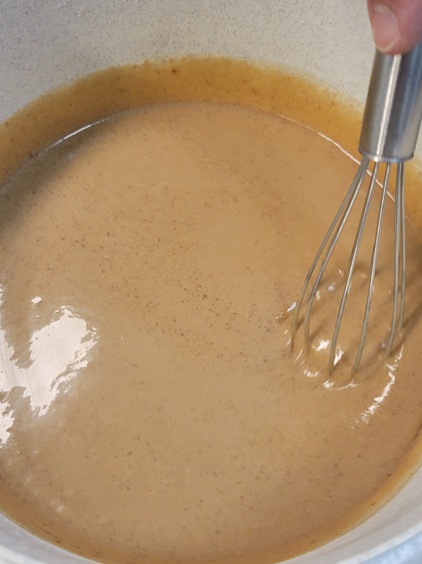
Next, add your whipping cream and mix well.

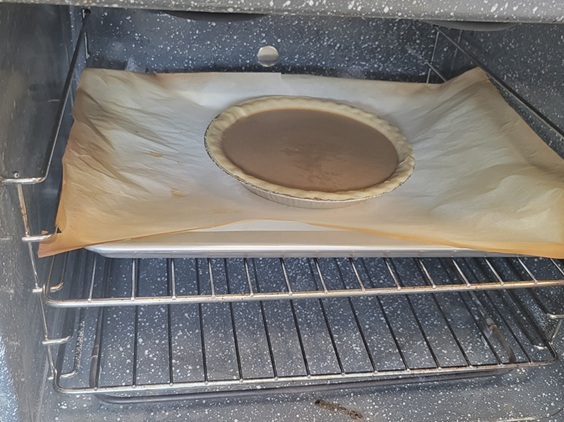
Pour the whole shebang into your pie shell, and bake for an hour.


The recipe warned about the potential for bubbling over, so we set our pie tin on a parchment-lined cookie sheet. It only cooked over a tiny bit, but it was nice not to have to scrape that off the bottom of the oven.
Cool completely before cutting.

I think ours might have been not-quite-100% cooled when we cut a trial piece, and our first reaction was: “Holy cow, is this sweet!” My ten-year old self hadn’t had a problem with it, but that was a lot of years ago.

For the next slice, it was definitely, positively cooled, and when it was topped with a bit of whipped cream, it wasn’t half-bad. With my 21st century, indoorsy ways, I wouldn’t want much more than a small piece in a single sitting – but I can appreciate why this would be a treat if one didn’t normally eat ultra-processed foods already crammed with hidden sugar.

And because there’s always pop-culture inspiration behind my makes, here’s what was going through my head as we baked:
Quite the fusion bake, no?
Thanks for looking! 🙂
I first heard about Altoid wallets a year ago or so – or rather, heard the term and then conducted my own online research and learned that yes, they’re pretty much exactly what they sound like. There’s something almost freeing about leaving the house with just a tin somewhat smaller than 2.5″ x 4″ containing all the essentials: a debit card, lip balm, hair tie, a few dollars in cash, and maybe even wireless earbuds if that’s how you roll…but I knew that would never work for me. I want an actual bag to hold my actual wallet, not to mention the sunglasses case, phone, reusable bag or two, and emergency rations in the form of leftover fun-size Halloween chocolate. (And occasionally, incoming/outgoing mail or a library book.) I dismissed the idea as “cute” and promptly forgot about it.
A month or two ago, Pinterest started showing me images of little mini beauty kits in an Altoids tin. Their creators managed to cram all this soft-girl aesthetic into a very small space, with strands of tiny faux pearls outlining teeny-tiny mirrors and little pink bows in the same shade as the lip stain tucked into the bottom. And thanks to the site algorithms, I also started seeing more pragmatic versions, like little tiny emergency kits.
I should make one for my mom, I thought, clearly a victim of social media saturation. Only…a beauty kit to go isn’t quite her speed (did you even know you can buy Altoid-sized mascara?), and a full-out “In Case of Emergency, Open Tin” scenario didn’t feel very gift-y somehow. I decided to hit somewhere between those two extremes, and decided on a cute tin with some purse essentials in it.
The theme came together in about five minutes for me when, in a fit of boredom, I googled “cat in boy scout uniform”. Google happily obliged with several images that I’m sure were AI-generated; one of them was captioned “Be Purr-pared”.
Yes! Be purr-pared, indeed! With the help of some musical inspiration, I was on my way.
I found some images from a vintage Girl Scouts manual on Etsy, and had my aesthetic.
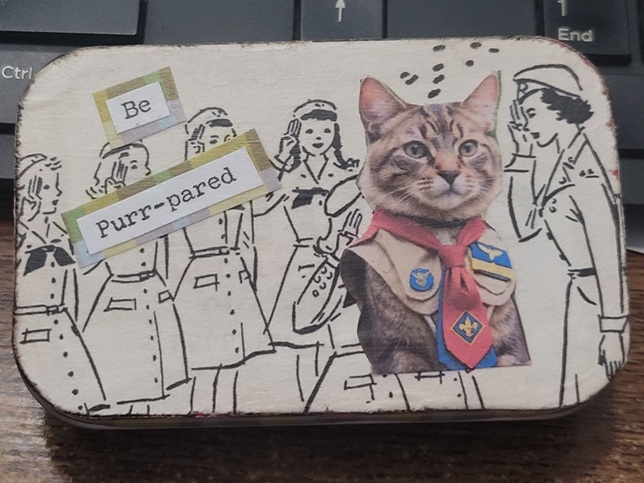


And filled with lip balm, hand cream, Band-Aids, and gum for those post-coffee emergencies.

There was a good amount of Mod Podge involved, and it was impossible to perfectly line up the plaid on the short edges, but overall I’m pretty happy with how it turned out.
Thanks for looking! 🙂
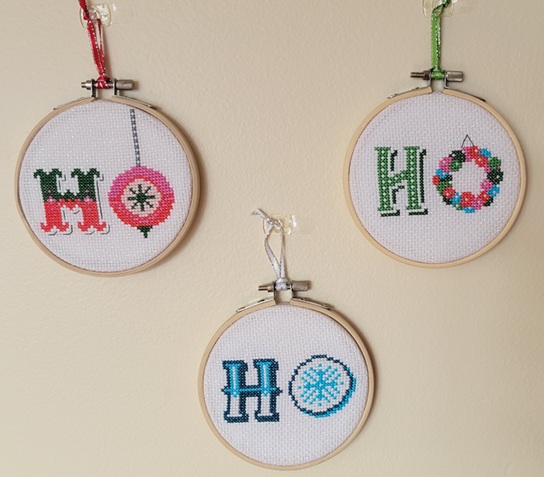
…my true love gave to me: some hoops to spread a message jolly!
Because it wouldn’t be Christmas if I weren’t finishing up a project last-minute, right? (Don’t worry, it’s been nearly a week; I was stuck waiting on a sunny day to get photos.) I love Stitchrovia‘s designs, and the idea of the different fonts really grabbed me. There’s something weirdly freeing about not making everything perfectly symmetrical.
I had stitched one of her patterns for Mother’s Day and by happy chance these used a lot of the same colours so finding my shades was a snap
Close-ups:

I probably use 14-count opalescent aida cloth more than any other needlework fabric. Sparkles make everything better!

I think the green H was my favourite…

They’re a perfect fit in 4″ hoops, and have joined the collection of holiday hoops adorning the walls.
Thanks for looking – Merry Christmas! 🙂
…my true love gave to me: a shirt with my life’s philosophy!
One of my looser goals for this year had been to craft for myself and not just for other people. It’s tough, man! Crafty types express their love via handmade items, and the idea of being even a little selfish and not putting others first feels foreign.
A couple of months ago, Michaels had a sale on long-sleeved t-shirts (buy 2, get 1 free) and I picked up a few. I live in t-shirts, but when the weather cools down the longer sleeves are a happy medium between your standard short-sleeved t-shirt and a sweatshirt. I hadn’t decided whether to embellish them or wear them as-is, and so they had been set aside after washing.
And then, while I was searching online for an appropriate SVG file for a swap I was in, I found the most perfect, retro-licious, bookish file – for me, not my partner. (Don’t worry, she got hers, too.)
I found a lovely, metallic-pearlescent heat-transfer vinyl in a peacock-green shade, and set to cutting…twice. It seems that although it looked vaguely like burnished metal, it is not considered metallic HTV by the Silhouette Studio software, and the machine cut right through the carrier sheet as well. Always check your settings! (This has been a public service announcement.)
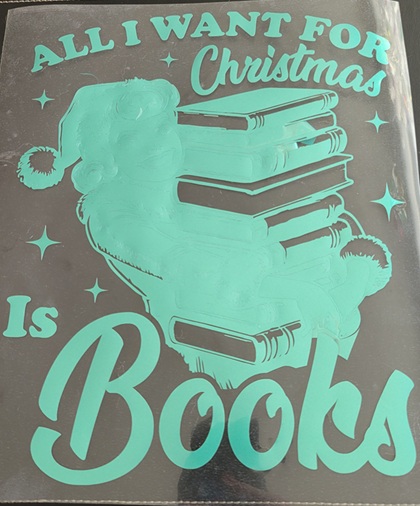
It didn’t take me too long to get the more basic weeding done, but there were a lot of tiny bits and bobs to pick out, too.

This is probably the truest representation of the colour. See how it reflects and shines?
My shirt was red, and although red and green are certainly Christmassy, I was hoping the green wouldn’t look too dark, and that the design wouldn’t get lost.

I think it’s going to be OK!
Is it colourful? Heck, yes. But I don’t mind a little seasonal brightness.

Secret Santas, take note!
Thanks for looking! 🙂
…my true love gave to me: a flock of birds to hang on the tree!
Every year, Satsuma Street releases a new entry in the “12 Days of Christmas” ornament series, and every year I buy the pattern but don’t get around to stitching it until the following year. I’ve got enough stuff going on by the time the holiday season rolls around without trying to race through another project. All this to say: while this pattern was released last year, it’s new-to-me for this year.

Calling birds…get it? I love a good pun.
I think my favourite detail on the ornament is the rotary dial on the phone:
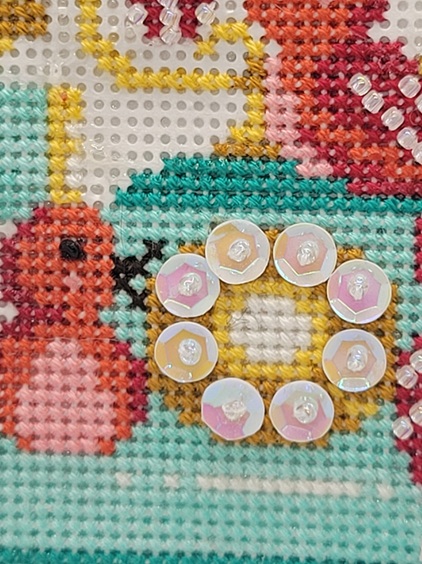
…although I wonder how that works with only eight buttons (finger holes?).
Along with the previous three ornaments:
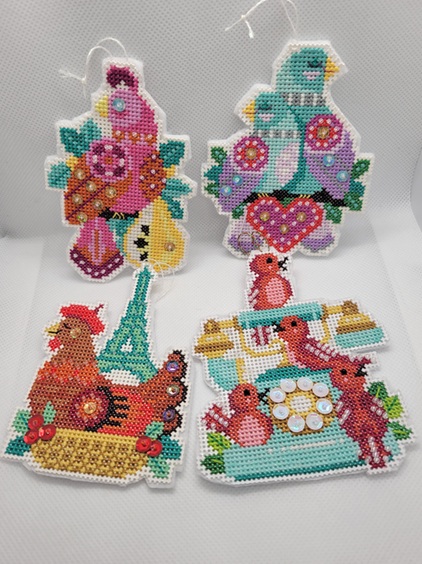
Gosh darn, there are a lot of birds in that song. Didn’t Alfred Hitchcock make a movie about dense ornithological populations? At least they’re cheery-looking.
Thanks for looking! 🙂
