I’ve been tie-dyeing since I was knee-high to a grasshopper an idealistic teenager who really wanted to be a hippie. I’ve gotten over the hippie stuff, mostly, but still enjoy the tie-dye. And although I’ve added vinyl transfers to a shirt I’ve already dyed (like my Canada Day shirts from a few years back), it didn’t occur to me to try dyeing a shirt that already had a graphic on it, until I saw someone do it on Lettuce Craft.
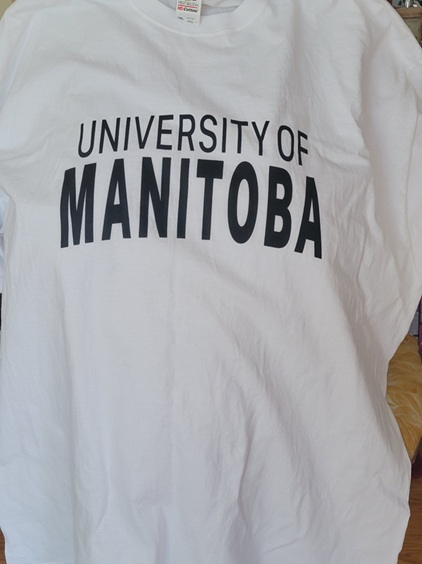
Back in the spring, I found this lonely guy in the clearance section:
I’m not a fan of white, and would normally never have looked twice, 40% savings be darned. But ah, as a blank canvas…that’s a different story.
After dampening the shirt and wringing it out (this is after prewashing, of course), I decided to go for a classic spiral pattern. My hands were covered in gloves which were in turn covered in dye, so I didn’t get an in-progress picture. If you’ve never tried this and want to see how, Tulip offers a really cool step-by-step.
After waiting the requisite 24 hours or so, the shirt was rinsed until the water ran clear, and it looked like this:
It still had to be run through the washing machine, though. It’s a little crazy how much dye there still is to be removed! Here’s the final product:
It might not be as brilliantly bright as it was post-rinse, but the colours are still vibrant and transform it into something summery and fun.
My Baking Buddy recently experienced the joy of fatherhood. His little bundle of joy weighs about seven and a half pounds, likes to wake him up at 3:00 AM, and meows when he comes home from work (but also at 3:00 AM).
Yes, he is fully in his Cat Dad era, and I couldn’t be more delighted for him.
With Easter coming up, I wanted to put together a basket of some sort for him. I didn’t want to go overboard on candy, because a) who really needs that much candy, and b) a lot of Easter candy is aimed at kids and isn’t super-great. I finally decided on a few pieces of chocolate (Aero lambs come but once a year, so enjoy the bubbles while you can!), a newly-released book in a series he’s been reading, and a shirt to reflect the bliss that is having a furry friend inspect every plate and every glass he’s trying to eat or drink from.
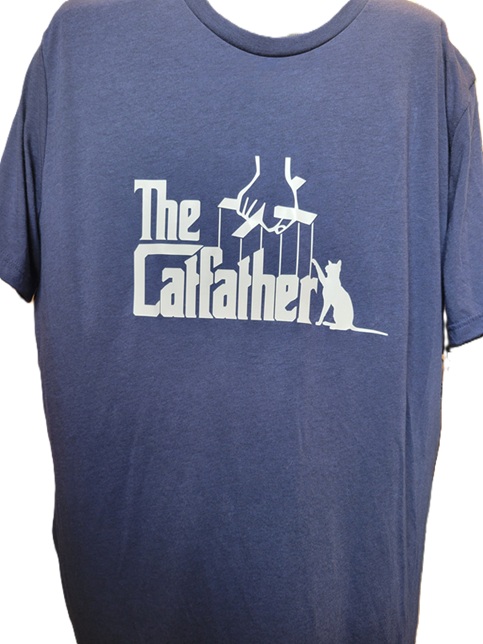
After combing Etsy for “cat dad SVG”, I found this:
Black would have been classic for this but is so overdone, so I opted for a navy heather triblend from Michaels – I think it was Bella & Canvas. The design was cut from white Easy Weed Siser heat-transfer vinyl.
(Excuse the disembodied shirt.)
The vinyl adhered like a dream…I’m so happy with how this came out! He loved it, and couldn’t believe I had made it (despite having worked on vinyl projects with me before). It looks great on him, too.
…my true love gave to me: a shirt with my life’s philosophy!
One of my looser goals for this year had been to craft for myself and not just for other people. It’s tough, man! Crafty types express their love via handmade items, and the idea of being even a little selfish and not putting others first feels foreign.
A couple of months ago, Michaels had a sale on long-sleeved t-shirts (buy 2, get 1 free) and I picked up a few. I live in t-shirts, but when the weather cools down the longer sleeves are a happy medium between your standard short-sleeved t-shirt and a sweatshirt. I hadn’t decided whether to embellish them or wear them as-is, and so they had been set aside after washing.
And then, while I was searching online for an appropriate SVG file for a swap I was in, I found the most perfect, retro-licious, bookish file – for me, not my partner. (Don’t worry, she got hers, too.)
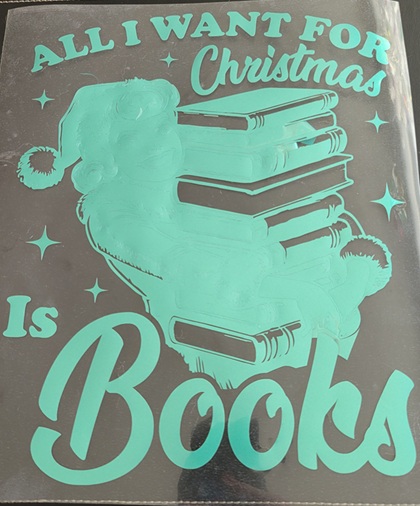
I found a lovely, metallic-pearlescent heat-transfer vinyl in a peacock-green shade, and set to cutting…twice. It seems that although it looked vaguely like burnished metal, it is not considered metallic HTV by the Silhouette Studio software, and the machine cut right through the carrier sheet as well. Always check your settings! (This has been a public service announcement.)
It didn’t take me too long to get the more basic weeding done, but there were a lot of tiny bits and bobs to pick out, too.
This is probably the truest representation of the colour. See how it reflects and shines?
My shirt was red, and although red and green are certainly Christmassy, I was hoping the green wouldn’t look too dark, and that the design wouldn’t get lost.
I think it’s going to be OK!
Is it colourful? Heck, yes. But I don’t mind a little seasonal brightness.
Ever since I first started playing around with heat transfer vinyl, the idea of doing multi-coloured/layered designs was always in the back of my mind. Like so many other things that live back there for “some day”, this was dismissed as being too complicated, and what if it didn’t work? That would be a waste of perfectly good vinyl!
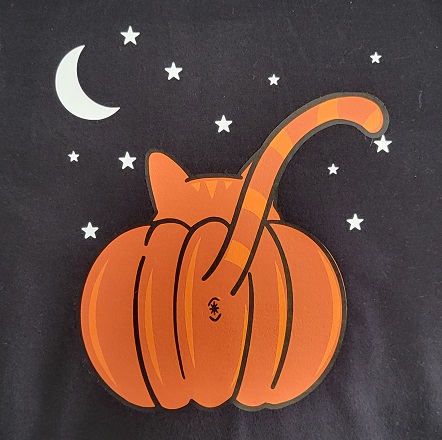
I was finally spurred into action when I saw this hoodie on Modcloth. So cute! So cat-iful! The price was a bit hard to swallow, though. And once the price caught in my throat, I found other reasons to not buy it: with the graphic on the back, people might not be able to see and appreciate it to the full extent possible; they only had a handful of sizes left and were still asking nearly-full price; that’s still a crazy amount of money for a hoodie that’s got a strong seasonal vibe.
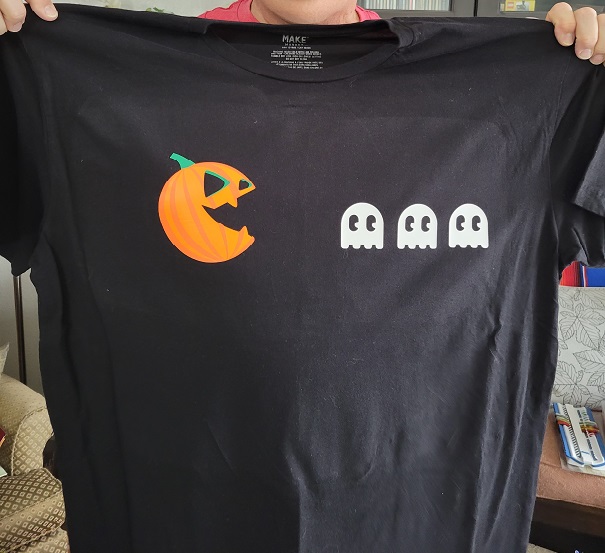
An Etsy search turned up the exact same image as an SVG file for a fraction of the price. (Note: searching for “pumpkin butt” generates a lot of hits for kits to, ahem, paint your infant’s backside orange and turn the resulting print into a pumpkin. Shudder. “Cat butt pumpkin” was a lot more helpful.) I gleefully informed my Crafting Buddy (who is also my Baking Buddy) that I had found our layered vinyl project. He said he wasn’t sure that he’d want a big pumpkin cat butt on the front of his shirt…”but I could see it as a smaller image on the chest, maybe”. Back to my search, where I found something appropriately pop-culture and masculine for his Halloween finery. Once I got the images resized appropriately, I cut out one colour/layer at a time and hoped against hope this would work.
We started with his shirt because the pieces were a bit smaller and easier to wrangle.
This is the back side i.e. the part that gets placed against the shirt. I learned an invaluable lesson: if you’re going to weed everything ahead of time, make sure you have wax paper or something similar between your pieces, or else the carrier sheet will stick to the sheet immediately below and maybe even start peeling the vinyl off.
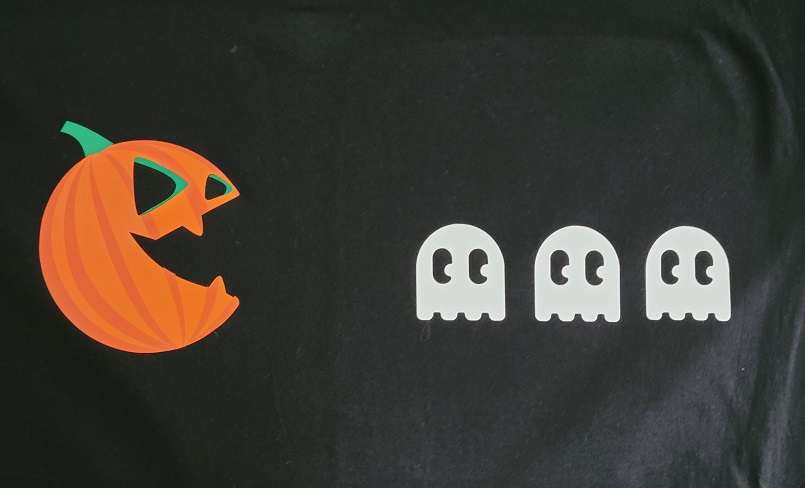
We started by dry-fitting (cold-fitting, sine this was before heat pressing?) the pieces to see how they would look.
It took some careful placement, but we got the remaining two layers of the pumpkin lined up. The ghosts should probably be a little bit closer to the pumpkin, but we moved them over to centre the design overall.
It looks pretty good! (The colour variance you’re seeing in the black is just from the heat press, and isn’t a permanent feature.)
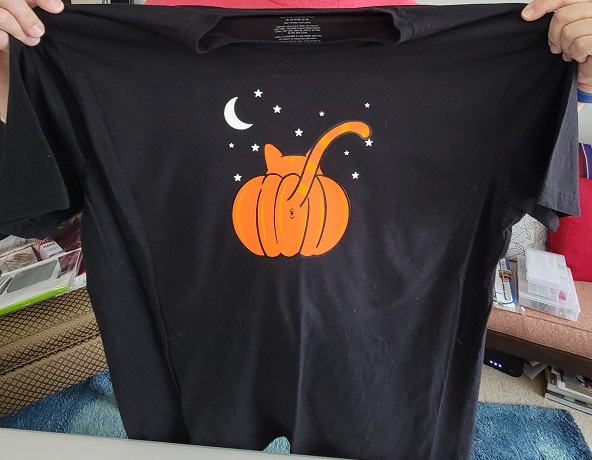
Once we had one under our belts, we assembled my shirt. It was slightly more awkward because of the larger pieces of vinyl.
We got things lined up pretty well, though!
Now we can check “layered vinyl” off our crafty bucket list. I don’t know how often I’ll do it, but it’s a nice trick to have up my sleeve.
Hard to believe, isn’t it? On August 21, 2008 I hit the “Publish” button on my very first post. I wanted to post something fun to commemorate the occasion, so here is the UFO to end all UFO’s.
Many, many years ago, three things happened in glorious synchronicity. I was the thinnest I had been in my life. I had a job with an extremely casual dress code. And (it’s impossible to overstate this) graphic t-shirts were seemingly everywhere. They’ve been around forever, I know, but suddenly there were swaths of them. This resulted in my amassing a collection to rival the local stores and turning a t-shirt and flared jeans into my de facto uniform.
Times change, though, and I moved on to a job that made us dress like we were in an office. T-shirts were still weekend wear, but some of them got a little small. Some new ones came into the closet, jockeying for space with the old ones. I’m a sentimentalist with a memory for detail, and couldn’t just get rid of most of them – they all had a story! I had seen t-shirt quilts in craft books before, but that felt like a really big project. (One of them assumed the crafter might not have enough t-shirts and provided instructions for using ink-jet transfer paper to create their own specifically for the purpose of cutting them up to sew.) Still, the idea was intriguing, and I started pulling shirts from my collection and setting them aside.
Reader, I gathered 30 in all. 30! I had no idea I owned that many, or at least, I was subconsciously repressing that knowledge.
Now, where was I? Oh, yes. I pulled the shirts, arranged them in a quasi-rainbow to get a feel for the balance of colours, and promptly ignored them for…a while. What was I supposed to do with them? Where should I start? This is what I get for picking a project that didn’t come with its own pattern.
Eventually, I decided squares would be easiest. I got a 12″ square peel-and-stick floor tile from the hardware store (genius!) and used that as a template, centring it on my shirts and then running the rotary cutter around it. This method meant that I actually got two 12-inch squares from each shirt – front and back – and for a brief moment I considered assembling the plain back squares into the backing of the quilt. Thank goodness I didn’t, because I’d probably still be sewing it today. The upside is, I now have 30 ultra-soft 12-inch cleaning cloths as a nice eco-friendly alternative to paper towels. I arranged and rearranged my 30 front squares until I had a 5 x 6 grid I was happy with. I took a picture for future reference (still more genius!), and then…ignored them for a while. Yes, there’s absolutely a trend developing here.
I knew I wanted a non-stretchy fabric in between my squares to prevent, well, stretching and distortion later on, and picked up some inexpensive solid-coloured flannelette that fit the bill nicely. I cut strips 12″ long by 2″ wide out of blue flannelette, and cut 2″ squares out of pink to go at the “intersections”. I didn’t think to take any pictures of this, but I did ignore it for a while after getting my pieces cut out.
When I was ready to assemble, I started making horizontal rows of five shirts, with a 12″ x 2″ strip between each one (for a total of four blue strips per row). Does anybody want to hazard a guess as to what happened? That’s right – I sewed “filler” rows of five blue strips with four pink squares in between, to eventually go in between the t-shirt rows…and then I ignored them for a while.
It might sound like there was a lot of ignoring going on, and while that’s true to a degree, I’m grateful this wasn’t the kind of project that had to sit out in the middle of the floor or dining room table while it was being ignored. In fact, it was something that could be sewn in steps and would have been a reasonably quick project were it not for the stashing away and ignoring.
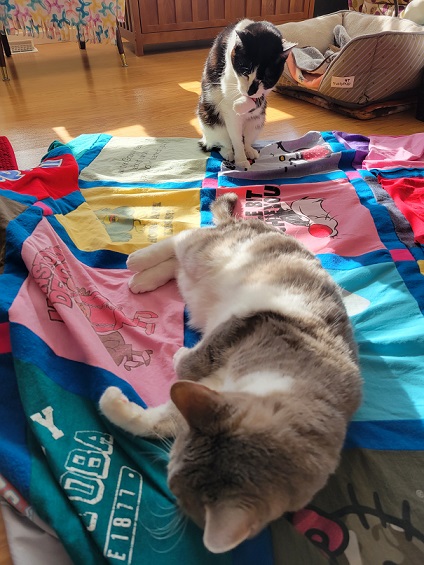
Somehow, I managed not to lose any of my rows (t-shirt or straight flannelette), and slowly…painfully slowly…would pin and sew on a row at a time here and there, as the mood struck me. The rows were about five feet long, less seam allowances but plus flannelette strips, and needed to be laid out carefully on the floor for pinning. I had to be mindful not to stretch any of the t-shirt squares (although it did happen, at least a little bit), and found it was easiest to start by lining up my pink squares in the filler rows with the blue strips in my t-shirt rows. Once I had done that, I just had to keep the t-shirt and the corresponding blue strip lined up.
Sometimes, I had help!
At long last, all six t-shirt rows and five filler rows were sewn together into one big piece that actually looked like it was supposed to. A traditional quilt includes a layer of batting in the middle and then a backing, but I’m not a traditional quilter. I bought some pink fleece for my back, figuring it could do double duty as the warm and snuggly part, too. I cut it to size and then lined it up with my quilt top (wrong sides together) and ran a zig-zag stitch all the way around to hold the layers together before adding my binding, which I also attached with a zig-zag stitch.
The other thing I didn’t do that might shock quilters is…I didn’t quilt it. I had weighed the merits of “stitch in the ditch” around my pink squares vs. going old-school and tying yarn through my layers at strategic points, and then decided against both. There’s no batting inside to move around and bunch up in one corner, and the fleece tends to stick a bit and stay put, so once this baby was bound, it was done.
My old photo ID for work featured me in this shirt:
In all, it took me just shy of nine years from the initial pulling of shirts until the final stitch. When I said UFO, I meant it! But oh my stars, was it ever worth it. It’s the perfect weight for a summer cover instead of my comforter, soft and snuggly without being too heavy. It would probably make a great picnic blanket, but I will not be risking grass stains after how long it took to get it finished. In the time since I first started gathering my shirts for this project, I’ve easily acquired that many again (and probably more)…so who knows; there may be another, hopefully quicker, t-shirt quilt in my future.
Last summer, Michaels* had included, in one of their daily promotional emails, a link to a tutorial to make a tie-dyed Canada Day t-shirt. My tie-dye buddy and I (he’s also my baking buddy; truly, he’s a jack of all trades) bought white t-shirts and a bottle of red dye, and…never got around to applying one to the other. Whoops.
Fast-forward to this year: back in May, I was putting a file at work in abeyance for two months, which took me to July 1. Hey – we had time to get them done this year! We found last year’s stash still in its plastic bag from the store, and I set to finding the tutorial from last year. It was underwhelming, to say the least.
Step 2
Follow the directions on the package for best results and dye patterns.
Really, Michaels*?
The package directions weren’t much better, and didn’t seem to offer the pattern shown in the picture, so we decided to dispense with their “rules” and choose our own pattern adventure. He wanted his to look like a Canadian flag (-ish), and I opted for a classic swirl, hoping against hope that I wasn’t going to look like a peppermint candy when all was said and done.
After a quick dunk in soda ash, they were ready for dyeing. Besides the single bottle of red we had bought last year, we found a couple other partial bottles of red in our stash and thought, “Why not?” I don’t know that it made a huge difference, but I’d like to think they lent a certain depth of colour.
Rinse time! His turned out beautifully, but I should have gotten down into the folds of mine a little bit more with the dye. But I can’t be too upset, for two reasons: 1) if I had wanted a solid red shirt, I would have bought one, and 2) the swirl lines came out well, and don’t look like Christmas candy. I’ll call that a win. If I squint, it looks a bit like a burst of fireworks, which is certainly a propos.
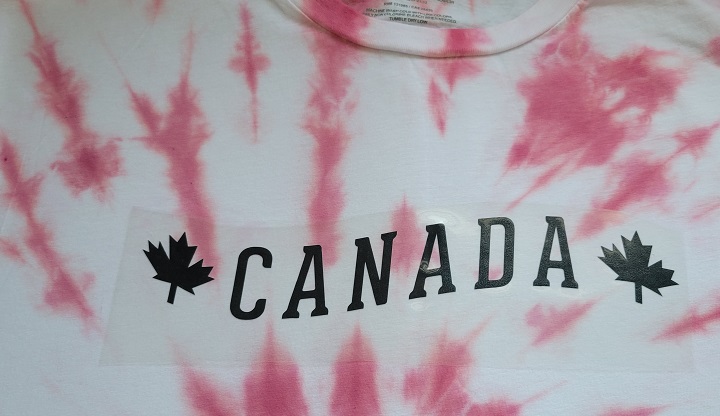
But wait, there’s more! The original tutorial had “Canada” in a pretty unremarkable font, straight across the chest. We found a design we liked on the Silhouette Design Store and edited it so we were left with this:
I found some inexpensive placement guides on Amazon to help centre designs on t-shirts and make sure they’re a reasonable distance from the collar, and the adult-sized one proved to be immeasurably (or actually, measurably) helpful here.
The final product(s):
Thanks for looking! 🙂
*Is anyone else bothered by the fact that the founder of that craft chain opted to not add an apostrophe and make it possessive? It takes everything I have not to spell it as “Michael’s”. And every time I see “Michaels”, I expect to see messieurs Keaton, Caine, Bolton, etc. all lined up, rather than aisles of craft supplies.
Happy National Grammar Day! If you’ve been reading me for a while, you likely know I have a bit of a fixation on grammar. And spelling. And language. Nothing aggrieves me more than getting a mass email at work from “You’re Social Committee”.
I’ve marked this occasion (I’m loath to call it a holiday) in the past by flying my language-freak flag with a tea towel, and one fun if amateurish t-shirt. I shouldn’t be so hard on the shirt, actually. Despite its clearly homemade vibe, it doubles as a nod to The Simpsons and still makes me laugh. A few weeks ago, I found the perfect design to try my hand at another shirt, and kept my fingers crossed that the execution would work as well as the idea.
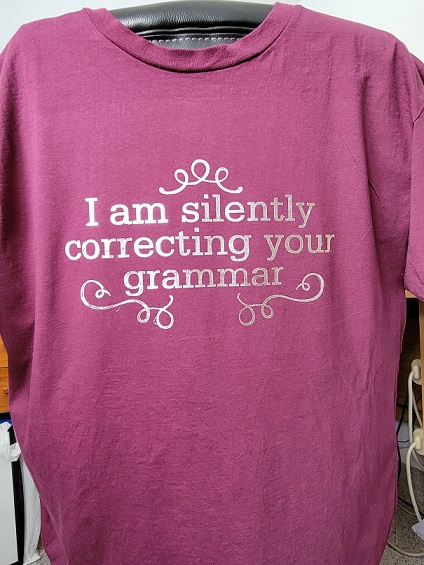
I started out with a plain maroon t-shirt from Michaels, and some silvery heat transfer vinyl, and got the design ready to cut on my Silhouette cutting machine. (A note: this picture is the most accurate representation of the shirt’s colour. Don’t ask me what happened in the later pictures.)
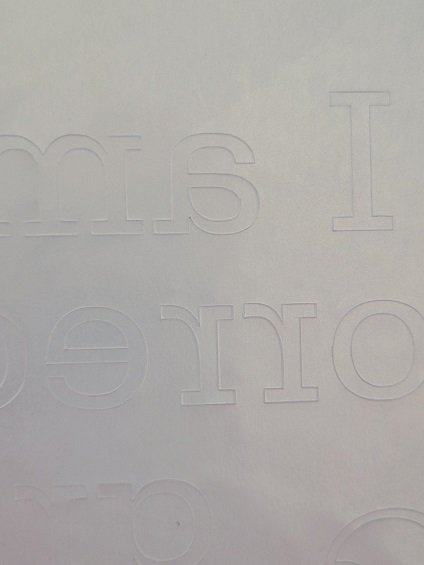
This is the back side of my cut. See the outlines of the letters?
A confession: it took me two tries to get this cut out properly. When I initially adjusted my cut settings for “heat transfer vinyl, metallic”, it cut straight through the vinyl and the plastic carrier sheet. When I adjusted them to “heat transfer vinyl, smooth”, it didn’t cut quite all the way through the vinyl on the first pass, and I had to feed it back into the machine for a second go.
While I was weeding the excess vinyl from my design, I discovered that if I pulled/stretched it too much, it sprang back on itself like curly ribbon – you can see a little bit of that above. Between my cutting issues and weeding issues, I should have realized how finicky this stuff was going to be.
Did I mention that this metallic vinyl was finicky? After following the application instructions, I still found that parts of it really, really liked hanging on to the plastic carrier sheet and were reluctant to adhere to the shirt (although an extra taste of my heat press solved that). It’s a bit hard to see in this shot, but the serif on the bottom of the “r” in “your” positively refused to join the rest of the letter, and the serif on the bottom of “I” folded over upon itself. Finicky.
Although the instructions advise to wait 24 hours before laundering my newly festooned garment, and it’s been several times that, I’m still convinced this (finicky, finicky) stuff will all slide off the first time I wash it. But I have pictures now to prove that, however briefly, I had an almost-professional looking grammar shirt.
When I was a Young Person™, I went through a massive hippie phase, but in the whitest, most uptight way possible. No illicit drugs or free love for this honey badger; my hippiedom was confined to doodling peace signs and rikki-tikki flowers on my notebooks, wailing along with Big Brother and the Holding Company, and bemoaning the fact that I never got to Woodstock despite having parents who were barely old enough to attend (an older, more self-aware Witty Child knows this was probably for the best, since I like hygiene and dislike crowds, but still…all those musical acts…). Oh, and tie-dyeing like it was going out of style (it was). I eventually stopped doing it when I ran out of places to wear it and people to give it to, but still always liked the look of it.
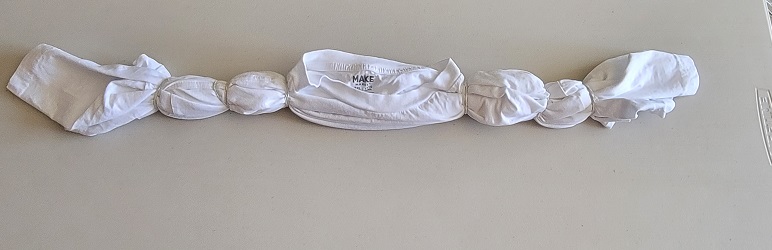
When I found out from my friend a few months ago that he had tried it as a child, with limited success due to some faulty technique on his mother’s part, I decided it was time to break out the rubber bands again. We turned his apartment into a sweatshop – literally: it was boiling hot out-of-doors, and because we were situated on the linoleum floor of the hallway in order to minimize damage from drips and to allow access to both the kitchen and bathroom faucets, neither of us benefited from any breeze the open windows might have provided – and got our hippie on.
We had to soak the shirts in soda ash in batches due to space constraints, but found that each 20-minute soak was approximately just enough time to get the current shirt finished and wrapped in plastic, and rinse off our gloved hands before starting all over again.
Not exactly awe-inspiring, are they? In order to shower, he had to gingerly remove them and try not to drip dye out of the ends while they did their overnight soak.
But when he unfurled them and rinsed them out the next morning, well:
Has anyone ever tried this with children? I’m appalled that they market some of these kits as a fun birthday party or day camp activity, considering the mess that two grown adults with fully developed motor skills made. I can’t imagine that being relaxing!
This has slaked my craving for a while, but I’d like to get my hands on a softer, cotton-poly blend shirt rather than the $4 Fruit of the Loom special from the men’s department at Wal-Mart – now that we’ve got our technique down, spending a little extra on raw textiles wouldn’t break my heart.
Hello, dear readers and crafters, and let me be the first (probably) to wish you a very Happy Grammar Day!
Having a fairly relaxed dress code, I wanted to do something wearable to mark the big day this year. I saw a t-shirt eerily similar (ahem) to the one below on a website, and knew it was perfect. They had a little blurb asking customers to contact them regarding international shipping rates, so I sent a very polite message doing just that…and never heard back. (Still haven’t.) Either they’re extremely skittish about shipping to Canada (“But the dollar is so low! How will she afford it? How will she afford it?”), or they’re now completely defunct. In either case, when it became readily apparent I wasn’t going to be finding a parcel in my mailbox in time for March 4, I took matters into my own hands. I’m crafty like that.
Yes! Something to combine my love of The Simpsons (as it used to be, anyway) with my inherent grammar geekiness! The shirt is just a standard men’s crewneck from Old Navy, and I used Tulip soft fabric paint for the logo. I would love to learn how to screen print to get cleaner lines, but overall, I’m pretty happy with how this turned out.
Fun fact: although the purely fictitious National Grammar Rodeo from the episode “Bart on the Road” was to be held at the Sheraton Hotel in Toronto, the original artist apparently decided this needed more of a Calgary vibe.
And because I know you’re all dying to know: yes, Andy Williams was on heavy constant rotation while I painted this. 🙂