…my true love gave to me, three stockings hanging.
(OK, I might be a stocking short, here…)
For the past several years, Lettuce Craft has hosted a Christmas card swap. As swaps go, it’s super low-key: you can choose how many people you want to exchange cards with, and then get your cards made before you sign up. Once sign-ups close, boom, you’re ready to send (and receive!). Who doesn’t like getting mail, especially when it’s a handmade card?
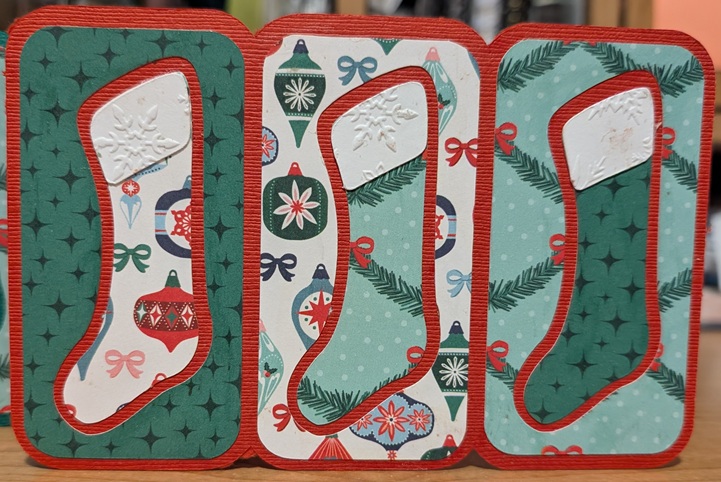
This year, I sent the tri-fold stockings card from the Merry and Bright kit on SVGCuts. They fit perfectly in your standard 18.5 cm x 13.5 cm envelope – that’s 7″ x 5″ for those who don’t speak metric – and were a fun way to mix and match patterns.
I stamped a festive message inside, and they were ready to go.
And just for fun, I did a variation with a green background:
…my true love gave to me, a stocking just for my kitty!
When my Baking Buddy became a cat dad earlier this year, I knew I wanted to do something special for kitty’s first Christmas. (Yes, he already has an ornament like that.) He’s always made sure that my furkids have something for the humans and their opposable thumbs to unwrap on their behalf at Christmas, and I wanted his new addition to have the same.
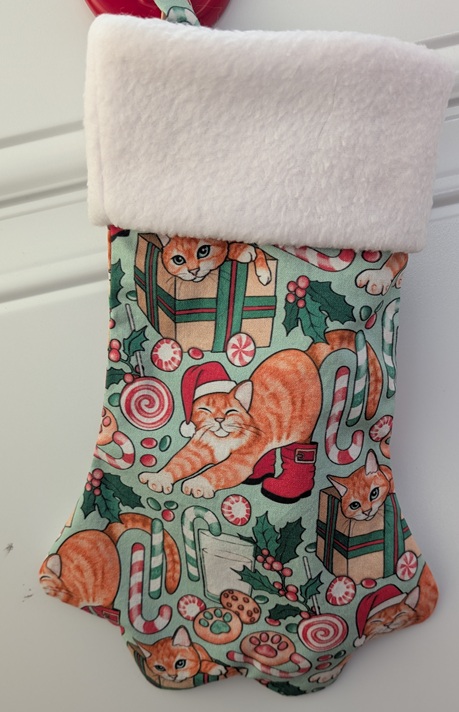
I found a fun paw-shaped stocking pattern (in three different sizes!), and also some fabric on Spoonflower that looks a lot like the cat in question.
Funny story…you’d think that having three stocking sizes to choose from would be enough, but you would be wrong. The regular-sized one sounded human-sized, and the mini felt too small. And don’t get me started on the jumbo! Now I understand Goldilocks’ struggle. In the end I used the pattern for the regular-sized stocking but resized the PDF to 3/4 its original size to strike a balance.
I also left off the foot pads and toe beans. I know! Toe beans! If I had been using a solid colour for the body of the stocking I would 100% have included them (because…toe beans!), but I didn’t want to cover up the fun pattern with them. Besides, human stockings don’t include toenails…right? Help me out here.
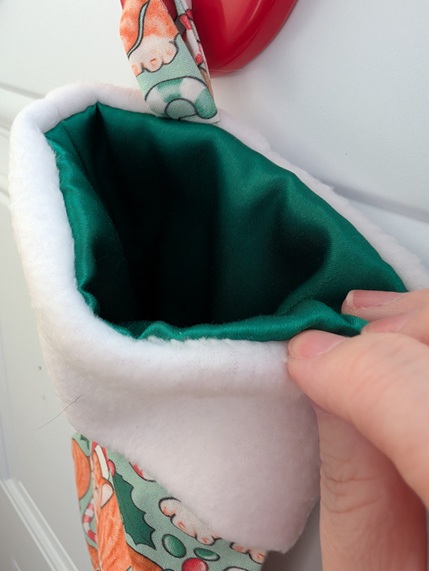
My favourite part – or maybe second-favourite, after the orange cat fabric – is the lining. I found a couple of scrap pieces of green cuddle satin in my stash, left over from a pair of pajama pants, that were just the right size and matched the darker green on the outer fabric admirably. It gives the stocking such a luxe feeling!
I filled it up with all kinds of toys and goodies, including a gift card to the pet store for future treat purchases…and am starting to think there might have been something to the regular size after all. Right now it’s hanging at kitty’s new abode, where she’s patiently waiting until Christmas morning.
…my true love gave to me: two doves of indeterminate species.
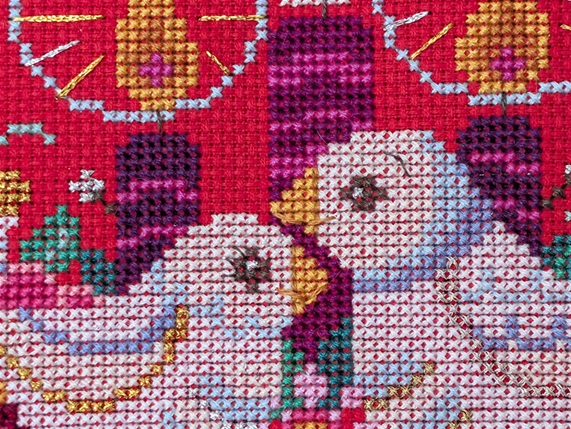
If swapping (see my previous post) lets me make things I would never normally make and didn’t even know I wanted to make, then this is pretty much the polar opposite. As soon as I saw Satsuma Street’s “Holiday Glow” design on their social media, I knew I had to stitch it. At the time, it was an exclusive to the Jingle Ball, which meant I was out of luck. But patience is a virtue, and about a year later it appeared on their website, and with a discount code to boot.
There are a few things that stitchers love to complain about. Backstitch and French knots come to mind (the tedium!…although secretly, I kind of like French knots, and there’s no denying the definition provided by backstitch), but black or navy Aida cloth is a strong contender. No problem, I thought, this uses red Aida.
It turns out that even a relatively bright red Aida cloth can be a bit of a nightmare to stitch on and see the holes properly. Once I had a few stitches in place it was a little bit easier, but there was a lot of stitching by feel involved. And the metallics! I originally started out using DMC diamant for the gold and silver but switched to Petite Treasure Braid by Rainbow Gallery, and this may have been the single best decision I made all year.
(Note: I’m not sponsored by Rainbow Gallery; I just really, really love their Petite Treasure Braid. They’ll completely change your view of metallic threads.)
For all my moaning and apparent sudden-onset red blindness, the finished product was 100% worth it.
I found a 9″ x 7″ flexible hoop in a pale red at my local needlework shop and bought it on a whim. It’s not a perfect match to the fabric, but the colour works well with the thread shades and it doesn’t overwhelm the design.
My favourite part to stitch was the rays around the candle flames. Who knew a few straight stitches in gold and silver would add the perfect finishing touch?
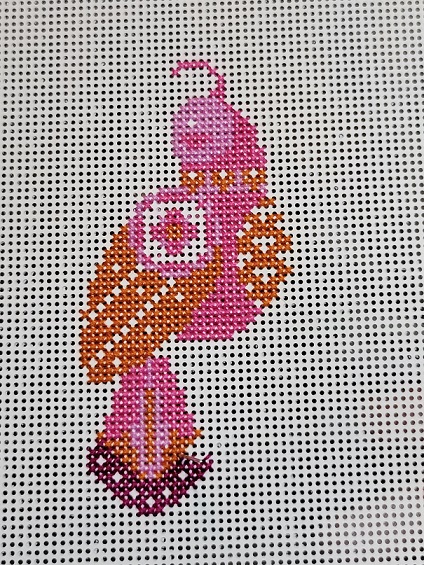
…my true love gave to me: a peacock but no pear tree!
While I don’t swap as much as I used to, it was impossible to resist the siren call of the Santa Sack Swap on Lettuce Craft this year. One of the things I love about swapping – besides the whole sending and receiving mail factor, because of course – is that it often lets me make something I might not ordinarily make for myself or my immediate circle.
Case in point: a felt peacock.
While browsing my partner’s Pinterest, I saw something similar to this and forgot I had clicked on it until Etsy innocently suggested this pattern from Elliott’s Playground. Clearly the digital takeover is well on its way. It checked all the boxes for me, so I downloaded and printed, and started combing through my far-too-large collection of felt.
I’m quite happy with how he came out! I weighed him down at the front so my partner can set him just about anywhere and have him balance, and he seems to do that just fine. Instead of wrestling with cutting out and then affixing teeny tiny black felt circles for his pupils, I used the pupil piece as a template and satin-stitched his eyes. But I think my favourite part was his crown (fan? The feathers sticking out of his head, in any case). It’s small and sweet, and really finishes him off.
The instructions also included variations for a white version and a Christmas version, so I may have to revisit this pattern for ornaments next year.
…my true love gave to me: a meme that comes straight from TV!
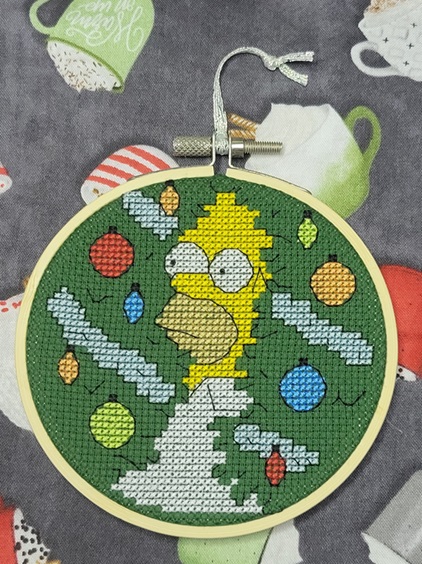
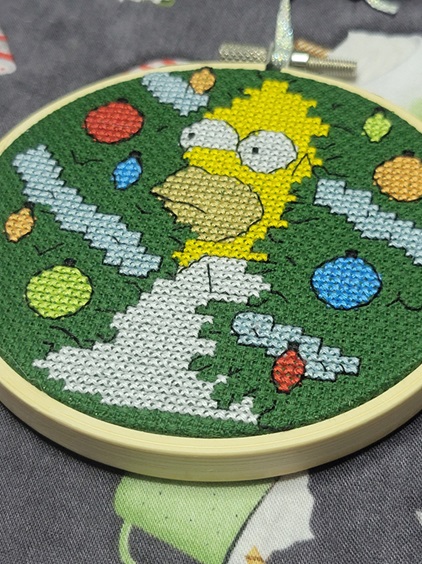
It was quite by accident that I found this pattern for a Christmas’d version of Homer Simpson moving silently through Ned Flanders’ hedge, but knew right away that I had to stitch it.
Luckily, my local needlework shop (always support your local needlework shop if you have a choice!) had the requisite Christmas green aida cloth, so I was able to get started on him right away.
He fits perfectly in a 4″ hoop!
The backstitch really creates the illusion of the hedge, and the two little French knots for his pupils are the finishing touch.
…my true love gave to me: a French hen to go with my two turtle doves and partridge in a pear tree!
By the time Satsuma Street released their holiday designs last year, I was done with taking on last-minute crafting projects. (Excuse me while I snicker behind my hand.) That didn’t stop me from buying the charts, though: one of them was the third installment in the 12 Days of Christmas series, and since I had stitched the first two last year it was a given I had to do this one as well.
Mon dieu! A French hen!
I didn’t think to take a picture of the back, but once I was finished stitching and attaching the beads and sequins, I glued it to glittery white felt so it will shimmer no matter how the lights catch it.
The four calling birds have been released, so I’ve got at least one project for next year lined up already.
…my true love gave to me: a card with a greeting merry!
For the second year in a row, I signed up for the Christmas Card swap on Lettuce Craft, because who doesn’t like getting a little festive mail? Or mail in general, really?
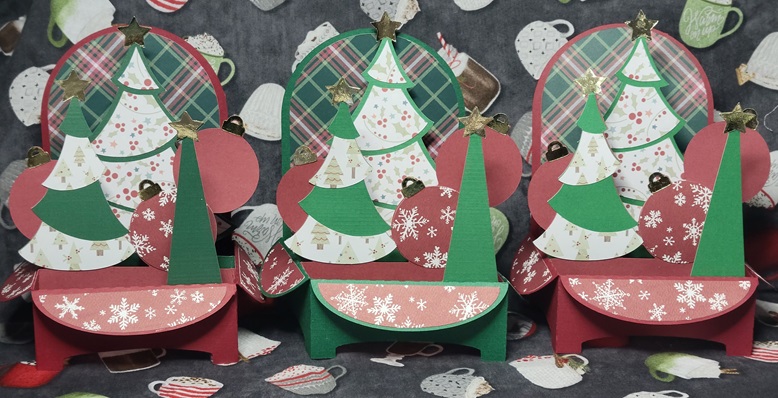
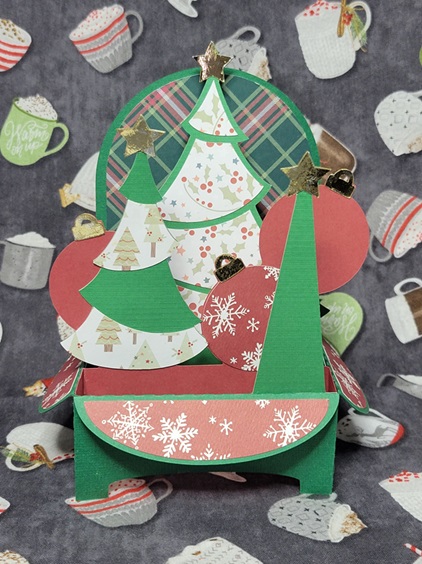
Last year, I kept things fairly simple with a bit of embossing powder and die-cut messages (trust me, it’s simpler than it might sound), but this year I apparently lost all sense of reason when I saw the Christmas Trees box card on SVGCuts. This had presence, drama, and a great reason to play with some fun patterned papers that mysteriously find their way into one’s stash but don’t get used for being “too busy”.
Speaking of patterned papers: trying to decide on a colour scheme was pretty much impossible. In the end, I made three cards in a traditional red-and-green theme, and the other three using fun mid-century pinks and teals. The traditional set got gold stars and ornament hangers, and I used silver for the mid-century set. I stamped the back of each card with a fun, festive message that still left plenty of room to sign. The pattern came with a little train to attach to the inside front of the card, but I left it out to make things all about the trees.
I wouldn’t say that making six 3D cards was a mistake, but it sure was an undertaking. The actual assembly wasn’t so bad – I hit upon a rhythm and system that got me down to about 30 minutes of gluing and positioning per card – but cutting out all the different pieces and keeping them sorted until I could put them together was a challenge. I started by making little piles for each card, starting with the solid coloured base and then setting subsequent stars, tree bits, etc. on top, and then putting each little group into its own envelope to wait patiently to be glued together.
The other challenge came when it was time to mail them. When folded flat, they’re 7 inches square (or as square as you can be with irregular edges), which is bigger than most envelope sizes commonly found in stores. Sure, there are 9″ x 12″ envelopes for letter-sized paper, but that felt like overkill. I found some 7.5″ x 10″ “catalogue envelopes” at Staples which fit the bill nicely. And then…I worried that they would get bent in the mail, so I made little cardboard sleeves to give them a bit of stiffness. Some people helicopter-parent their kids; I do it to my crafts.
Luckily, my over-packaging seems to have worked: four out of six partners have received them so far, and they’re standing just as straight as they did before mailing.
…my true love gave to me: some Grinchy little guys for the tree!
In unpacking the Christmas decorations this year, I came to the realization that wow, there were a lot of cross-stitched pieces in there, and I might have a problem. There were cross-stitched representations of the cats, typographical hoops, and a whole bunch of ornaments stitched on perforated paper. (And that’s not counting the older ones, stitched on flexible vinyl Aida, that are blocky and weird by contemporary design standards.)
Of course, even if I had (re)discovered this sooner, it likely wouldn’t have stopped me from working up these guys. I had had the pattern in my Etsy favourites for a long time, and finally had the chance to stitch it.
Because the design is so small, and because my Q-snaps are…not that small, it was easier to cut a piece of fabric (iridescent Aida for the win!) large enough to accommodate three repeats of the pattern than to struggle and curse a piece sized for one. I folded the strip into thirds, found the centre of each third, and set to stitchin’.
When they were done I washed and pressed the whole big piece, then cut the thirds apart and mounted each one in a 3″ wooden hoop. I had briefly debated painting the hoops somehow (or maybe spray them with glitter spray paint) but thought the understated look worked well for someone who stole Christmas before promptly returning it. He’s definitely adopted a pre-epiphany stance here.
A friend has called dibs on one, and I’ll be keeping one, leaving me with an extra to hang somewhere or keep up my sleeve as a crafty add-on to a gift.
…my true love gave to me: a night known for being starry!
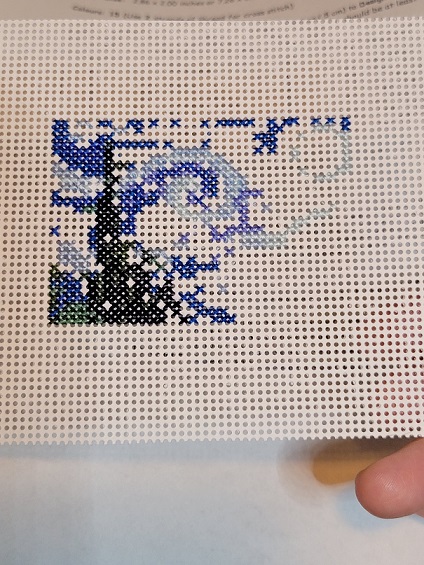
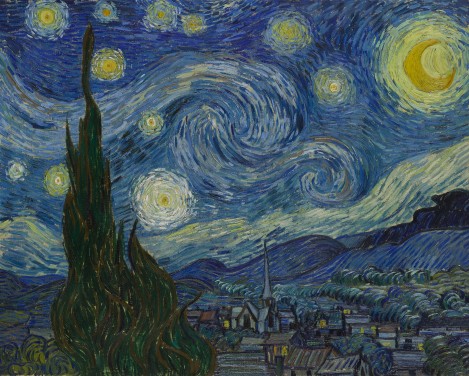
Earlier this year (or maybe late last year?), I read about a shop called CrossStitchObsession that produces charts of miniaturized works of art in cross-stitch form. The picture the article featured included a tiny version of van Gogh’s The Starry Night, and one of my nearest and dearest particularly admires that painting. This was a stocking stuffer just waiting to stuff!
I had my doubts when I first started – it really didn’t look like too much.
Gradually, though, a picture began to emerge.
Before long, anyone would have been able to recognize it!
It actually got harder to do the further I got! I’m not one for marking up charts to cross out what I’ve already stitched, and without that, trying to match up the blank spots on the perforated paper to the chart became quite the trick. There are so many shades of blue in this, and they all started to look alike after a while.
I backed it with some navy blue cardstock to give it a little sturdiness. The mini easel was one of those miraculous Michaels finds. They came in a pack of four, so I might have to stitch a few more mini masterpieces.
For comparison, here’s the original painting (image courtesy of the MoMA website):
That the designer(s) got that much detail into a 2″ x 3″ pattern is simply astounding. I’m so excited for him to unwrap it on Christmas!
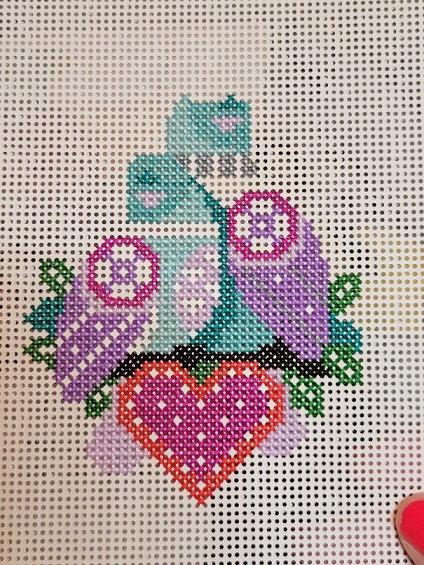
…my true love gave to me: two turtle doves and a partridge in a pear tree!
“Wait, wait, that’s not how this works! You’re just supposed to use the format of the song to talk about what you’ve made, not rip it off word-for-word. You know better than that! Now, what did you actually make? OK…two…turtledoves and…a partridge in a pear tree? Really? Uh, carry on, then, I guess.”
I don’t collect much anymore. Sure, my tsundoku spiralled out of control during the pandemic, but books don’t count, right? One soft spot I have, though, is cross-stitched interpretations of “The 12 Days of Christmas”. I’ve probably got no fewer than six or eight different patterns, not to be stitched (yet!), but to be admired and the possibilities dreamt of.
Late last year, I was delighted to see that Satsuma Street had been offering, for the last two years, an ornament pattern for the first two days. Not only do I *heart* Satsuma Street, but stitching a single 3″x4″-ish ornament felt much more achievable than the entire 12 days at once – although I also own that pattern of theirs.
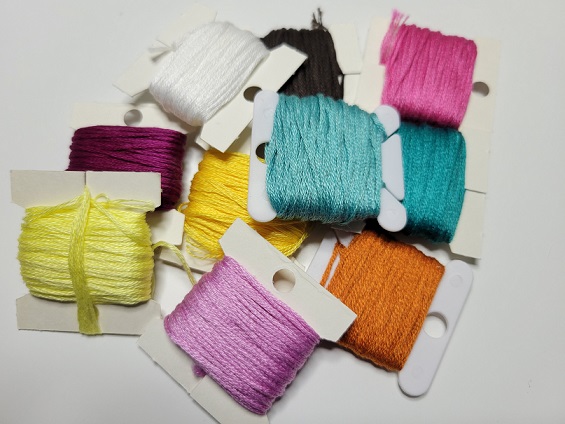
Anything that starts with colours like this has to be good right?
I worked on these at a nice, leisurely pace, occasionally setting them aside if something more pressing came along, but got the beads and sequins added in time for them to go on the tree this year.
I backed them with white felt for a little extra stability, and used an iridescent white metallic thread for the hanging loops.
She already has a French hen in this year’s ornament collection, so I’m sure you can guess what’s going in my virtual cart. I’m hoping she continues with this series, because I’d love to be able to display all twelve days, eventually…just nine more years to go, at the current rate!