My Baking Buddy recently experienced the joy of fatherhood. His little bundle of joy weighs about seven and a half pounds, likes to wake him up at 3:00 AM, and meows when he comes home from work (but also at 3:00 AM).
Yes, he is fully in his Cat Dad era, and I couldn’t be more delighted for him.
With Easter coming up, I wanted to put together a basket of some sort for him. I didn’t want to go overboard on candy, because a) who really needs that much candy, and b) a lot of Easter candy is aimed at kids and isn’t super-great. I finally decided on a few pieces of chocolate (Aero lambs come but once a year, so enjoy the bubbles while you can!), a newly-released book in a series he’s been reading, and a shirt to reflect the bliss that is having a furry friend inspect every plate and every glass he’s trying to eat or drink from.
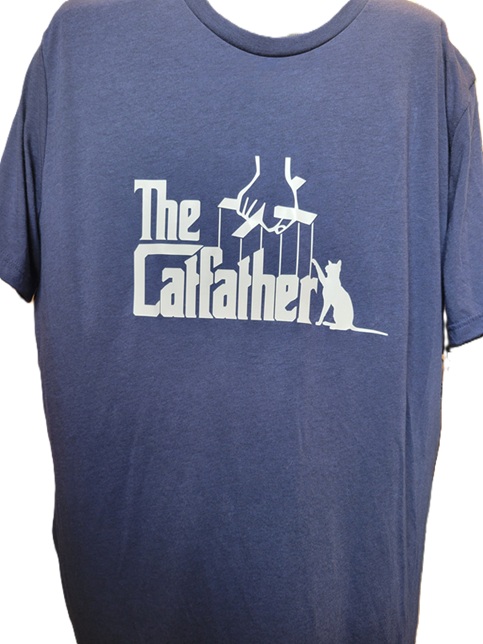
After combing Etsy for “cat dad SVG”, I found this:
Black would have been classic for this but is so overdone, so I opted for a navy heather triblend from Michaels – I think it was Bella & Canvas. The design was cut from white Easy Weed Siser heat-transfer vinyl.
(Excuse the disembodied shirt.)
The vinyl adhered like a dream…I’m so happy with how this came out! He loved it, and couldn’t believe I had made it (despite having worked on vinyl projects with me before). It looks great on him, too.
…my true love gave to me: a shirt with my life’s philosophy!
One of my looser goals for this year had been to craft for myself and not just for other people. It’s tough, man! Crafty types express their love via handmade items, and the idea of being even a little selfish and not putting others first feels foreign.
A couple of months ago, Michaels had a sale on long-sleeved t-shirts (buy 2, get 1 free) and I picked up a few. I live in t-shirts, but when the weather cools down the longer sleeves are a happy medium between your standard short-sleeved t-shirt and a sweatshirt. I hadn’t decided whether to embellish them or wear them as-is, and so they had been set aside after washing.
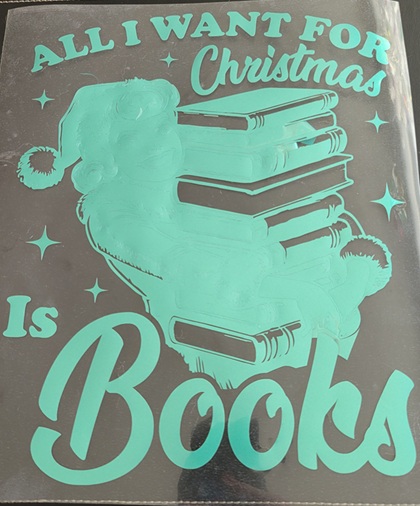
And then, while I was searching online for an appropriate SVG file for a swap I was in, I found the most perfect, retro-licious, bookish file – for me, not my partner. (Don’t worry, she got hers, too.)
I found a lovely, metallic-pearlescent heat-transfer vinyl in a peacock-green shade, and set to cutting…twice. It seems that although it looked vaguely like burnished metal, it is not considered metallic HTV by the Silhouette Studio software, and the machine cut right through the carrier sheet as well. Always check your settings! (This has been a public service announcement.)
It didn’t take me too long to get the more basic weeding done, but there were a lot of tiny bits and bobs to pick out, too.
This is probably the truest representation of the colour. See how it reflects and shines?
My shirt was red, and although red and green are certainly Christmassy, I was hoping the green wouldn’t look too dark, and that the design wouldn’t get lost.
I think it’s going to be OK!
Is it colourful? Heck, yes. But I don’t mind a little seasonal brightness.
Ever since I first started playing around with heat transfer vinyl, the idea of doing multi-coloured/layered designs was always in the back of my mind. Like so many other things that live back there for “some day”, this was dismissed as being too complicated, and what if it didn’t work? That would be a waste of perfectly good vinyl!
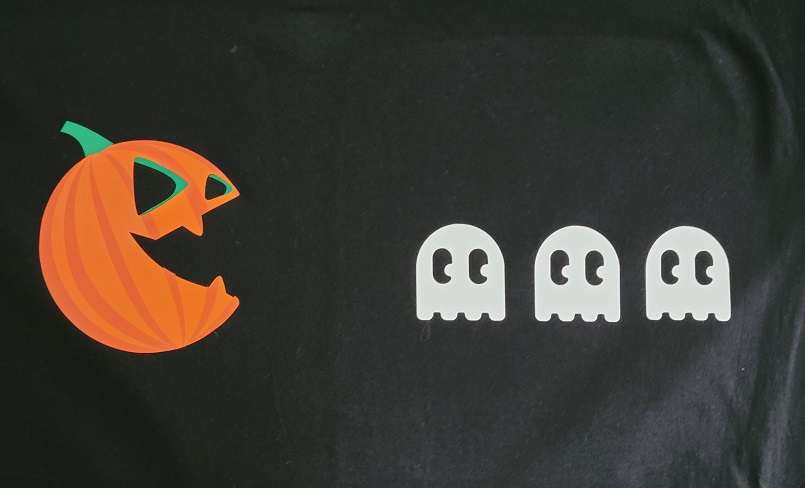
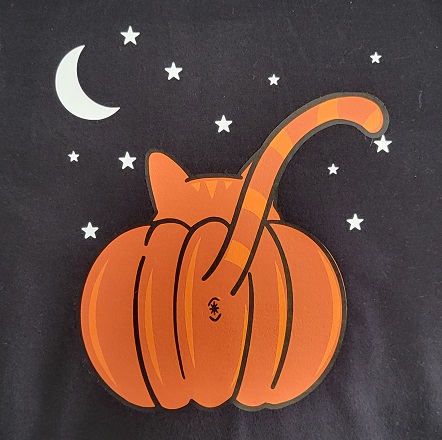
I was finally spurred into action when I saw this hoodie on Modcloth. So cute! So cat-iful! The price was a bit hard to swallow, though. And once the price caught in my throat, I found other reasons to not buy it: with the graphic on the back, people might not be able to see and appreciate it to the full extent possible; they only had a handful of sizes left and were still asking nearly-full price; that’s still a crazy amount of money for a hoodie that’s got a strong seasonal vibe.
An Etsy search turned up the exact same image as an SVG file for a fraction of the price. (Note: searching for “pumpkin butt” generates a lot of hits for kits to, ahem, paint your infant’s backside orange and turn the resulting print into a pumpkin. Shudder. “Cat butt pumpkin” was a lot more helpful.) I gleefully informed my Crafting Buddy (who is also my Baking Buddy) that I had found our layered vinyl project. He said he wasn’t sure that he’d want a big pumpkin cat butt on the front of his shirt…”but I could see it as a smaller image on the chest, maybe”. Back to my search, where I found something appropriately pop-culture and masculine for his Halloween finery. Once I got the images resized appropriately, I cut out one colour/layer at a time and hoped against hope this would work.
We started with his shirt because the pieces were a bit smaller and easier to wrangle.
This is the back side i.e. the part that gets placed against the shirt. I learned an invaluable lesson: if you’re going to weed everything ahead of time, make sure you have wax paper or something similar between your pieces, or else the carrier sheet will stick to the sheet immediately below and maybe even start peeling the vinyl off.
We started by dry-fitting (cold-fitting, sine this was before heat pressing?) the pieces to see how they would look.
It took some careful placement, but we got the remaining two layers of the pumpkin lined up. The ghosts should probably be a little bit closer to the pumpkin, but we moved them over to centre the design overall.
It looks pretty good! (The colour variance you’re seeing in the black is just from the heat press, and isn’t a permanent feature.)
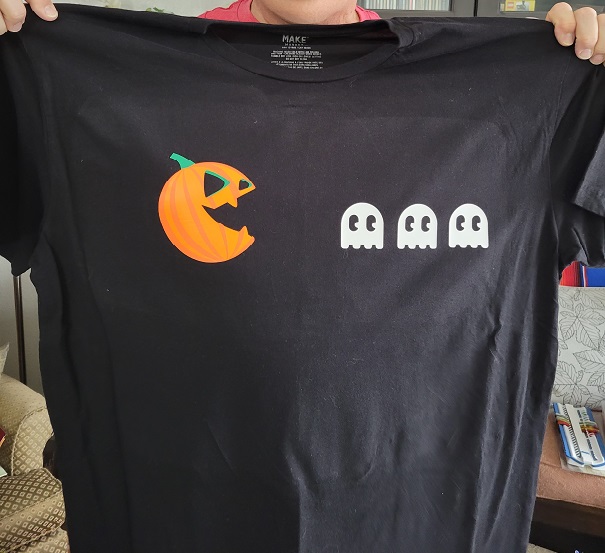
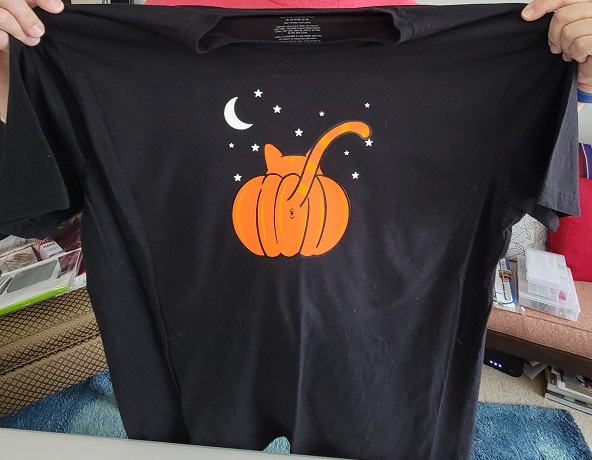
Once we had one under our belts, we assembled my shirt. It was slightly more awkward because of the larger pieces of vinyl.
We got things lined up pretty well, though!
Now we can check “layered vinyl” off our crafty bucket list. I don’t know how often I’ll do it, but it’s a nice trick to have up my sleeve.
I hate painting. It’s not the actual act of painting I dislike, but all of the trappings that come with it: the prep work, the masking, the moving of things, and the inevitable chaos that descends with the furniture/appliances pushed to the middle of the room and all the things you would normally use on a daily basis shifted somewhere else or packed into boxes. Compared to that, the painting part is a breeze.
I thought a newly painted kitchen could use some sort of kitchenwarming (paintwarming?) flair (since you can’t gift yourself), and found the perfect match in heat-transfer vinyl.
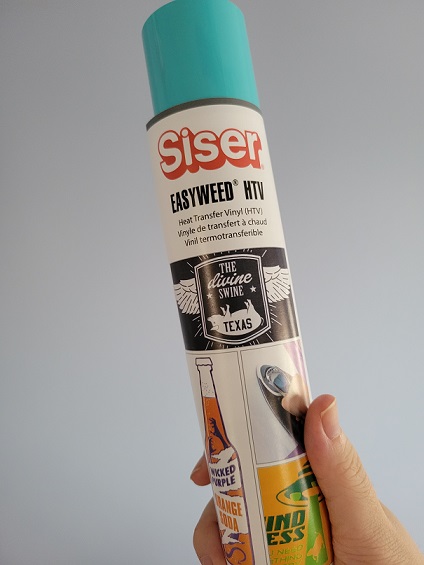
Because I’m a clever, clever individual, I forgot to take a picture before I unwrapped it, and did not quite manage to hold the label flush to the roll. I’m not sponsored by Siser, by the way; I just really like how easy their Easyweed actually is.
I found a couple of fun designs on the Silhouette design store, and started cutting!
Are they “sister designs”? Nope. Do I love them? Yes! I sing modified versions of “Baby Got Back” to the cat all the time, so this is beyond appropriate. The tea towels I used were some that I found in my crafty stash, so this was a great way to use them instead of waiting for the perfect project to come along…or maybe this was the perfect project?
And they certainly turned out to be a perfect match for the paint! I can’t say that I’m eager to start cooking again (painting the kitchen is a great excuse to not cook), but at least I can admire my handiwork while I do it.
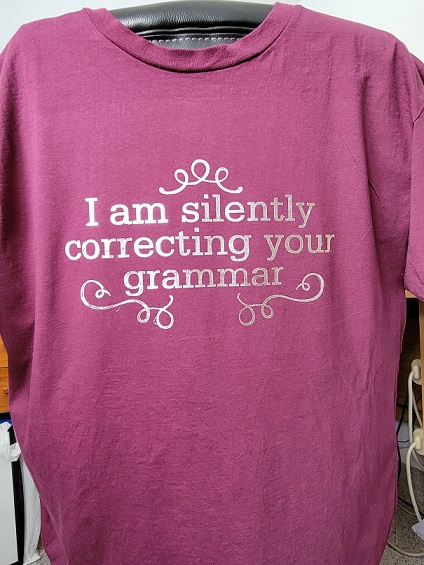
Happy National Grammar Day! If you’ve been reading me for a while, you likely know I have a bit of a fixation on grammar. And spelling. And language. Nothing aggrieves me more than getting a mass email at work from “You’re Social Committee”.
I’ve marked this occasion (I’m loath to call it a holiday) in the past by flying my language-freak flag with a tea towel, and one fun if amateurish t-shirt. I shouldn’t be so hard on the shirt, actually. Despite its clearly homemade vibe, it doubles as a nod to The Simpsons and still makes me laugh. A few weeks ago, I found the perfect design to try my hand at another shirt, and kept my fingers crossed that the execution would work as well as the idea.
I started out with a plain maroon t-shirt from Michaels, and some silvery heat transfer vinyl, and got the design ready to cut on my Silhouette cutting machine. (A note: this picture is the most accurate representation of the shirt’s colour. Don’t ask me what happened in the later pictures.)
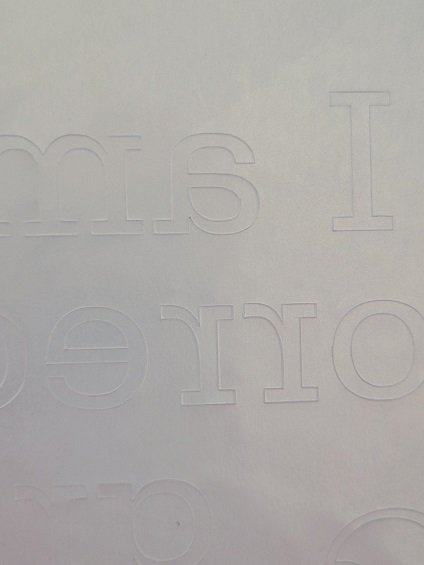
This is the back side of my cut. See the outlines of the letters?
A confession: it took me two tries to get this cut out properly. When I initially adjusted my cut settings for “heat transfer vinyl, metallic”, it cut straight through the vinyl and the plastic carrier sheet. When I adjusted them to “heat transfer vinyl, smooth”, it didn’t cut quite all the way through the vinyl on the first pass, and I had to feed it back into the machine for a second go.
While I was weeding the excess vinyl from my design, I discovered that if I pulled/stretched it too much, it sprang back on itself like curly ribbon – you can see a little bit of that above. Between my cutting issues and weeding issues, I should have realized how finicky this stuff was going to be.
Did I mention that this metallic vinyl was finicky? After following the application instructions, I still found that parts of it really, really liked hanging on to the plastic carrier sheet and were reluctant to adhere to the shirt (although an extra taste of my heat press solved that). It’s a bit hard to see in this shot, but the serif on the bottom of the “r” in “your” positively refused to join the rest of the letter, and the serif on the bottom of “I” folded over upon itself. Finicky.
Although the instructions advise to wait 24 hours before laundering my newly festooned garment, and it’s been several times that, I’m still convinced this (finicky, finicky) stuff will all slide off the first time I wash it. But I have pictures now to prove that, however briefly, I had an almost-professional looking grammar shirt.