In a fit of fey inspiration (largely fuelled by wanting an excuse to buy some of the neon yarn I’d been seeing at Michaels, because really, where else am I going to use acrylic neon yarn?), I crocheted a cat-sized party hat.
I found the pattern on Etsy and wound up using a too-large crochet hook and too-thick yarn, and so left a few rounds off the bottom before it turned into a hat for a medium-sized dog. Even with that, it was a little on the large side; luckily, by reshaping the base into a bit of an oval, it would sit further back on the cat’s head and not look quite as ridiculously oversized.
…my true love gave to me: a meme that comes straight from TV!
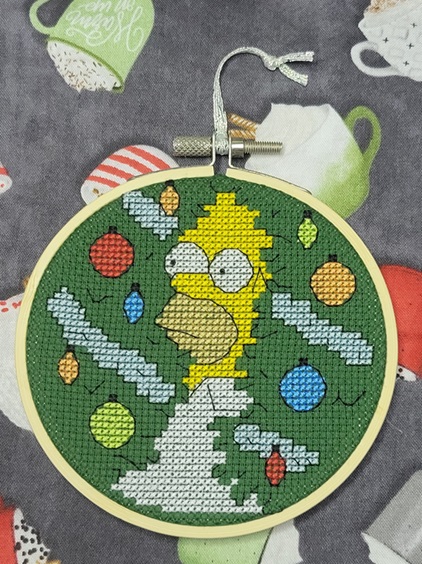
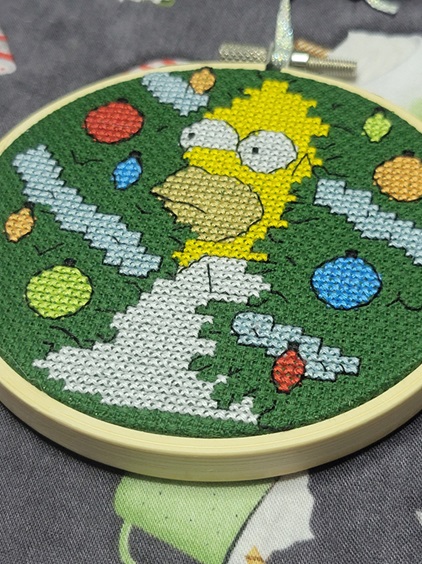
It was quite by accident that I found this pattern for a Christmas’d version of Homer Simpson moving silently through Ned Flanders’ hedge, but knew right away that I had to stitch it.
Luckily, my local needlework shop (always support your local needlework shop if you have a choice!) had the requisite Christmas green aida cloth, so I was able to get started on him right away.
He fits perfectly in a 4″ hoop!
The backstitch really creates the illusion of the hedge, and the two little French knots for his pupils are the finishing touch.
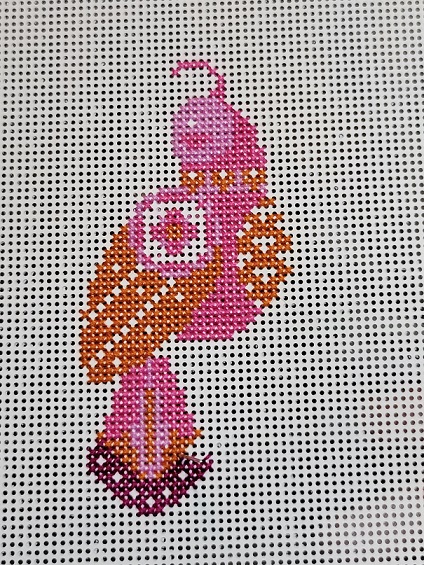
…my true love gave to me: a French hen to go with my two turtle doves and partridge in a pear tree!
By the time Satsuma Street released their holiday designs last year, I was done with taking on last-minute crafting projects. (Excuse me while I snicker behind my hand.) That didn’t stop me from buying the charts, though: one of them was the third installment in the 12 Days of Christmas series, and since I had stitched the first two last year it was a given I had to do this one as well.
Mon dieu! A French hen!
I didn’t think to take a picture of the back, but once I was finished stitching and attaching the beads and sequins, I glued it to glittery white felt so it will shimmer no matter how the lights catch it.
The four calling birds have been released, so I’ve got at least one project for next year lined up already.
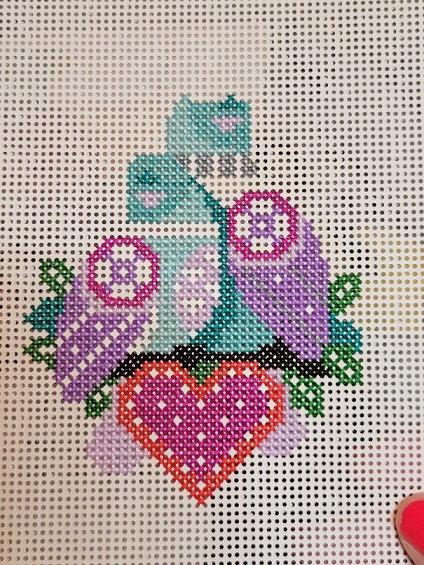
…my true love gave to me: some Grinchy little guys for the tree!
In unpacking the Christmas decorations this year, I came to the realization that wow, there were a lot of cross-stitched pieces in there, and I might have a problem. There were cross-stitched representations of the cats, typographical hoops, and a whole bunch of ornaments stitched on perforated paper. (And that’s not counting the older ones, stitched on flexible vinyl Aida, that are blocky and weird by contemporary design standards.)
Of course, even if I had (re)discovered this sooner, it likely wouldn’t have stopped me from working up these guys. I had had the pattern in my Etsy favourites for a long time, and finally had the chance to stitch it.
Because the design is so small, and because my Q-snaps are…not that small, it was easier to cut a piece of fabric (iridescent Aida for the win!) large enough to accommodate three repeats of the pattern than to struggle and curse a piece sized for one. I folded the strip into thirds, found the centre of each third, and set to stitchin’.
When they were done I washed and pressed the whole big piece, then cut the thirds apart and mounted each one in a 3″ wooden hoop. I had briefly debated painting the hoops somehow (or maybe spray them with glitter spray paint) but thought the understated look worked well for someone who stole Christmas before promptly returning it. He’s definitely adopted a pre-epiphany stance here.
A friend has called dibs on one, and I’ll be keeping one, leaving me with an extra to hang somewhere or keep up my sleeve as a crafty add-on to a gift.
Is anyone else noticing a proliferation of celestial-themed everything out there lately? When I was in high school, that kind of stuff was everywhere, and I’m pretty sure my mom still has the moon-and-stars ironing board cover I picked out for her. I’d like to think I’ve matured since high school: I don’t plan my days based on my horoscope, have stopped following those “get this gift for the person in your life with that zodiac sign” guides that were a staple of every November or December issue of Seventeen and YM, and only use “Mercury is in retrograde” ironically. Lo, the fully-functioning adult, basing her life on fact rather than vague character descriptions.
All of that newfound maturity and composure was out the window when a zodiac swap was being planned on Lettuce Craft a few months back. As luck would have it, I had just finished a large-ish crafty commitment, and my fingers were itching for a new project. Surely this was written in the stars! Or…not. Due to a lack of interest, the official swap got cancelled, but the only other would-be participant reached out and asked if I was interested in doing a personal swap with her. Ooh! This was written in the stars!
My partner was a Capricorn. I’ve had a lot of Sagittariuses (Sagittarii?) in my life, but the only Capricorn I grew up with was my best friend from Gr. 3 – 10, and she just didn’t embrace the whole astrology thing. After doing a bit of online research, I was pretty well-versed in traits, colours, everything. And although we were only supposed to make one item, I wound up making two. It happened like this…
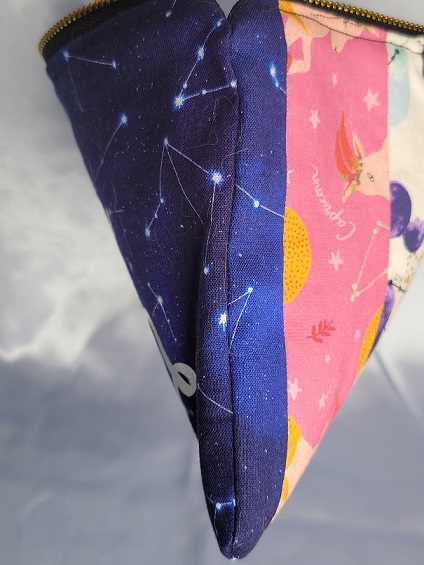
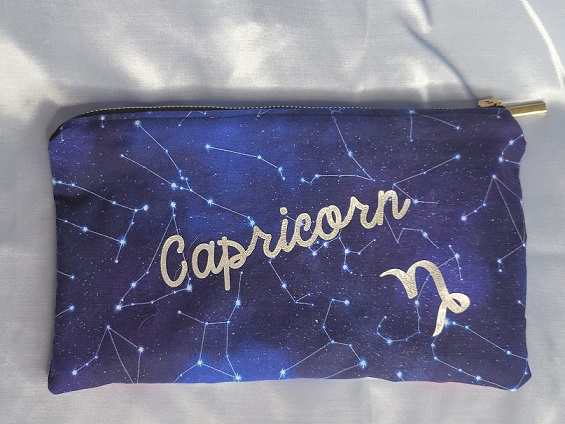
When we first exchanged questionnaires, one of my partner’s “wish” items was a zipper pouch. I was psyched, because even my rudimentary sewing skills should have been able to handle that. She went on to say she liked bright colours, as well as earth tones, but “not too much pink”.
When I got to the fabric store (any excuse for a trip there!) and found the section housing appropriately astrological prints, the designated Capricorn print was pink. Of course. That didn’t stop me buying a bit of it, as well as varying cuts of a few other prints. Nothing said I had to use the pink fabric for the entire pouch, right? Maybe I could combine them somehow. Sewing is one thing, but I’m not a quilter, a planner-of-attaching-pieces-to-other-pieces. I let my fabrics languish for a while (this is very much the approach I took to my t-shirt quilt, albeit over a shorter time frame), and started cruising the internet again.
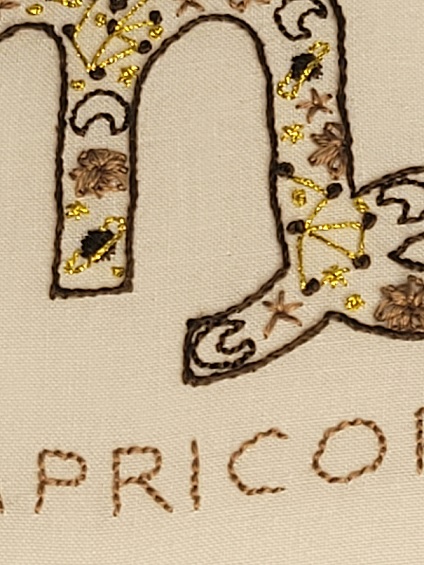
Etsy saved the day with this fun embroidery pattern. Finally, something right in my wheelhouse! I wasted no time in downloading the PDF and transferring it to some Kona cotton I had bought a few years ago for the sole purpose of embroidering. The only thing I did a little differently was changing up the order of the stitches from what the accompanying guide recommended: the outline of the symbol was one of the first parts stitched in the guide, but I left it until the very end to ensure no other stitches (looking at you, lazy daisies!) would breach the edge of the design.
This was a complete joy to stitch. The pattern and colours were something I would normally never have done for myself or others in my immediate circle, and yet they worked together so well.
That still left the issue of my zip pouch. I found a zipper I liked and measured its length to determine how wide my fabric would need to be. From there, I cut strips of three different fabrics and sewed them into one big rectangle. Fun fact: despite much calculating on my part, my Franken-rectangle turned out to be longer than the zipper – still, better too long than too short, right? That’s what scissors are for! I decided the other side didn’t need to be as busy, and used just a single fabric for it, making sure it was the same as the outside strips on the other side to allow for some continuity at the side seam.
I cut out the word “Capricorn” and its symbol using the Silhouette and some metallic silver heat transfer vinyl just to stop the other side from being completely plain and positioned it at an angle for visual interest.
Oh, and used some elegant moon-phase fabric for the lining.
My partner said she loved everything, and I’m pretty sure my sigh of relief was heard around the world. Between reliving my horoscope-obsessed high school days and crafting something just a little bit out of my comfort zone, this was a really fun swap.
…my true love gave to me: a night known for being starry!
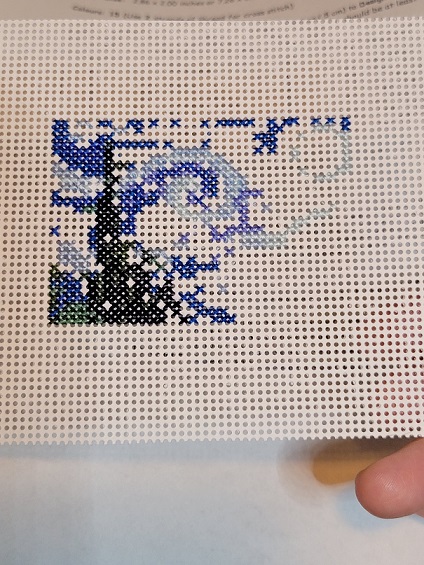
Earlier this year (or maybe late last year?), I read about a shop called CrossStitchObsession that produces charts of miniaturized works of art in cross-stitch form. The picture the article featured included a tiny version of van Gogh’s The Starry Night, and one of my nearest and dearest particularly admires that painting. This was a stocking stuffer just waiting to stuff!
I had my doubts when I first started – it really didn’t look like too much.
Gradually, though, a picture began to emerge.
Before long, anyone would have been able to recognize it!
It actually got harder to do the further I got! I’m not one for marking up charts to cross out what I’ve already stitched, and without that, trying to match up the blank spots on the perforated paper to the chart became quite the trick. There are so many shades of blue in this, and they all started to look alike after a while.
I backed it with some navy blue cardstock to give it a little sturdiness. The mini easel was one of those miraculous Michaels finds. They came in a pack of four, so I might have to stitch a few more mini masterpieces.
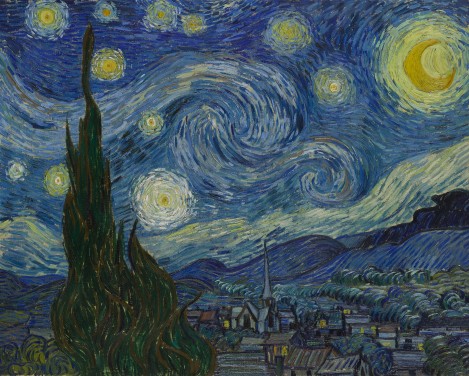
For comparison, here’s the original painting (image courtesy of the MoMA website):
That the designer(s) got that much detail into a 2″ x 3″ pattern is simply astounding. I’m so excited for him to unwrap it on Christmas!
…my true love gave to me: two turtle doves and a partridge in a pear tree!
“Wait, wait, that’s not how this works! You’re just supposed to use the format of the song to talk about what you’ve made, not rip it off word-for-word. You know better than that! Now, what did you actually make? OK…two…turtledoves and…a partridge in a pear tree? Really? Uh, carry on, then, I guess.”
I don’t collect much anymore. Sure, my tsundoku spiralled out of control during the pandemic, but books don’t count, right? One soft spot I have, though, is cross-stitched interpretations of “The 12 Days of Christmas”. I’ve probably got no fewer than six or eight different patterns, not to be stitched (yet!), but to be admired and the possibilities dreamt of.
Late last year, I was delighted to see that Satsuma Street had been offering, for the last two years, an ornament pattern for the first two days. Not only do I *heart* Satsuma Street, but stitching a single 3″x4″-ish ornament felt much more achievable than the entire 12 days at once – although I also own that pattern of theirs.
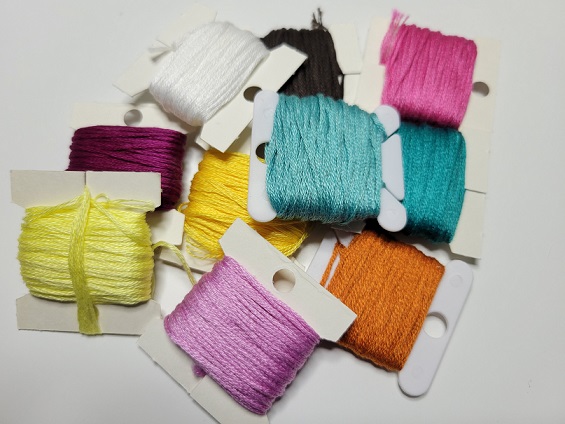
Anything that starts with colours like this has to be good right?
I worked on these at a nice, leisurely pace, occasionally setting them aside if something more pressing came along, but got the beads and sequins added in time for them to go on the tree this year.
I backed them with white felt for a little extra stability, and used an iridescent white metallic thread for the hanging loops.
She already has a French hen in this year’s ornament collection, so I’m sure you can guess what’s going in my virtual cart. I’m hoping she continues with this series, because I’d love to be able to display all twelve days, eventually…just nine more years to go, at the current rate!
Other subject lines that were considered for this post:
"I've got garlic in my soul."
Rejected because: As an individual of Ukrainian descent, of course I have garlic in my soul.  Heart, soul, genes - you name it, it's there.  If I still ate meat, I'd probably be working my way through a coil of kubasa from Tenderloin Meats as I type this.

"I wouldn't touch you with a thirty-nine-and-a-half-foot pole."
Rejected because: In these fourth-wave days of aerosolized droplets, this actually sounds like sound public-health advice.  Thirty-nine-and-a-half-foot poles: when two metres just isn't enough.
Back when Craftster still roamed the interwebs, one of the members posted a picture of this same scarf she had made for herself, along with a bit of a rant how, as soon as she posted it on social media, everybody and his brother dogpiled on her: “Can you make me one? I neeeeeed it!” Several duplicates later, she was sick of the yarn colours and didn’t want to see the darned thing again, when all she had originally wanted was something cute to wear to a holiday party.
My crochet skills at the time were pretty rudimentary and I wouldn’t have dared attempt this for myself back then, but I’ve gained a bit of confidence and really wanted to try it this year. I didn’t include it as a Craftmas post because a) this was for myself, and not a gift, and b) I didn’t have it finished by the 25th. But who cares? It’s still warm and cute!
It’s folded in half in the picture above – the bottom half (not seen) is solid red, and altogether it measures 138 cm in length. I didn’t take a lot of in-progress shots because it worked up fairly quickly and there wasn’t a lot to be said. It’s done in Corner-to-Corner (C2C) crochet, which means that instead of working in either horizontal or vertical rows (depending on your perspective), you work it on the diagonal.
Like this:
See how that one side is much longer than the other? There are lots of great tutorials for it online, so I won’t attempt to elaborate further except to say that if I can do it, anyone can. The way you work “squares” of stitches at 90-degree angles to one another makes for a lovely soft and squishy texture.
The eyes and nose are crocheted, too, and then sewn on, and the mouth was free-hand sewn on. I was going for his devious, plotting smirk.
(I promised my model anonymity in the form of decapitation.)
Even though Christmas is over, I’m still going to wear him until the weather warms up – hopefully he’s recognizable by the general public.
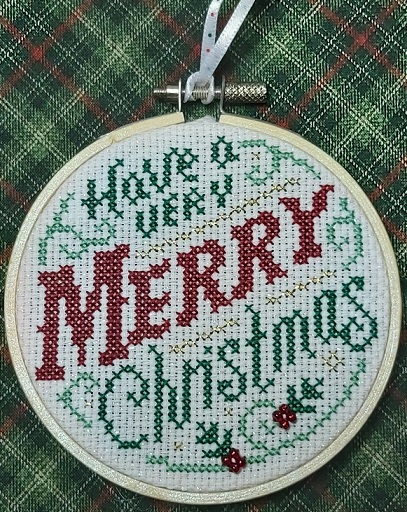
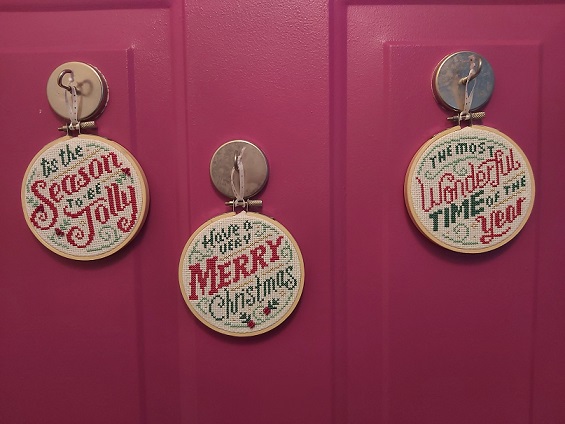
…my true love gave to me: some hoops for the wall (or the tree)!
This is indeed serendipitous timing: I downloaded the patterns for these hoops exactly one year ago (based on the “printed” date at the bottom of the pages). Someone on Lettuce Craft had stitched one of the designs, and I absolutely loved the typography. I immediately went off to download a digital copy of the magazine they were from (the November 2020 issue of Cross Stitcher, if anyone’s interested) even though I knew there was no way they were happening last year, not with 10 days to go before Christmas.
This year, however, I started early to make sure they’d be done. Although I loved the typography, I didn’t love the original colour scheme – the yellow-green looked so wishy-washy – and so I chose my own colours for a bolder, simpler look.
The holly berries were supposed to be red cross-stitches, but I had some beads on hand that worked perfectly. The gold metallic accents were my substitution, too, and worth the frustration of working with metallic thread.
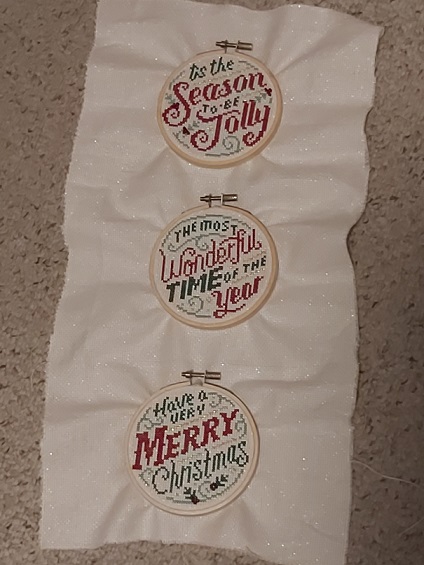
I framed the finished pieces in 4″ wooden hoops that I sprayed with glitter spray paint – it’s not a solid, disco-ball kind of glitter, but adds a bit of shimmer to the plain wood. It also carried the theme of the iridescent fabric, which doesn’t show well in the above pictures. But take a gander at this progress shot:
What a beaut, huh?
My other moment of inspiration in making these: because stitching on pieces of fabric that are too small to fit in a hoop or frame properly is the worst, I cut one large piece and marked off thirds, then centered a design in each third.
My mom laid claim to two of these as soon as they were done, and the third went to a friend. No matter where they hang, though, I hope they spread some holiday cheer.
Just a short blast for today, because there’s haunting to do…
I love Halloween. I love cats. So cats dressed up for Halloween feels like a no-brainer, especially if I can work a Satsuma Street design into the mix.
One-Eyed Jack is one of their new Halloween ornament designs for 2021. I was too impatient to order and wait for the kit, so I purchased the PDF pattern from her Etsy shop and printed it out at home so I could start stitching right away.
And you know what they say, kids…if life gives you white perforated paper in your stash when a pattern calls for black, grab a Sharpie and make it so (or “sew”). 😉
I altered the pattern slightly to make his markings look a bit more like my parents’ cat, and I left the plumage off his hat, but definitely added all the sparkly beads and sequins as prescribed.
Because I apparently have too much time on my hands, I created (another!) stop-motion video of the process:
He was a big hit, and is currently affixed to my parents’ refrigerator door via the magic of magnets, keeping watch over any tasty treasures that might get put in there.