My friend Ricky recently had a birthday, and I wasn’t going to let the little matter of a couple thousand kilometres keep me from celebrating him in style. I got it in my head that I needed to do a “birthday in a box”-type package for him. In rapid succession, I decided on: an actual gift (Lego-adjacent building block set), a banner, a “I’m the Birthday Boy” badge that would likely have gotten him beaten up in school, a singing candle, and…cake? I make a mean cupcake, but I didn’t think they’d travel especially well via Canada Post. I looked at mug cake mixes at the grocery store, but just about dropped the box when I made the mistake of reading the nutrition information. (Cake will never be health food, but for 400 calories and 50 grams of sugar, reconstituted and microwaved “cake” just isn’t worth it.) I did find a homemade cake-in-a-can tutorial on Pinterest that, although I applaud its creativity in having layers of cake and icing sandwiched securely in a repurposed tin can, looked frankly kind of gross. Maybe if I couldn’t reasonably make him dessert, I could buy him dessert instead.
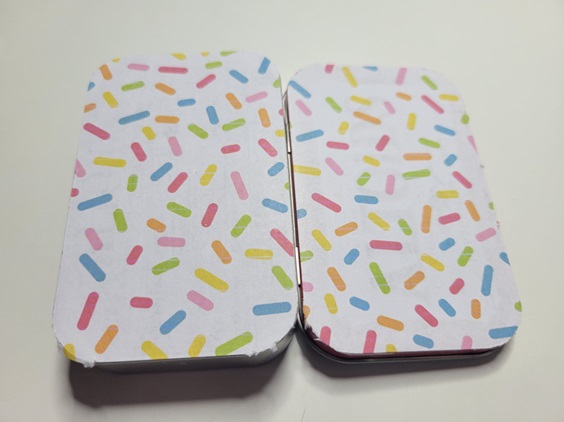
Armed with that somewhat heartening thought, I bought a Dairy Queen gift card to tuck in the box. Only…we all knew I couldn’t just toss the card in on its own, right? In looking through my Downloads folder, I found a sprinkle patterned digital paper I bought ages ago off of Etsy, and everything fell into place.
I’ve used this tutorial for altered Altoid tins before, and it’s delightful. The step by step pictures are a fantastic help, even for someone who doesn’t consider herself a papercrafter and gluer (like me).
I started out by covering the outside and inside surfaces with the paper, and then (not pictured) covered the edges. I learned in kindergarten that cutting in a straight line eludes me, so I used my Silhouette to cut perfectly straight pieces exactly the width of the various edges I had to cover.

Next, I had to figure out what kind of decoration I wanted to add to it. I’m a fan of vintage kitsch (shocking, I know), and after a search-engine rabbit hole of results for “retro birthday party”, I found a couple of images I liked. I resized them to the width(ish) of the tin and printed them out, then cut out the section I wanted by hand. I also used a typewriter-inspired font to spell out a few well-wishes (although I only used one in the end). I couldn’t resist sneaking a quote from National Lampoon’s Animal House in there.

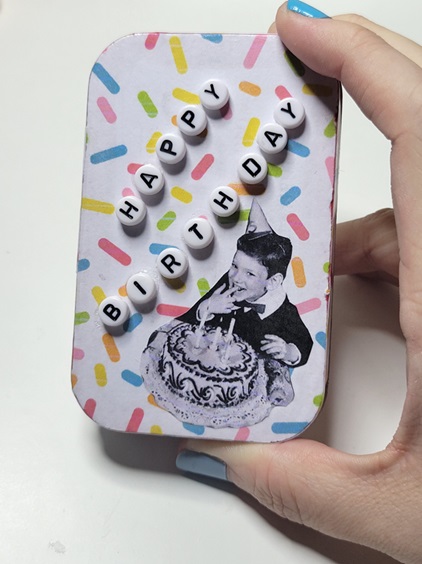
The front, on the other hand, required the big guns be brought out (brought in?).

Just laying out slips of paper saying Happy Birthday didn’t quite give it enough oomph. Luckily, I had bought some alphabet beads a year or so ago in a moment of inspiration.
When the glue had dried, I was ready to add the gift card.
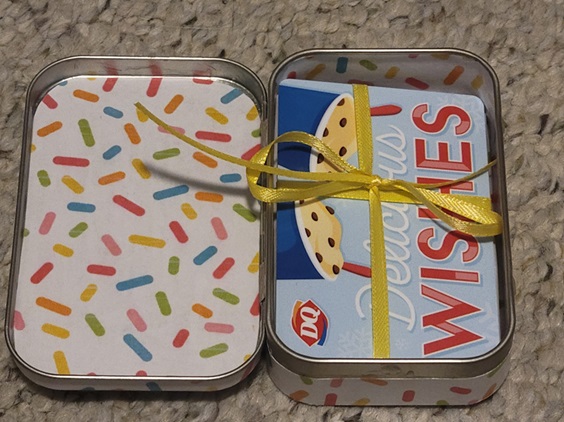
Besides being festive, the ribbon made it easier to pull out the gift card – experience is a great teacher sometimes.
The tin was the perfect size to tuck into a little open space at the end of the box, and the postal gods were on their game because it made it to him in time for his big day.
Thanks for looking! 🙂