(pattern by weelittlestitches)
Thanks for looking – happy Canada Day!
A compendium of homespun endeavours.
I’ll spare you all the long and fabled history of the French-Canadian fur traders, because it’s widely available elsewhere. I had to learn about it in school, and even then, my strong pull toward an indoorsy life prevented me from fully embracing the spirit of the voyageur.
Recently, the newspaper published a recipe for tarte au sucre, a.k.a sugar pie. I hadn’t thought about it since I made one back in Grade 5 as part of the aforementioned school experience, but thought it sounded simple enough to try again. My baking buddy was enthusiastic when I showed him the recipe, and was even kind enough to pick up any missing ingredients from the store.
What you’ll need:
The recipe doesn’t call for it, but we added a generous splash of vanilla.
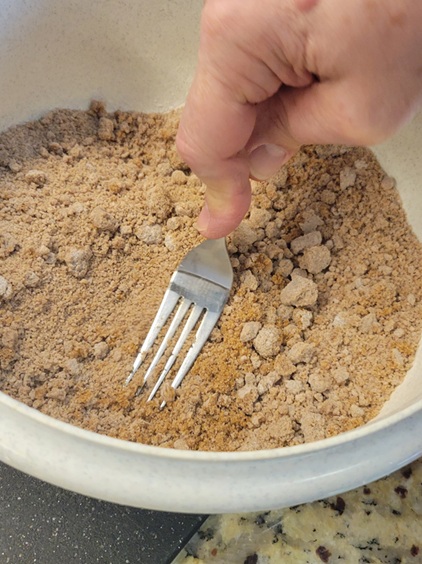
Turn the oven to 350°F, and while it comes to temperature, mix the brown sugar and flour together until well-combined. If your sugar is lumpy, break those puppies down. We used a fork to crumble them and incorporate them.

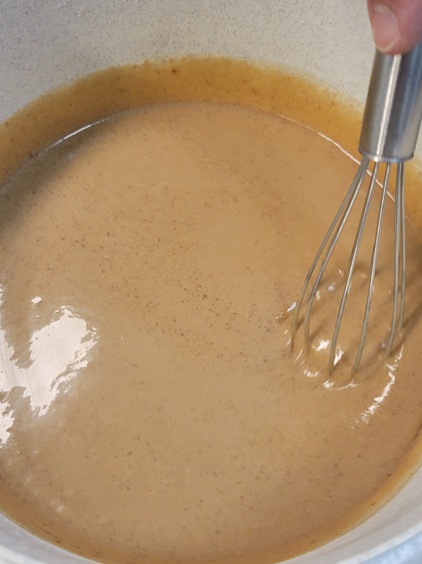
Next, add your whipping cream and mix well.

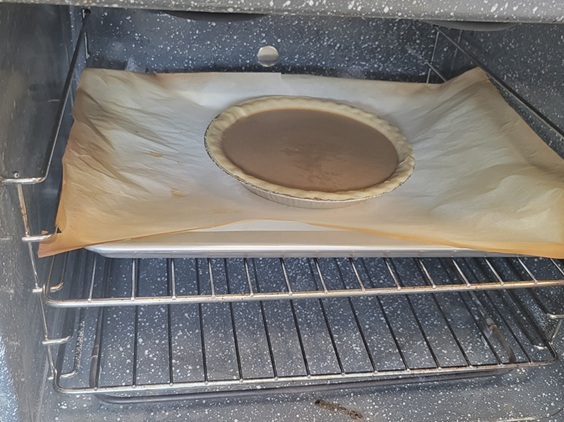
Pour the whole shebang into your pie shell, and bake for an hour.


The recipe warned about the potential for bubbling over, so we set our pie tin on a parchment-lined cookie sheet. It only cooked over a tiny bit, but it was nice not to have to scrape that off the bottom of the oven.
Cool completely before cutting.

I think ours might have been not-quite-100% cooled when we cut a trial piece, and our first reaction was: “Holy cow, is this sweet!” My ten-year old self hadn’t had a problem with it, but that was a lot of years ago.

For the next slice, it was definitely, positively cooled, and when it was topped with a bit of whipped cream, it wasn’t half-bad. With my 21st century, indoorsy ways, I wouldn’t want much more than a small piece in a single sitting – but I can appreciate why this would be a treat if one didn’t normally eat ultra-processed foods already crammed with hidden sugar.

And because there’s always pop-culture inspiration behind my makes, here’s what was going through my head as we baked:
Quite the fusion bake, no?
Thanks for looking! 🙂
Last summer, Michaels* had included, in one of their daily promotional emails, a link to a tutorial to make a tie-dyed Canada Day t-shirt. My tie-dye buddy and I (he’s also my baking buddy; truly, he’s a jack of all trades) bought white t-shirts and a bottle of red dye, and…never got around to applying one to the other. Whoops.
Fast-forward to this year: back in May, I was putting a file at work in abeyance for two months, which took me to July 1. Hey – we had time to get them done this year! We found last year’s stash still in its plastic bag from the store, and I set to finding the tutorial from last year. It was underwhelming, to say the least.
| Step 2 |
| Follow the directions on the package for best results and dye patterns. |
Really, Michaels*?
The package directions weren’t much better, and didn’t seem to offer the pattern shown in the picture, so we decided to dispense with their “rules” and choose our own pattern adventure. He wanted his to look like a Canadian flag (-ish), and I opted for a classic swirl, hoping against hope that I wasn’t going to look like a peppermint candy when all was said and done.
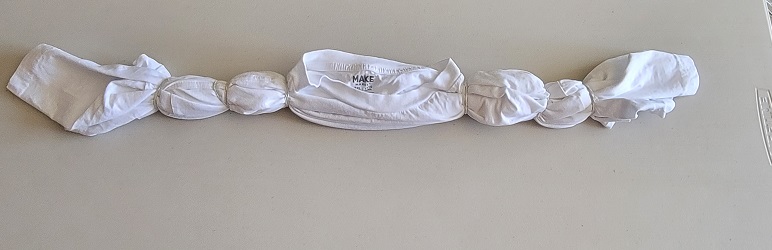

After a quick dunk in soda ash, they were ready for dyeing. Besides the single bottle of red we had bought last year, we found a couple other partial bottles of red in our stash and thought, “Why not?” I don’t know that it made a huge difference, but I’d like to think they lent a certain depth of colour.


Rinse time! His turned out beautifully, but I should have gotten down into the folds of mine a little bit more with the dye. But I can’t be too upset, for two reasons: 1) if I had wanted a solid red shirt, I would have bought one, and 2) the swirl lines came out well, and don’t look like Christmas candy. I’ll call that a win. If I squint, it looks a bit like a burst of fireworks, which is certainly a propos.


But wait, there’s more! The original tutorial had “Canada” in a pretty unremarkable font, straight across the chest. We found a design we liked on the Silhouette Design Store and edited it so we were left with this:

I found some inexpensive placement guides on Amazon to help centre designs on t-shirts and make sure they’re a reasonable distance from the collar, and the adult-sized one proved to be immeasurably (or actually, measurably) helpful here.
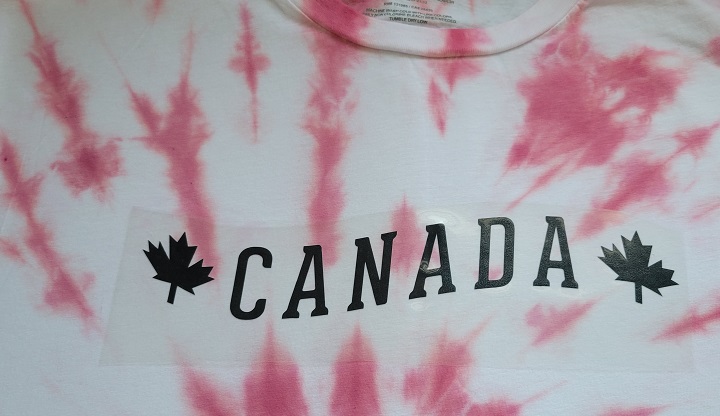
The final product(s):


Thanks for looking! 🙂
*Is anyone else bothered by the fact that the founder of that craft chain opted to not add an apostrophe and make it possessive? It takes everything I have not to spell it as “Michael’s”. And every time I see “Michaels”, I expect to see messieurs Keaton, Caine, Bolton, etc. all lined up, rather than aisles of craft supplies.
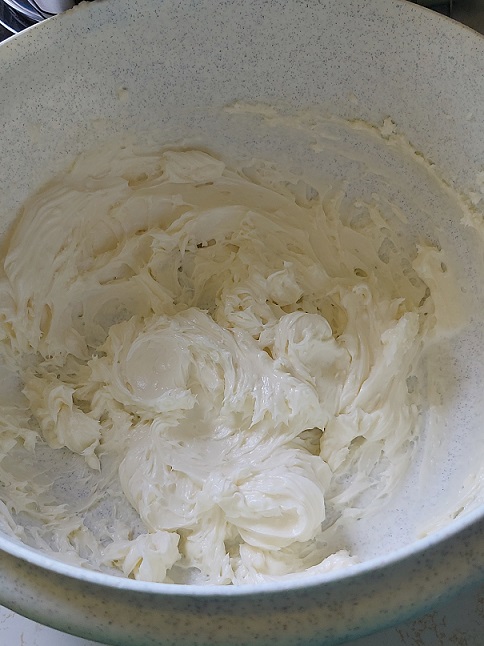
I actually made this last year for Canada Day, too, and it a) got inhaled so quickly that I never got any “completed” pictures, and b) was such a hit that my mom stole my recipe for a get-together at her sister’s house a few weeks later. So when I wanted something vaguely patriotic to make, this felt like the obvious choice: Strawberry Shortcake Icebox Cake.
Because I’m working from home and get to skip the commute, I used what would normally be my on-the-road time to clean and chop the strawberries as prescribed.

Once they were ready to go, the rest of it came together really quickly and beautifully after work.
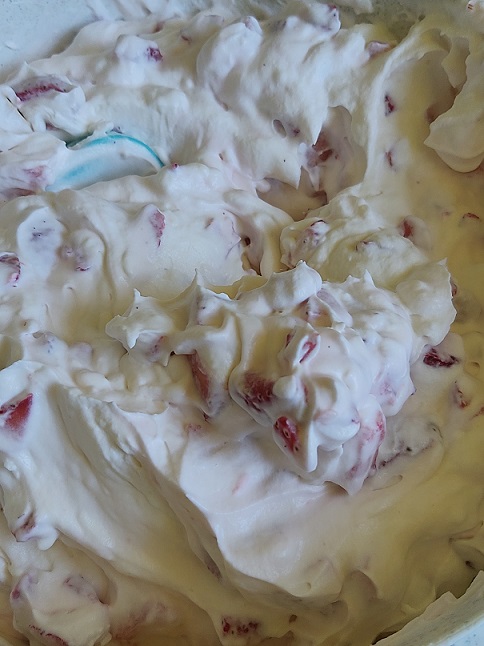
Two things I did differently from the recipe: I used 3 full cups of heavy cream (horrors!) rather than the 2 3/4 cups called for in the recipe; also, it was too ding-danged hot to turn the oven on and do the topping, so I settled for a sprinkling of graham crumbs instead.

If, however, you are making this on a day when it’s not 38 degrees with the humidity, or you have a naturally higher tolerance for the oven in summer, I highly recommend making the topping. It’s crunchy and wonderful against the creaminess of the whipped cream-strawberry mixture.

The first piece was a mess to get out of the pan, but look at the beautiful layers it revealed! The ladyfingers do tend to get quite soft after a couple of days, so best to enjoy this within the first day or two after making it.
Happy Canada Day! 🙂
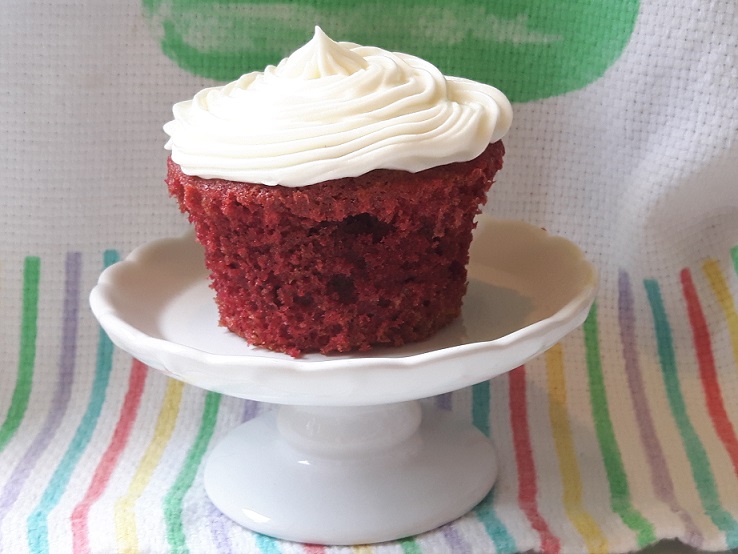
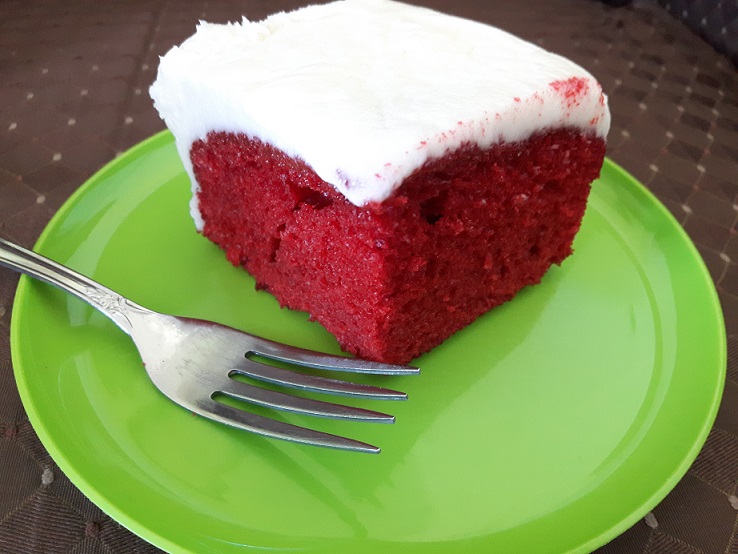
I know that red velvet cake is generally considered to be a southern dessert. That’s “southern” as in “below the Mason-Dixon line”, and not “Windsor” – being within spitting distance of the Ambassador Bridge doesn’t count, but I really, really wanted some sort of red velvet cupcake for Canada Day. It’s red cake! With white icing!
Silly me: if I wanted a patriotic dessert, I should have stuck with something simple like Nanaimo bars or butter tarts (again).
See, I’ve got issues with red velvet cake. The Crimson Velveteen cupcakes from Vegan Cupcakes Take Over the World are moist and delicious, but, well, darkish. (The authors fully own this colour issue, arguing that their dessert is much classier than some of the day-glo red versions you see. Very well, but what if I want bright red?)
Last year I tried the recipe on the Brown Eyed Baker. Those puppies were nothing short of fire-engine in the picture on her site, but were just as dark as my original recipe and much less flavourful once baked. Talk about your bait-and-switch!
When I happened upon the red velvet recipe on Sally’s Baking Addiction, I thought I had died and gone to baker’s heaven. Sally is a full-on baking geek who understands the chemistry and technique involved in making a truly spectacular dessert. I followed her recipe to the letter, and was rewarded with lovely, brighter-red cupcakes. (The secret is using about half the cocoa called for in other recipes I’ve seen.)

They’re red and gorgeous and perfect! They look exactly like the ones on the blog (piping techniques notwithstanding). They rose, and formed these perfectly rounded tops upon which to pipe scads of icing

And they’re just as beautiful under the wrappers, too.
This is as striptease-y as it gets.
I so appreciated the methodology of the recipe: there’s butter for flavour; oil for moisture; buttermilk to make them tender; and two eggs, the whites of which were whipped and folded into the batter separately to keep things light and fluffy.
There was just one problem…they were kind of dry. Okay, really dry.
My test audience was split about 50/50 as to whether or not this was a dry cake. One conceded that “they were fine at first” and only got dry after a few days. On the other hand, whenever I ate one, I felt like I was playing that old party game wherein one tries to whistle while eating crackers. And I’ve made hundreds of moist cupcakes, so believe me, I know a dry cupcake when I taste one. So disappointing! The only thing I can figure is that the cornstarch in the batter dries them out – there’s cornstarch in the vanilla cupcakes from VCTOtW, and they’re nowhere near as moist as the other varieties.
It’s back to the drawing board for a red velvet recipe that’s at once moist and red; in the meantime, I think I’ll have to order a piece from Sals when the craving hits:
(Now that’s a red velvet cake!)
Update: After this fiasco, I tried the Betty Crocker red velvet cupcake mix-in-a-box, and once I got past the shame of using a mix, was forced to admit that they’re pretty darned good. Darker in colour than my scratch-baked cupcakes, above, they’re moist and light. And I still made my own icing from scratch, so that makes them practically homemade.
Happy Canada Day! 🙂
I think the name says it all – and I hope everyone is enjoying the day off! (I know I am.)
I knew I wanted to bake something, but the question was: “What?” I didn’t want to mess around with Nanaimo bars and all their layers, and butter tarts evoked a “been-there-done-that” response in me.
Ultimately, I decided on this:

I’ve always been drawn to those American flag cakes done with blueberries and strawberries, but knew if I tried that I’d wind up with a terribly unbalanced fruit load, with some slices being covered in berries and others with none at all (and my poor maple leaf would likely come out looking all Picasso-esque). Some simple coloured sugar made an excellent substitution, because who cares if they get or don’t get a little sugar? It’s strictly decorative, with no real effect on the flavour of the cake.
But make no mistake; this is no ordinary cake with a handful of sugar tossed artfully on top.
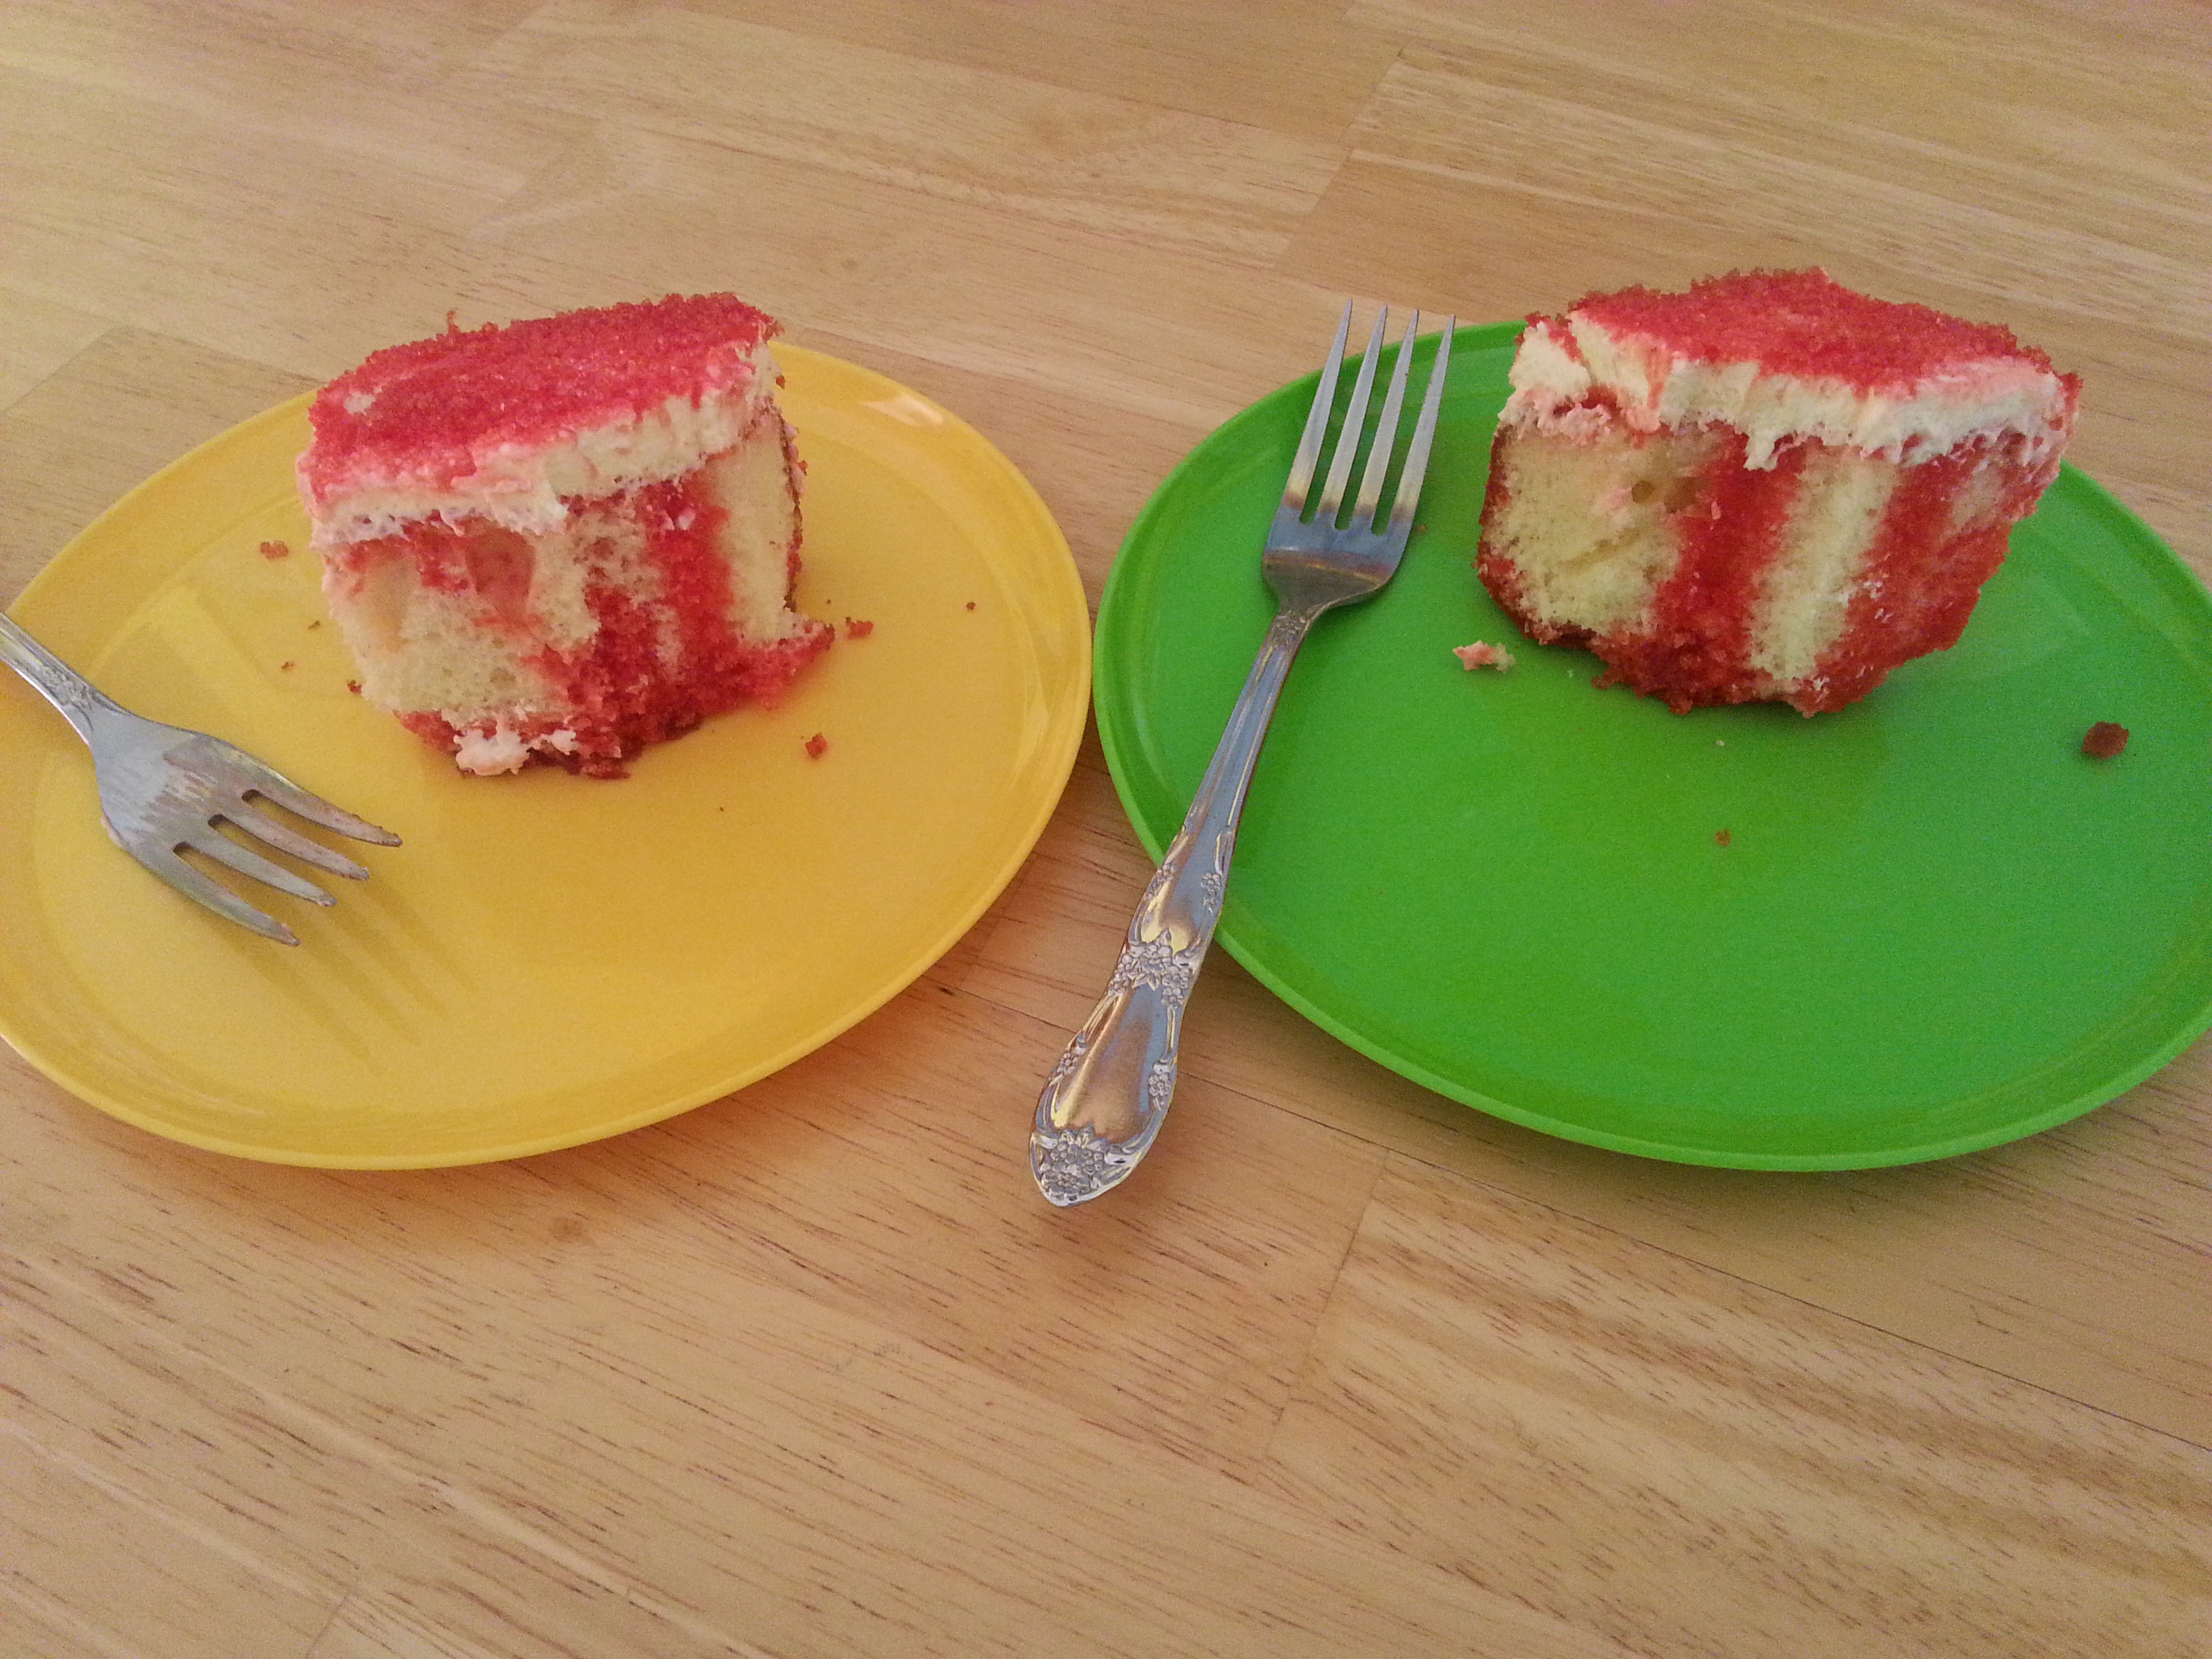
Ta-dah! Poke cake! Little rivulets of cherry Jell-o run through it, livening up the otherwise basic white cake considerably. The test audience seems to approve wholeheartedly.
I hope everyone has a safe and happy long weekend – thanks for looking!
Timbits are ten for a toonie!
I didn’t quite realize how many uniquely Canadian desserts there were until just a few days ago. You’ve got your matrimonial cake, your Nanaimo bars, your beaver tails – which might not be as cruel as their name suggests, but in any case, aren’t exactly part of a balanced diet.
And lo, the humble butter tart became my baking project for the long weekend. (This would be way more fun that studying, I knew it!) I used the “Better than Butter Tarts” recipe from Sarah Kramer and Tanya Barnard’s How it All Vegan!, and I’m pretty darned pleased with how they came out.

The recipe was soooo quick and simple. The longest part was letting the raisins plump for 10 minutes before I could do much of anything else, but seriously? So not a big deal when your payoff is tasty pastry.
My momma is a bona-fide butter tart aficionado, and had been more than willing to schlep me to the store to buy raisins and flaxseed. She dubbed these “less cloyingly sweet than some of the others you get” (where? Commercially? From your recipe?), but “really, really good”. I liked the addition of chopped walnuts on top. They toasted up as the tarts baked, and added a hint of crunch to the whole deal. I think this recipe is a keeper!
But before I resume hitting the books, a riddle: What does a Canadian gang look like?

“Hey, tart. Where do you think you’re going?”