Last summer, Michaels* had included, in one of their daily promotional emails, a link to a tutorial to make a tie-dyed Canada Day t-shirt. My tie-dye buddy and I (he’s also my baking buddy; truly, he’s a jack of all trades) bought white t-shirts and a bottle of red dye, and…never got around to applying one to the other. Whoops.
Fast-forward to this year: back in May, I was putting a file at work in abeyance for two months, which took me to July 1. Hey – we had time to get them done this year! We found last year’s stash still in its plastic bag from the store, and I set to finding the tutorial from last year. It was underwhelming, to say the least.
| Step 2 |
| Follow the directions on the package for best results and dye patterns. |
Really, Michaels*?
The package directions weren’t much better, and didn’t seem to offer the pattern shown in the picture, so we decided to dispense with their “rules” and choose our own pattern adventure. He wanted his to look like a Canadian flag (-ish), and I opted for a classic swirl, hoping against hope that I wasn’t going to look like a peppermint candy when all was said and done.
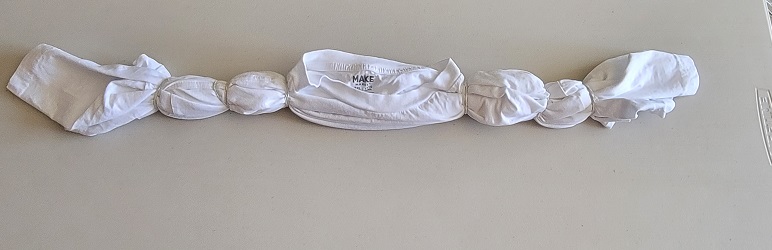

After a quick dunk in soda ash, they were ready for dyeing. Besides the single bottle of red we had bought last year, we found a couple other partial bottles of red in our stash and thought, “Why not?” I don’t know that it made a huge difference, but I’d like to think they lent a certain depth of colour.


Rinse time! His turned out beautifully, but I should have gotten down into the folds of mine a little bit more with the dye. But I can’t be too upset, for two reasons: 1) if I had wanted a solid red shirt, I would have bought one, and 2) the swirl lines came out well, and don’t look like Christmas candy. I’ll call that a win. If I squint, it looks a bit like a burst of fireworks, which is certainly a propos.


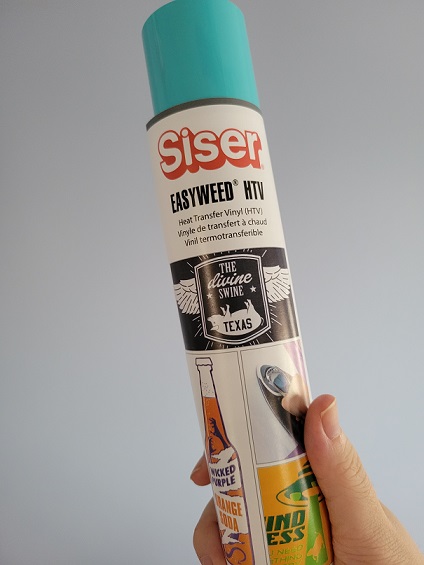
But wait, there’s more! The original tutorial had “Canada” in a pretty unremarkable font, straight across the chest. We found a design we liked on the Silhouette Design Store and edited it so we were left with this:

I found some inexpensive placement guides on Amazon to help centre designs on t-shirts and make sure they’re a reasonable distance from the collar, and the adult-sized one proved to be immeasurably (or actually, measurably) helpful here.
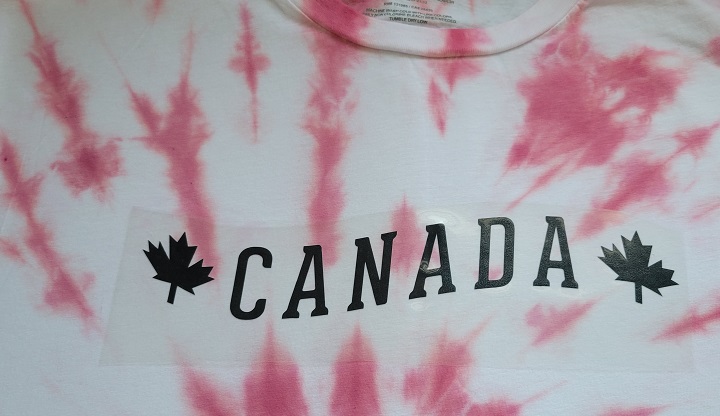
The final product(s):


Thanks for looking! 🙂
*Is anyone else bothered by the fact that the founder of that craft chain opted to not add an apostrophe and make it possessive? It takes everything I have not to spell it as “Michael’s”. And every time I see “Michaels”, I expect to see messieurs Keaton, Caine, Bolton, etc. all lined up, rather than aisles of craft supplies.