Other Crafts

Easter greetings that are quick like a…well, you know

I’ve gotten myself hooked up with a few different snail-mail groups over the last several years. Who doesn’t like getting a bit of mail that’s not a bill or a solicitation for money? I wanted to make a few notecards to send out in anticipation of Easter, but I’m not the single most artistic person out there (read: I can’t draw or paint).

Last year, when I was still essentially scared of playing around with the Silhouette Cameo cutting machine, I had downloaded a file of three bunnies shaped like…well, like those marshmallow candies that are everywhere at this time of year, and with the wording “Hanging With My Peeps”. My friend and I cut out a few repeats of the pattern out of heat-transfer vinyl and made tea towels. I thought about using the file again, but didn’t want to mess around with getting the lettering on straight. Mind you, the bunnies were cute on their own…

I wound up cutting out six sets of the three bunnies. When I resized the file so that they’d fit on the blank notecards I bought, I discovered they’d fit perfectly on sheets of this glittery cardstock I’ve had for probably the last 15 years. I bought it because it was sparkly and pretty, and then had no idea what to do with it. Also, that much pattern can be a bit much in one big chunk, but in smaller shapes? It works!

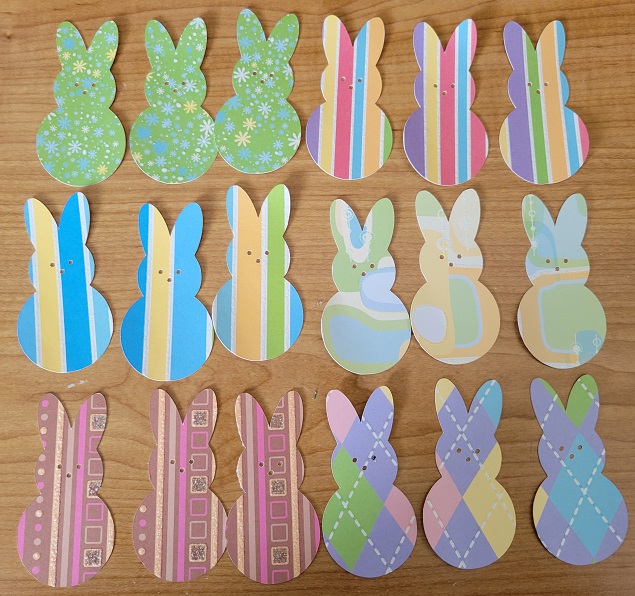
Once they were all cut out, I took the plunge and started shuffling them around to see how any three given patterns looked side-by-side-by-side. I have a hard time with being random, and this takes every ounce of self-uncontrol that I have in me.

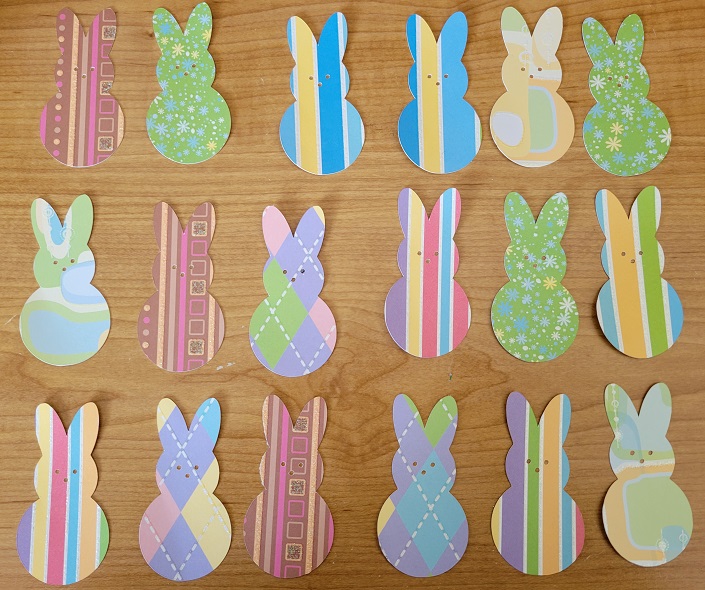
Once I was satisfied with my groupings, I glued them down on my card blanks:

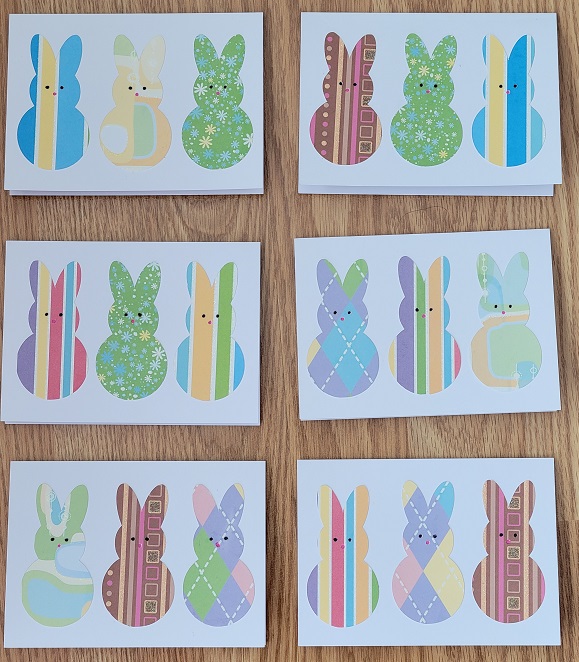
I elected to colour in their eyes and noses just to give them a bit of definition.

And there we have it: quick, simple Easter cards!

I did use a cutting machine for my bunnies, but I think this could be achieved with a bit of patient tracing and cutting with scissors…although if I were doing that I’d probably not bother trying to neatly cut eyes and noses. I used a plain UHU glue stick to affix them, nothing fancy. And they were a great way to use up smallish pieces of paper that might not have gotten used otherwise.

Thanks for looking! 🙂

Other Crafts

It’s not always silent

Happy National Grammar Day! If you’ve been reading me for a while, you likely know I have a bit of a fixation on grammar. And spelling. And language. Nothing aggrieves me more than getting a mass email at work from “You’re Social Committee”.

I’ve marked this occasion (I’m loath to call it a holiday) in the past by flying my language-freak flag with a tea towel, and one fun if amateurish t-shirt. I shouldn’t be so hard on the shirt, actually. Despite its clearly homemade vibe, it doubles as a nod to The Simpsons and still makes me laugh. A few weeks ago, I found the perfect design to try my hand at another shirt, and kept my fingers crossed that the execution would work as well as the idea.

I started out with a plain maroon t-shirt from Michaels, and some silvery heat transfer vinyl, and got the design ready to cut on my Silhouette cutting machine. (A note: this picture is the most accurate representation of the shirt’s colour. Don’t ask me what happened in the later pictures.)

This is the back side of my cut. See the outlines of the letters?

A confession: it took me two tries to get this cut out properly. When I initially adjusted my cut settings for “heat transfer vinyl, metallic”, it cut straight through the vinyl and the plastic carrier sheet. When I adjusted them to “heat transfer vinyl, smooth”, it didn’t cut quite all the way through the vinyl on the first pass, and I had to feed it back into the machine for a second go.

While I was weeding the excess vinyl from my design, I discovered that if I pulled/stretched it too much, it sprang back on itself like curly ribbon – you can see a little bit of that above. Between my cutting issues and weeding issues, I should have realized how finicky this stuff was going to be.

Did I mention that this metallic vinyl was finicky? After following the application instructions, I still found that parts of it really, really liked hanging on to the plastic carrier sheet and were reluctant to adhere to the shirt (although an extra taste of my heat press solved that). It’s a bit hard to see in this shot, but the serif on the bottom of the “r” in “your” positively refused to join the rest of the letter, and the serif on the bottom of “I” folded over upon itself. Finicky.

Although the instructions advise to wait 24 hours before laundering my newly festooned garment, and it’s been several times that, I’m still convinced this (finicky, finicky) stuff will all slide off the first time I wash it. But I have pictures now to prove that, however briefly, I had an almost-professional looking grammar shirt.

Thanks for looking! 🙂